9
MAINTENANCE
AUDIO SYSTEM
1. Clean the exterior case with a clean cotton cloth and a mild detergent. Do not use harsh detergents
or an abrasive.
2. Clean textured areas and controls with a dry bristle brush.
WIRELESS MICROPHONE
1. Clean the Wireless Microphone Windscreen as follows.
a. Unscrew the wire-mesh cap counterclockwise and remove the wire-mesh cap from the
Microphone body.
b. Remove the windscreen (foam sheet) from the wire-mesh cap.
c. Wash the windscreen in a mild detergent.
d. As soon as the windscreen has dried, replace it in the wire-mesh cap and screw the wire-mesh
cap onto the Microphone body clockwise.
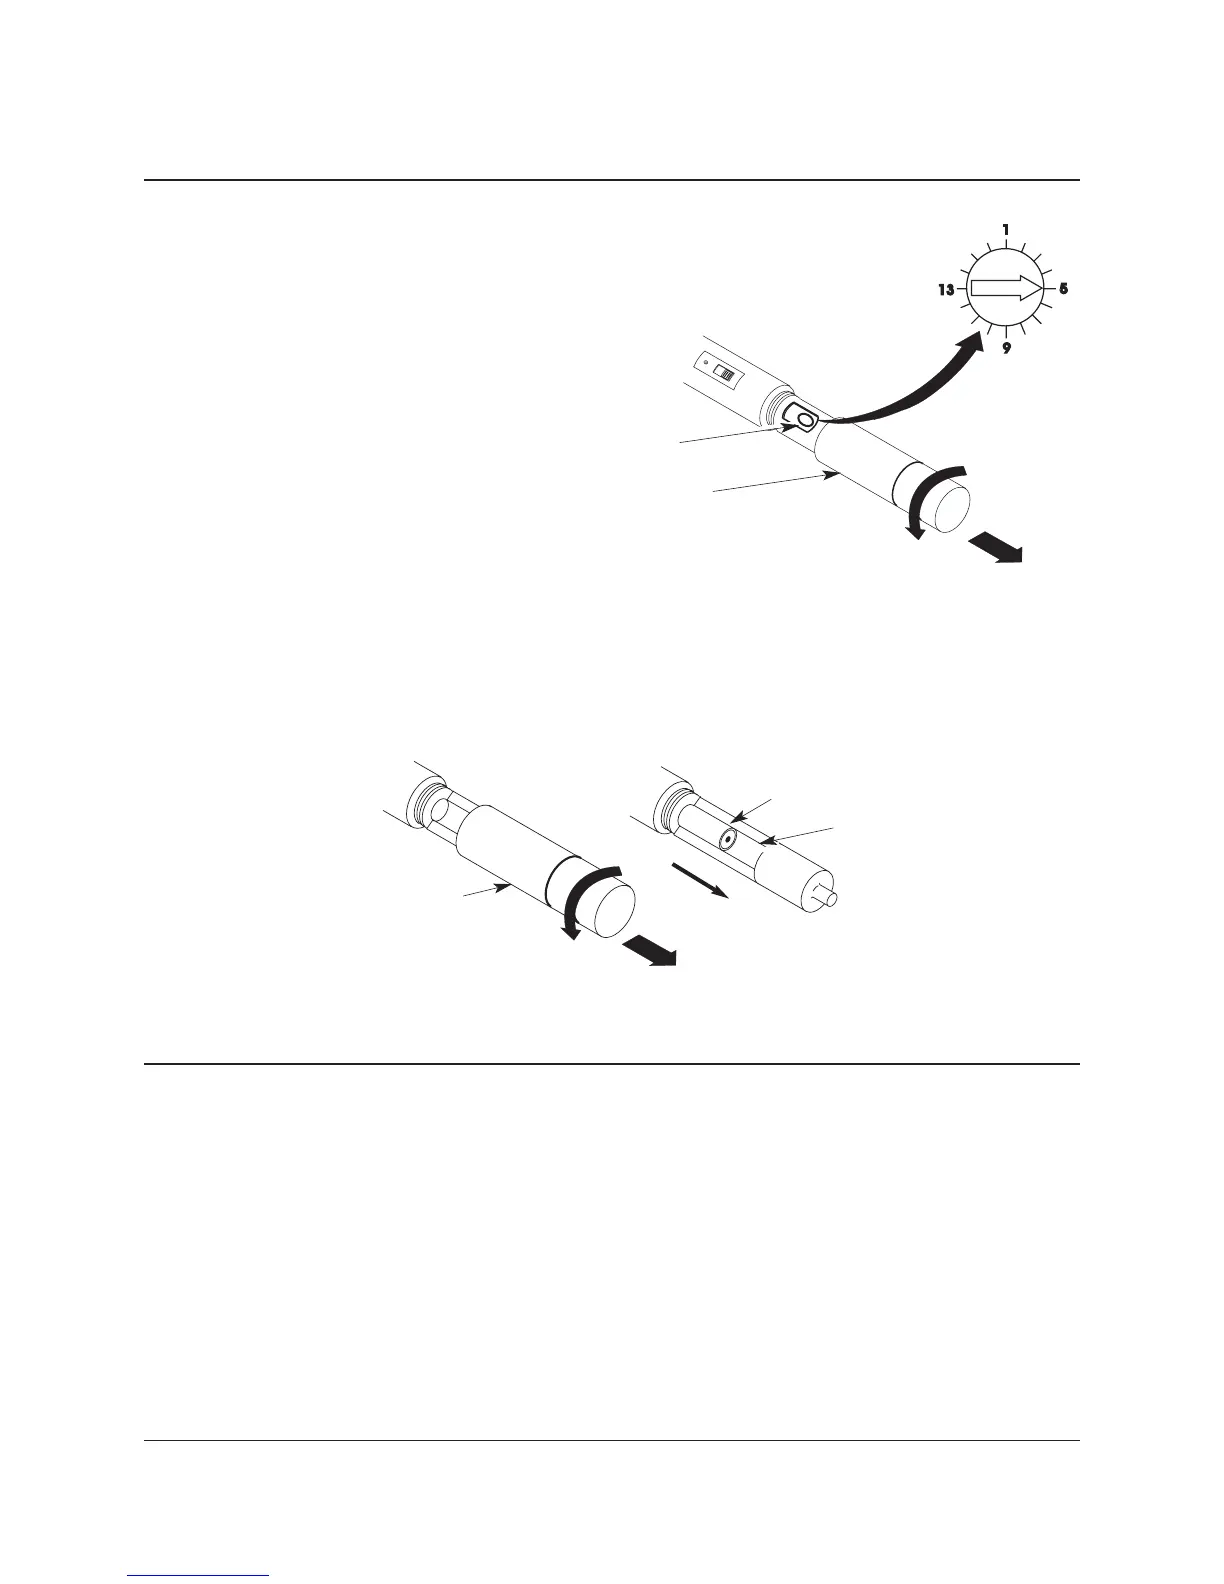
WIRELESS MICROPHONE CHANNEL SELECTION
1. Unscrew and remove the Wireless Microphone Battery Cover on the lower end of
the Wireless Microphone.
2. Using a miniature electronic screwdriver, set the Wireless Microphone CHANNEL
SELECTOR
to the same channel frequency selected on the Wireless Receiver.
3. Replace the Battery Cover.
Wireless Microphone
Wireless Microphone
Battery Cover
Wireless Microphone
Channel Selector
OPERATION
CONTINUED
WIRELESS MICROPHONE BATTERY REPLACEMENT
1. Unscrew and remove the Wireless Microphone Battery Cover on the lower end of the Wireless
Microphone.
2. Place two AA Alkaline batteries onto the Battery Slot. The positive end of each battery must face the
bottom of the microphone.
3. Replace the Battery Cover.
Wireless Microphone
Battery Cover
Wireless Microphone
AA Alkaline Battery
Battery Slot
+
 Loading...