LEONARDO DATALOGGER
User manual
2
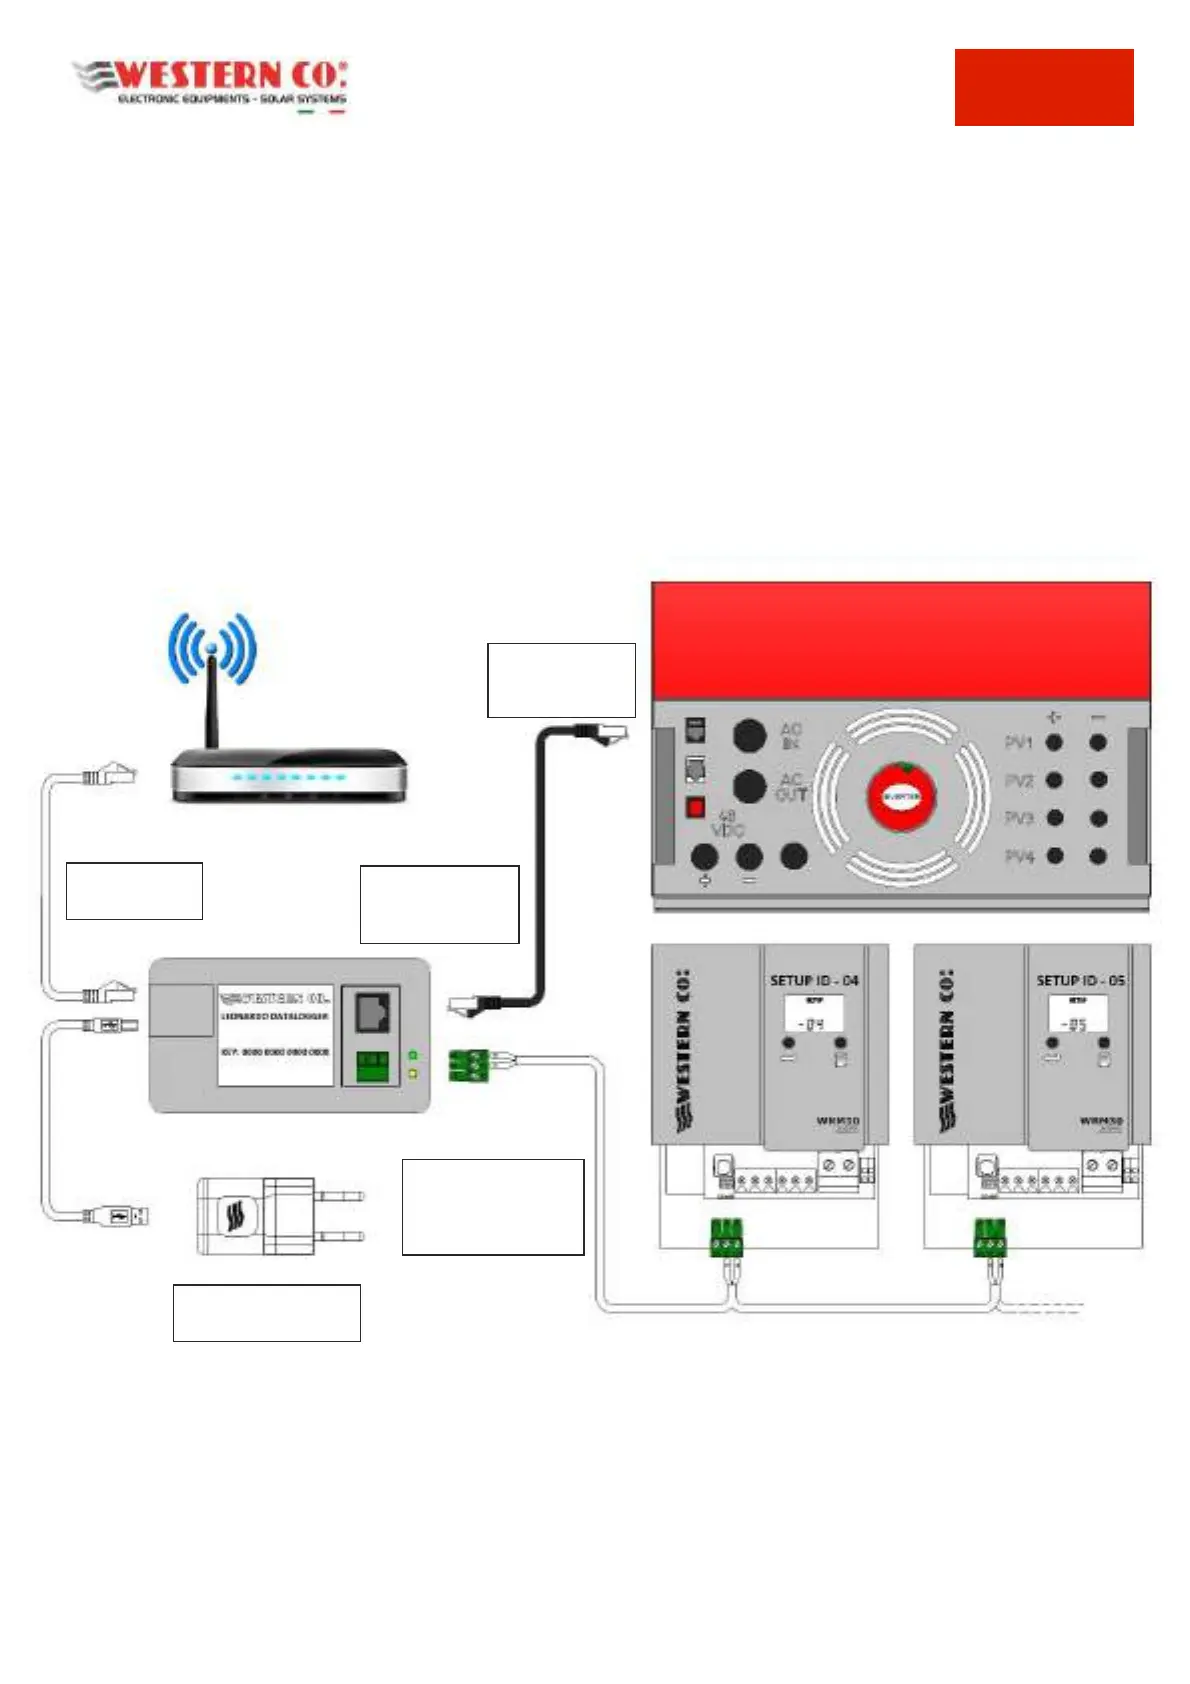
Leonardo Datalogger Installation
The electrical connections of the Leonardo Datalogger must be done with the Leonardo inverter switched off,
strictly according to the following order of steps:
1- Plug in the serial connection cable of the Leonardo Datalogger to the monitoring plug on the Leonardo
inverter (the BLACK one), by means of the patch cable you find in the box of the product;
2- Connect the serial connection of any additional charge controllers external to the inverter, through the A
and B poles of the RS-485 connection, as shown in the figure;
3- Set the addresses of the external charge controllers, through the SETUP menu, sequentially from address
n.4 up to the following ones;
4- Connect the Ethernet cable for Internet connection, using an external router, which must have enabled the
DHCP service to automatically assign the IP addresses of the network;
5- Connect the USB power cable, using the supplied AC adapter that must be connected to the AC-OUT line of
the Leonardo inverter;
Pic.1 Installation Scheme
6- Do the switching on of the Leonardo inverter, as per specific manual;
7- check the internet connection to the WCLOUD server, by turning on the green LED light on the Leonardo
Datalogger
8- check the inverter serial communication, if the the yellow LED light on the Leonardo Datalogger is on;
SERIAL
CONNECTION to
the INVERTER
BLACK PLUG
INVERTER for
monitoring
SERIAL CONNECTION
OF THE EXTERNAL
WRM30 CHARGE
CONTROLLERS
AC SUPPLY on AC-OUT
inverter line