EasyManua.ls Logo

Whirlpool 29" User Manual

Whirlpool 29"
48 pages
To Next Page IconTo Next Page
Page #1 background imageLoading...
Page #1 background image
1
W10646607A
W10646608A-SP
Table of Contents
DRYER SAFETY ................................................................2
INSTALLATION REQUIREMENTS ....................................4
Tools and Parts .................................................................... 4
Location Requirements ...................................................... 5
ELECTRIC DRYER POWER HOOKUP – CANADA ONLY ......... 8
Electrical Requirements ..................................................... 8
GAS DRYER POWER HOOKUP ................................................. 8
Electrical Requirements ..................................................... 8
Gas Supply Requirements .................................................. 9
Install Leveling Legs ......................................................... 10
Make Gas Connection ...................................................... 11
VENTING .................................................................................... 11
Venting Requirements ....................................................... 11
Plan Vent System ............................................................... 12
Venting Kits ........................................................................ 13
Install Vent System ............................................................ 14
Connect Inlet Hoses .......................................................... 14
Connect Vent ..................................................................... 15
LEVEL DRYER ........................................................................... 16
COMPLETE INSTALLATION CHECKLIST ............................... 16
REVERSE DOOR SWING (OPTIONAL) .................................... 17
TROUBLESHOOTING ............................................................... 23
INSTALLATION NOTES
Date of purchase: _________________________________
Date of installation: _______________________________
Installer: ________________________________________
Model number: ___________________________________
Serial number: ___________________________________
Date d’achat : _____________________________________
Date d’installation : ________________________________
Installateur : ______________________________________
Numéro de modèle : ________________________________
Numéro de série : __________________________________
NOTES CONCERNANT L’INSTALLATION
Table des matières
SÉCURITÉ DE LA SÉCHEUSE ........................................24
EXIGENCES D’INSTALLATION .......................................26
Outillage et pièces .............................................................26
Exigences d’emplacement ................................................27
RACCORDEMENT DE LA SÉCHEUSE ÉLECTRIQUE –
CANADA SEULEMENT ............................................................. 29
Spécications électriques .................................................29
RACCORDEMENT DE LA SÉCHEUSE À GAZ .........................30
Spécications électriques .................................................30
Spécications de l’alimentation en gaz ...........................31
Installation des pieds de nivellement ...............................32
Raccordement au gaz ........................................................33
ÉVACUATION .............................................................................33
Exigences concernant l’évacuation .................................33
Planication du système d’évacuation ............................34
Trousses d’évacuation ...................................................... 35
Installation du circuit d’évacuation ................................. 36
Raccordement des tuyaux de vidange ............................ 37
Raccordement du conduit d’évacuation ..........................38
RÉGLAGE DE L’APLOMB DE LA SÉCHEUSE......................... 39
ACHEVER L’INSTALLATION – LISTE DE VÉRIFICATION ....... 39
INVERSION DU SENS DE L’OUVERTURE DE LA PORTE
(FACULTATIF)
............................................................................. 40
DÉPANNAGE ............................................................................. 47
Dryer Installation Instructions
29" and 27" Wide Models
Gas (U.S.A. and Canada) & Electric (Canada Only)
Instructions d’installation de la sécheuse
Modèles de 29" et de 27" de largeur
À gaz (É.-U. et Canada) et
électrique (Canada uniquement)
Para obtener acceso al manual de uso y cuidado en español, o para obtener información adicional acerca de su producto, visite:
www.whirlpool.com
Tenga listo su número de modelo completo. Puede encontrar el número de modelo y de serie dentro de la cavidad superior de la puerta.
Question and Answer IconNeed help?

Do you have a question about the Whirlpool 29" and is the answer not in the manual?

Whirlpool 29" Specifications

General IconGeneral
BrandWhirlpool
TypeElectric or Gas
Dryer VentingVented
Energy Star CertifiedYes
Width29 inches
ColorWhite

Summary

Dryer Safety

Important Safety Instructions

General safety warnings and precautions for dryer installation and use.

Installation Requirements

Tools and Parts

Lists necessary tools and parts for dryer installation.

Parts Needed

Specifies parts required based on local codes and venting needs.

Location Requirements

Explosion Hazard

Warning about keeping flammable materials away from the dryer.

Installation Clearances

Specifies minimum clearances required around the dryer for installation.

Installation Spacing

27" Wide Models Dryer Dimensions

Provides front view dimensions for 27-inch wide dryer models.

Installation Spacing

Recessed Area and Closet Installation

Details spacing requirements for installing the dryer in a closet or recessed area.

Mobile Home Installation Requirements

Specific installation requirements for mobile home setups.

Electric Dryer Power Hookup (Canada Only)

Electrical Requirements

Details electrical supply and connection requirements for Canadian electric dryers.

Grounding Instructions

Explains the proper grounding procedures for the dryer.

Gas Dryer Power Hookup

Electrical Requirements

Details electrical supply and connection requirements for gas dryers.

Grounding Instructions

Explains the proper grounding procedures for the dryer.

Gas Supply Requirements

Details requirements for connecting the gas supply to the dryer.

Gas Supply Connection Requirements

Guidelines for connecting the gas supply line to the dryer.

Install Leveling Legs

Prepare Dryer for Leveling Legs

Steps to prepare the dryer for adjusting leveling legs.

Screw in Leveling Legs

Instructions for attaching and adjusting the dryer's leveling legs.

Mobile Home Gas Dryer Fastening

Specific fastening requirements for mobile home gas dryer installations.

Make Gas Connection

Connect Gas Supply to Dryer

Steps for connecting the gas supply line to the dryer.

Plan Pipe Fitting Connection

Guidance on planning the necessary pipe fittings for gas connection.

Open Shut-off Valve

Instructions for opening the gas shut-off valve and testing for leaks.

Venting

Venting Requirements

Specifies requirements for safe and effective dryer venting.

Exhaust Hoods and Styles

Details acceptable exhaust hood styles and installation height.

Plan Vent System

Provides recommended exhaust installation methods.

Optional Exhaust Installations

Details side or bottom exhaust options for 27" wide models.

Alternate Installations for Close Clearances

Shows venting setups for installations with limited space.

Mobile Home Venting Provisions

Specific requirements for venting in mobile homes.

Determine Vent Path and Length

Guidance on selecting vent path, length, and elbow usage.

Vent System Chart

Chart detailing vent requirements based on turns and vent type.

Install Vent System

Install Exhaust Hood

Steps for installing the dryer's exhaust hood.

Connect Vent to Exhaust Hood

Instructions for connecting the dryer vent to the exhaust hood.

Connect Inlet Hoses (Steam Models Only)

Prepare Water Faucet Connections

Procedure for preparing the water faucet before connecting hoses.

Attach Short Hose and "Y" Connector

Steps to connect the short inlet hose and Y-connector.

Tighten Couplings

Guidance on properly tightening hose couplings.

Connect Inlet Hoses (Continuation)

Attach Long Hose to "Y" Connector

Connecting the long inlet hose to the Y-connector and tightening.

Attach Long Hose to Dryer Fill Valve

Connecting the long inlet hose to the dryer fill valve.

Turn on Cold Water Faucet and Check Leaks

Instruction to turn on faucet and check all water connections for leaks.

Connect Vent

Connect Vent to Exhaust Outlet

Steps to connect the dryer vent to the dryer's exhaust outlet.

Move Dryer to Final Location

Instructions for moving the dryer to its final installation position.

Level Dryer

Level Dryer Procedure

Procedure for checking and ensuring the dryer is level.

Adjust Leveling Legs

Instructions for adjusting the dryer's leveling legs.

Complete Installation Checklist

Reverse Door Swing (Optional)

29" Super Wide Side-Swing Door

Instructions for reversing the door swing on 29" Super Wide models.

Reverse Door Swing (Optional)

Door Hinge Screw Procedures

Steps for removing and attaching door hinge screws.

Door Panel Reassembly

Steps for rotating, flipping, and reattaching the outer door panel.

Door Catch and Plug Adjustment

Procedure to switch and reposition the door catch, bezel, and plug.

Reverse Door Swing (Optional)

Door Strike and Hinge Plug Adjustments

Steps for repositioning door strike and transferring hinge hole plugs.

27" Wide Model Side-Swing Door

Instructions for reversing the door swing on 27" Wide models.

Reverse Door Swing (Optional)

Door Hinge and Screw Procedures

Steps for removing and attaching door hinges and screws.

Door Panel Reassembly

Steps for rotating, flipping, and reattaching the outer door panel.

Reverse Door Swing (Optional)

Plugs and Hinge Screw Installation

Steps for transferring plugs and inserting hinge screws into the cabinet.

Door Strike Alignment Check

Step to check and adjust door strike alignment.

27" Wide Model Side-Swing Door with Glass

Instructions for reversing door swing on 27" Wide models with glass.

Reverse Door Swing (Optional)

Door Hinge and Panel Separation

Steps for removing door hinges and separating door panels.

Door Panel Reassembly

Steps for rotating, flipping, and reattaching the outer door panel.

Attach Door Hinges

Step to reattach the door hinges to the dryer door.

Reverse Door Swing (Optional)

Door Strike and Plug Relocation

Steps for relocating the door strike and transferring plugs.

Hinge Screw Installation and Alignment Check

Steps for inserting hinge screws and checking door strike alignment.
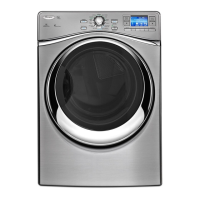
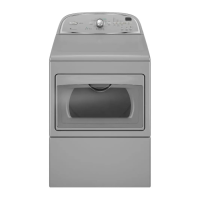
Troubleshooting

Related product manuals