EasyManua.ls Logo

Whirlpool WHES44 - User Manual

Whirlpool WHES44
28 pages
Print Icon
To Next Page IconTo Next Page
Loading...
7392319 (Rev. C 9/13/23)
Manufactured and warranted by
Water Channel Partners
1890 Woodlane Drive
Woodbury, MN 55125
How to install, operate
and maintain your Demand
Controlled Water Softener
Model WHES40
Model WHES44
Installation and Operation Manual
Systems tested and certified by the Water Quality
Association against CSA B483.1.
Systems tested and certified by NSF International
against NSF/ANSI Standard 44
for hardness reduction and efficiency,
and certified to NSF/ANSI/CAN Standard 372.
®
If you have any questions or concerns when
installing, operating or maintaining your water
softener, call our toll free number:
1-866-986-3223
or visit whirlpoolwatersolutions.com
When you call, please be prepared to provide
the model and serial number of your product,
found on the rating decal, typically located on
the rim below the salt lid hinges.
PRODUCT REGISTRATION
AND WARRANTY EXTENSION
Please register your product on
whirlpoolwatersolutions.com
See warranty page for
extended warranty details.

Questions and Answers

Summary

Dimensions

Specifications & Performance Claims

Water Softener Safety

Before You Start

Initial steps and checks before installing or operating the softener.

Inspect Shipment

Water Conditioning Information

IRON

Explains iron in water, its types, and measurement in ppm.

SEDIMENT

Defines sediment and its impact on water clarity.

Installation Requirements

LOCATION REQUIREMENTS

Guidelines for choosing a suitable installation spot for the water softener.

PLUMBING CODES

Importance of adhering to national, state, and local plumbing codes.

AIR GAP REQUIREMENTS

Specifies the 1-1/2" air gap needed for drain hoses to prevent backflow.

VALVE DRAIN REQUIREMENTS

Details on measuring, cutting, and installing drain hoses, including rigid options.

INLET; OUTLET PLUMBING OPTIONS

Discusses options for connecting the softener inlet/outlet like copper or PEX.

Installation Instructions

TYPICAL INSTALLATION

Illustrates the standard connection of the water softener to plumbing and power.

TURN OFF WATER SUPPLY

Instructions on how to safely shut off the main water supply before installation.

INSTALL THE BRINE TANK OVERFLOW ELBOW

Guidance on installing the overflow grommet and elbow in the brine tank.

MOVE THE WATER SOFTENER INTO PLACE

Procedures for safely moving and positioning the water softener unit.

GROUNDING INFORMATION (for Installations on Metal Pipe)

Explains grounding requirements for metallic plumbing to prevent electrical shock.

COMPLETE INLET AND OUTLET PLUMBING

Instructions for completing the final pipe connections to the softener valve.

INSTALL VALVE DRAIN HOSE

Steps for connecting the drain hose to the softener valve.

INSTALL SALT STORAGE TANK OVERFLOW HOSE

Guidance on connecting the overflow hose to the salt storage tank.

TEST FOR LEAKS

Steps to check for and fix leaks after the water softener is installed.

ADD WATER AND SALT TO THE SALT STORAGE TANK

Instructions for adding the initial water and salt to the brine tank.

PLUG IN THE POWER SUPPLY

Guidance on connecting the power supply to the unit.

SANITIZE THE WATER SOFTENER; SANITIZE AFTER SERVICE

Procedure for sanitizing the water softener unit.

Programming the Water Softener

STATUS LIGHT

Describes the meaning of different status light patterns on the control panel.

PROGRAM THE SOFTENER

Introduces the process of programming the softener's settings.

SET TIME OF DAY

Instructions for setting the current time on the softener's control panel.

SET WATER HARDNESS NUMBER

How to input the water hardness level for optimal performance.

SET RECHARGE (REGENERATION) TIME

Setting the preferred time for the softener's automatic regeneration cycle.

SET SALT TYPE

Selecting the type of salt used (NaCl or KCl) for the softener.

START A RECHARGE

How to manually initiate a regeneration cycle for the water softener.

Controller Features

RECHARGE

Explains how to use the RECHARGE button for immediate regeneration.

RECHARGE SCHEDULED

How to schedule an additional recharge for a later time.

SET SALT LEVEL

Instructions for setting the salt level indicator on the control panel.

TANK LIGHT

How to use the tank light button to illuminate the brine tank.

POWER OUTAGE MEMORY

Explains how the softener retains settings during power interruptions.

WATER FLOW INDICATOR

How the display indicates water flow through the softener.

SALT EFFICIENCY

How to enable the salt efficiency feature for optimized salt usage.

CLEAN; CLEAR WATER IRON REDUCTION

How to enable the iron reduction feature for improved water quality.

CLEAN FEATURE MINUTES

Adjusting the duration of the Clean/Clear Water Iron Reduction feature.

MAXIMUM DAYS BETWEEN REGENERATIONS

Setting the maximum interval between automatic regeneration cycles.

12 OR 24 HOUR CLOCK

Changing the time display format from 12-hour to 24-hour.

Routine Maintenance

WATER SOFTENER CLEANSER

Recommended procedure for using the water softener cleanser every four months.

ADDING SALT

Guidance on checking and adding salt to the storage tank.

BREAKING A SALT BRIDGE

How to identify and fix salt bridges that form in the brine tank.

CLEANING THE NOZZLE & VENTURI

Detailed steps for cleaning the nozzle and venturi assembly.

PROTECT THE WATER SOFTENER FROM FREEZING

Instructions on how to drain the softener to prevent freeze damage.

Troubleshooting Guide

AUTOMATIC ELECTRONIC DIAGNOSTICS

Explains how the softener self-diagnoses malfunctions and displays error codes.

Procedure for removing error code from display

Steps to clear error codes from the softener's display.

MANUAL ADVANCE DIAGNOSTICS

Using manual advance to check the softener's regeneration cycle operations.

RESETTING TO FACTORY DEFAULTS

How to reset the electronic controller to its original factory settings.

MANUAL ADVANCE REGENERATION CHECK

Verifying proper operation of valve motor, brine fill, draw, and rinse cycles.

Wiring Schematic

Softener Exploded View

Valve Assembly

Refers to pages 26 & 27 for detailed parts of the valve assembly.

Softener Parts List

Valve Exploded View

Valve Parts List

EXTEND YOUR WARRANTY

WATER SOFTENER WARRANTY - MODELS WHES40 & WHES44

Details the one-year full warranty and limited warranties for the softener.

Overview

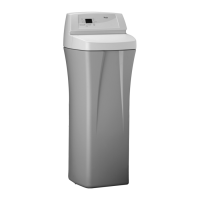
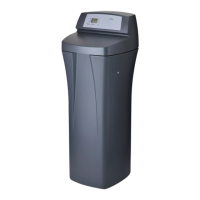
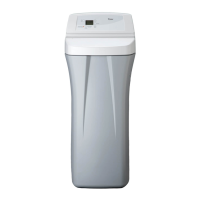
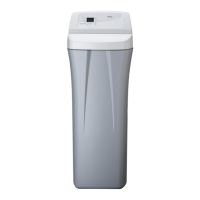
This document provides comprehensive instructions for the installation, operation, and maintenance of the Whirlpool WHES40 and WHES44 Demand Controlled Water Softeners. These systems are designed to reduce water hardness and improve water quality in residential settings.

Function Description

The Whirlpool WHES40 and WHES44 water softeners operate on a demand-initiated regeneration (D.I.R.) principle, meaning they regenerate based on actual water usage rather than a fixed schedule. This intelligent design helps minimize the amount of regenerant brine and water consumed, contributing to operational efficiency. The primary function of these softeners is to reduce total hardness in water, which is achieved through an ion exchange process. As hard water passes through the resin bed within the softener, calcium and magnesium ions (which cause hardness) are exchanged for sodium or potassium ions, resulting in softened water.

Beyond hardness reduction, these models also offer features for clear water iron reduction. For water supplies containing ferrous (clear water) iron, a "Clean / Clear Water Iron Reduction" feature can be activated. When set to ON, this feature introduces an additional backwash and fast rinse cycle before the normal regeneration sequence. This extra cleaning helps to prepare the resin bed more effectively before it is regenerated with salt brine, improving the softener's ability to handle iron. The duration of this cleaning cycle can be adjusted from 1 to 15 minutes, with a default setting of 6 minutes. This helps to keep the resin bed clean and maintain optimal performance, especially in areas with iron-rich water.

The system is equipped with electronic controls that manage various aspects of its operation, including regeneration timing, salt dose selection, and monitoring. The variable salt dose feature allows the electronic controls to select the appropriate amount of salt needed for regeneration, further enhancing efficiency.

Usage Features

The control panel of the water softener provides a user-friendly interface for programming and monitoring. Key features include:

  • Setting Time of Day: Users can easily set the current time using UP and DOWN buttons. The display shows "CURRENT TIME" and flashes 12:00 PM during initial setup or after a power outage. The clock can be set to either a 12-hour (AM/PM) or 24-hour format.
  • Setting Water Hardness Number: This crucial setting determines how often the softener regenerates. Users input their water's hardness in grains per gallon (gpg). If the water supply contains clear water iron, an additional 5 grains should be added to the hardness setting for every 1 ppm of ferrous iron to compensate and ensure effective iron reduction.
  • Setting Recharge (Regeneration) Time: The default recharge time is 2:00 AM, a period when water usage is typically low. Users can adjust this time using the UP and DOWN buttons to suit their household's schedule.
  • Setting Salt Type: The softener can operate with either sodium chloride (NaCl) or potassium chloride (KCl) salt. Users can select the appropriate salt type via the PROGRAM button and UP/DOWN buttons. If KCl is used, specific guidelines are provided, such as placing only one bag at a time (no more than 60 pounds) and monthly checks for hardening.
  • Initiating a Recharge: An immediate recharge can be started by pressing and holding the RECHARGE button for three seconds. This is useful for sanitizing the softener or when an extra regeneration is desired. The display will flash "RECHARGE," "SERVICE," and "FILL" during this process.
  • Scheduling a Recharge: A recharge can also be scheduled to occur at the next preset regeneration time by simply pressing and releasing the RECHARGE button. The display will show "RECHARGE SCHEDULED."
  • Salt Monitor System: The softener includes a salt monitor indicator light to remind users when to add salt. A salt level scale (0-8) is located on the brinewell inside the tank. Users set the salt level by pressing the SET SALT LEVEL button until black ovals correspond to the observed salt level. If the level drops to 2 or below, a "Low Salt Level" light will flash. This monitor can also be turned off if desired.
  • Tank Light: A built-in tank light allows for easy viewing of the salt level in the brine tank. It can be turned on and off with a button press and automatically turns off after 15 minutes if not manually switched off.
  • Water Flow Indicator: The display shows scrolling water droplets on the right side of the screen whenever water is flowing from the outlet port. The faster the flow, the faster the droplets flash, providing a visual indication of water usage.
  • Power Outage Memory: In case of a power loss, the softener's settings are retained for several hours. While the display will be blank, the system will resume normal operation once power is restored. Only the current time may need to be reset if the outage is prolonged.
  • Maximum Days Between Regenerations: While the softener typically operates in an automatic, demand-initiated mode for optimal efficiency, users can set a maximum number of days (1 to 15) between regenerations. This can be beneficial for water supplies with clear water iron, ensuring the resin bed is cleaned regularly.

Maintenance Features

Regular maintenance is crucial for the longevity and optimal performance of the Whirlpool water softener. The manual outlines several key maintenance procedures:

  • Adding Salt: Users should frequently check the salt storage level, ideally every two to three weeks, and refill when less than 1/4 full. Recommended salt types include nugget, pellet, or coarse solar salts with less than 1% impurities. Certain salt types like rock salt or granulated salt are not recommended due to high impurities or tendency to form bridges.
  • Breaking a Salt Bridge: A common issue, especially in humid areas or with incorrect salt types, is the formation of a hard salt crust (salt bridge) in the brine tank. This prevents salt from dissolving and forming brine, leading to hard water. The manual provides instructions on how to detect and gently break a salt bridge using a broom handle, emphasizing caution to avoid damaging the brine tank.
  • Cleaning the Nozzle & Venturi: The nozzle and venturi assembly is a critical component that creates suction to draw brine into the resin tank. If it becomes plugged with sand, silt, or dirt, the softener will not function correctly. The manual provides detailed steps for disassembling, cleaning with warm, soapy water, and reassembling the nozzle and venturi, including instructions for lubricating O-rings and ensuring proper seating of parts.
  • Water Softener Cleanser: The manufacturer recommends using Whirlpool® WHE-WSC Water Softener Cleanser every four months. The cleanser is poured into the brinewell, followed by initiating a manual recharge. This helps to maintain water quality and address any taste, odor, or discoloration issues.
  • Protecting from Freezing: If the softener is installed in an area prone to freezing temperatures (e.g., summer cabins), it must be drained to prevent damage. The manual provides a step-by-step guide for shutting off the water supply, opening faucets to vent pressure, placing the bypass valve in the bypass position, unplugging the power supply, and tipping the softener to drain all water. This ensures the system is protected during cold periods.
  • Troubleshooting Guide: A comprehensive troubleshooting guide is included, listing common problems, their potential causes, and corresponding corrections. This covers issues such as no soft water, salt level not dropping, water running to drain during the soft water cycle, hard water intermittently, iron in water, resin in household plumbing, salt storage tank leaks, motor stalled/clicking, and various error codes (Err1, Err3, Err4, Err5).
  • Automatic Electronic Diagnostics: The softener features a self-diagnostic function that monitors electronic components and circuits. If a malfunction occurs, an error code (e.g., "Err1") will appear on the display. The manual provides a procedure for removing error codes and suggests correcting the underlying problem.
  • Manual Advance Diagnostics: For more in-depth troubleshooting, users can access manual advance diagnostics. This allows for advancing the softener through its regeneration cycles to check valve motor operation, brine tank fill, brine draw, and regeneration flow rates. It also provides information on the number of days the electronic control has had electrical power and the number of regenerations initiated.
  • Resetting to Factory Defaults: If necessary, the electronic controller can be reset to its factory default settings (time, hardness, etc.) by following a specific sequence of button presses.

Overall, the Whirlpool WHES40 and WHES44 water softeners are designed for efficient and effective water conditioning, with user-friendly controls and clear maintenance guidelines to ensure reliable performance.

Whirlpool WHES44 Specifications

General IconGeneral
TypeWater Softener
Capacity44, 000 grains
Grain Capacity44, 000 grains
Operating Pressure20-125 psi
Connection Size1 inch
Operating Temperature40-100°F

Related product manuals