Do you have a question about the Whirlpool WHES48 and is the answer not in the manual?
Details the comprehensive two-year coverage for all parts and labor.
Outlines specific limited warranties for tanks and electronic control board.
Specifies operating conditions and limitations for warranty validity.
Essential pre-installation checks and safety precautions for setup.
Explains water contaminants like iron and sediment and their effects.
Guidelines for selecting an appropriate and safe installation site.
Adherence to national, state, and local plumbing regulations.
Specifies the necessary air gap for drain connections to prevent backflow.
Instructions for connecting the drain hose and ensuring proper drainage.
Details on connecting the softener to household plumbing using various pipe types.
Diagram illustrating the physical size and measurements of the water softener.
Procedure for safely shutting off the main water supply before installation.
Steps for correctly installing the brine tank overflow connection.
Safety guidelines and steps for safely positioning the unit.
Critical steps for grounding the unit, especially on metal plumbing.
Finalizing the water connections to the softener's inlet and outlet ports.
Guidance on connecting and routing the drain hose for regeneration discharge.
Instructions for connecting the overflow hose for the salt storage tank.
Procedures to check for and resolve water leaks after installation.
Steps for filling the brine tank with water and the correct type of salt.
Connecting the unit to a power source and initial power-up checks.
Instructions for disinfecting the softener after installation or maintenance.
Overview of the softener's touch screen interface and controls.
Step-by-step guide for initial configuration of language, time, and hardness.
Description of the main display screen and its active buttons.
How to adjust and interpret the salt level indicator on the display.
Information on the brine tank's internal light and its operation.
Explains conditions that cause the display backlight to flash.
How the softener communicates important status messages and errors.
Guide for changing the display language of the softener.
Adjusting the display contrast for optimal readability.
Overview of the button used to control regeneration cycles.
Instructions for manually initiating an immediate water softener recharge.
How to schedule the daily automatic regeneration time.
Procedure to enable or disable scheduled automatic recharges.
Accessing various settings and configuration options through the setup menu.
Adjusting the current time on the softener's control panel.
Entering the water hardness level for accurate softening.
Configuring the softener to compensate for iron content in the water.
Referencing instructions for setting the automatic recharge start time.
Using the INFO button to access operational data like flow rate and usage.
Enabling or disabling the Clean Feature for improved resin bed cleaning.
Adjusting the duration of the Clean Feature cycle.
Optimizing softener operation for higher salt efficiency, especially in California.
Selecting between Sodium Chloride or Potassium Chloride salt.
Configuring display units for volume, time, and water hardness.
Choosing between gallons or liters for water volume measurements.
Selecting the 12-hour or 24-hour display format for the clock.
Choosing to display water hardness in grains or ppm.
How the softener retains settings during power interruptions.
Resetting the softener's controller to its default factory configuration.
Guidelines for checking and refilling the salt storage tank.
Identifying and resolving hard crust formations in the brine tank.
Instructions for cleaning essential components for proper brine draw.
How the softener's system monitors itself and reports error codes.
Procedure to verify the water flow meter (turbine) is functioning correctly.
Verifying the softener model code for correct configuration.
Step-by-step process to test regeneration cycles and valve operation.
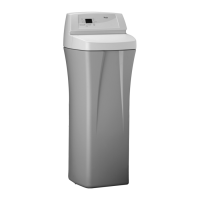
| Type | Water Softener |
|---|---|
| Capacity | 48, 000 grains |
| Family Size | Up to 6 people |
| Salt Storage Capacity | 200 lbs |
| Water Connection Size | 1 inch |
| Iron Removal | Up to 10 ppm |
| Sediment Filter | Included |
| Flow Rate | 12.7 GPM |
| Weight | 110 lbs |
| Warranty | 10-year limited warranty |
| Salt Efficiency | Low salt usage |
| Power Supply | 120V/60Hz |



 Loading...