1
Important Safeguards/Conventions
This appliance is designed for commercial use. Any servicing other than cleaning and maintenance should be performed by an
authorized service technician.
•DoNOTimmersetheunitinwateroranyotherliquid
•Toreducetheriskofreorelectricshock,doNOTopentoporfrontpanel.Nouserserviceablepartsinside.
•Keephandsandotheritemsawayfromhotpartsofunitduringoperation.
•Nevercleanwithscouringpowders,bleachorharshchemicals.
Symbols
WARNINGS–Tohelpavoidpersonalinjury
ImportantNotes/Cautions–fromthefactory
SanitationRequirements
YourCurtisComboBrewerisFactoryPre-SetandReadytoGo…RightoutoftheBox.
FollowingaretheFactorySettingsforyourCoffee/TeaBrewingSystem:
•BrewTemperature=204°F
•BrewVolume=Settodispensingvesselrequirements(2.2liters)
GenerallytherewillneverbeareasontochangetheG3/GoldCupSeriesdefaultsettings.However,shouldyouneedtomakeslight
adjustmentstomeetyourbrewingneeds,programminginstructionsareprovidedlaterinthismanual.
SystemRequirements:
•WaterSource20–90PSI.Minimumowrateof½gpm(1gpmpreferredowrate).
•Electrical:Seeattachedschematicforstandardmodelorvisitwww.wilburcurtis.comforyourmodel.
Equipmenttobeinstalledtocomplywithapplicablefederal,state,orlocalplumbing/electricalcodeshavingjurisdiction.
SETUP STEPS
Theunitshouldbelevel(lefttorightandfronttoback)andlocatedonasolidcountertop.Connectawaterlinefromthewaterltertothe
brewer.
NOTE:Awaterltrationsystemmustbeusedtohelpmaintaintrouble-freeoperation.Air must be purged from the
cartridge prior to connection to equipment.Inareaswithextremelyhardwater,wehighlyrecommendtheuseofaCurtis
approvedwaterlter.Forourfulllineoflters,pleaselogontowww.wilburcurtis.com.
1.A1/4”Flarehasbeensuppliedforwaterlineconnection.Usetubingsizedsufcientlytoprovideaminimumof½gpm(1gpmis
preferred).
2.Connecttheunittoanappropriateelectricalpowercircuit.
3.Turnonthetoggle(STANDBY/ON)switchbehindtheunit.Theheatingtankwillstarttoll.Whenthewaterlevelinthetankrises
tothecorrectvolume,theheatingelementwillenergizeautomatically.WiththeG3/GoldCupSeriesthereisnodangerofelement
burnoutduetoanunlledheatingtank.
4.Theheatingtankwillrequire20to30minutestoreachoperatingtemperature(204°F)asindicatedbytheREADY-TO-BREW
LCDreadout.
5.Important:RunonefullTEAbrewcyclerst,beforerunningacoffeebrewcycletopurgewaterlinesandvalvesofair.Five
secondsofpulsingdilutionwateratthebeginningofeachTEAbrewcycleisnormalpre-programmedoperatingbehavior.
NSFInternationalrequiresthefollowingwaterconnection:
1.Aquickdisconnectoradditionalcoiledtubing(atleast2xthedepthoftheunit)sothatthemachinecanbemovedforcleaning
underneath the unit.
2.Thisequipmentistobeinstalledwithadequatebackowprotectiontocomplywithapplicablefederal,stateandlocalcodes..
3.Waterpipeconnectionsandxturesdirectlyconnectedtoapotablewatersupplyshallbesized,installedandmaintainedin
accordancewithfederal,state,andlocalcodes.
CAUTION:Pleaseuse
this setup procedure
before attempting to use
thisbrewer.Failuretofollowthe
instructionscanresultininjuryorthe
voidingofthewarranty.
CAUTION:DONOT
connectthisbrewertohot
water.Theinletvalveis
notratedforhotwater.
IMPORTANT:After
setup,runafullTEA
cyclerstbeforerunning
aCOFFEEcycle.Placeanempty
teacontainertocatchbothhotwater
fromthebrewconeanddilution
waterfromspoutonthefrontcover.
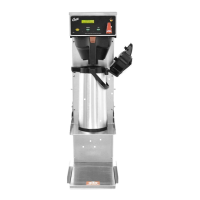
Models:
•CB
•CBP
WARNINGHOTLIQUID,
Scaldingmayoccur.
Avoid splashing.
4. Pourground
coffee into
brewcone
marked
COFFEE
6.Pressthe
COFFEE
Brewbutton.
5. Position
lledbrew
cone into
brewrails.
BREWING INSTRUCTIONS – COFFEE
1.Ready-to-BrewshouldbedisplayedontheUCMscreen.
2.Makesurethatthefoldingairpotdeckisintheproperpositiontoaccommodateyourairpot.Placeaclean,emptyairpotonthedeck.
3. Placeanewpaperlterintothebrewcone.
FOR THE LATEST SPECIFICATIONS AND INFORMATION GO TO WWW.WILBURCURTIS.COM
ISO 9001:2008 REGISTERED
WILBUR CURTIS CO., INC.
6913 West Acco Street
Montebello, CA 90640-5403
For the latest information go to
www.wilburcurtis.com
Tel: 800-421-6150
Fax: 323-837-2410
ServiceManual–CB&CBP
Wilbur Curtis Co., inC.