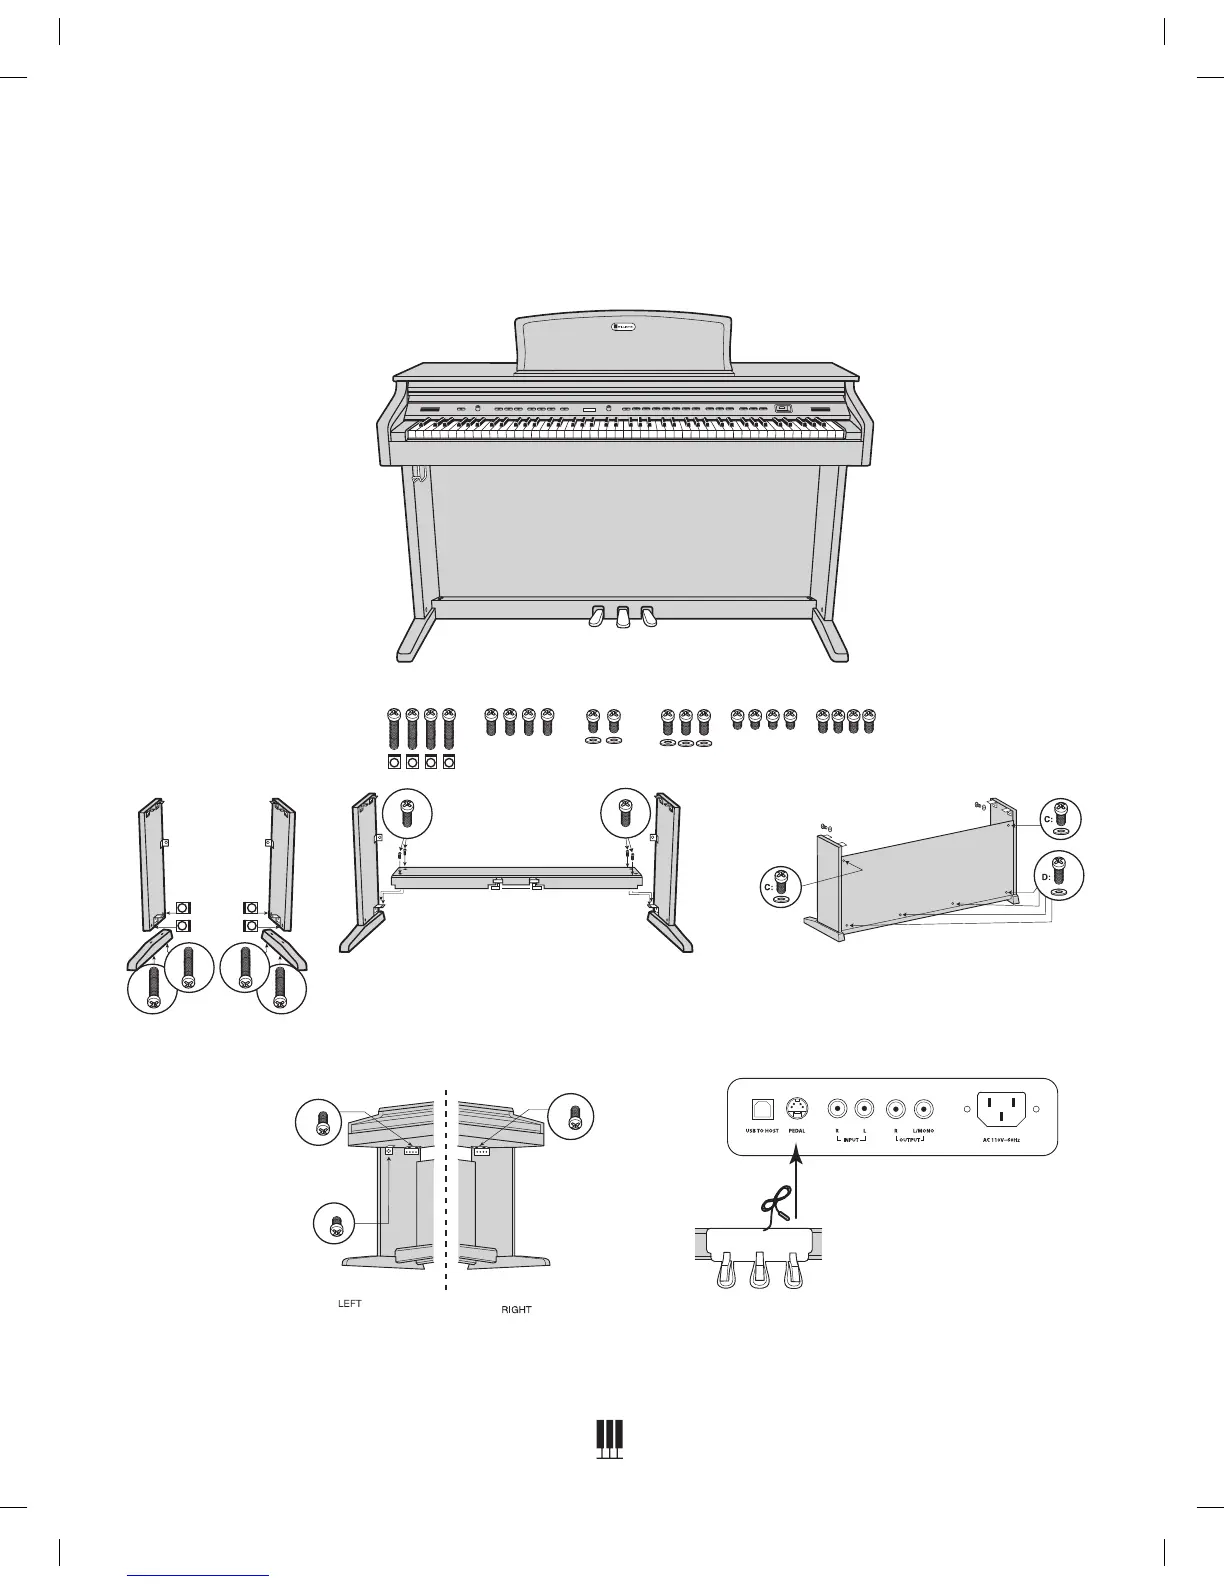
ASSEMBLY INSTRUCTIONS
A: M6x55
B: M6x25 C: M4x16 D: M4x20 E: M4x16 F: M6x16
B:
B:
A:
A: A:
A:
E:
F:
F:
1. Place the four M6x55 screws into the holes in the stand legs,
with the philips slot facing out. Use a screwdriver to align the
threads in the nuts with the openings on the bottom of the
stand legs. Attache the piano base to left and right legs, and
secure using four M6x25 screws.
2. Attach the modesty panel to the legs and base, using
three M4x20 screws at the bottom of panel. Use two
M4x16 screws and washers to secure the top of the
modesty panel.
3. Place the main piano section on top of the legs. Slip protruding
tabs into slotted brackets in back. Use two M6x16 screws to
secure the left and right bracket. Attach the headphone holder to
the bottom left of the piano with four M4x16 screws.
4. Plug in the pedal cable to the pedal jack and the AC
power cable to the AC 110V ~ 60Hz jack.