36 WILOSE04-2015V05DINA4
English OPERATION AND FUNCTION
5.4.13. Switching service interval display on/off
To increase operational reliability of the unit,
aserviceintervalindicatorcanbeswitchedon.
Afterthesetintervalhasexpired,avisualsignalis
emitted by means of the yellow LED on the front.
No audible signal is emitted and the collective
fault contact is not activated! Time is only record-
ed continuously when mains voltage is present.
Counter reset must be carried out by Wilo Cus-
tomer Service.
The function and the desired interval can be
switchedon/offviaDIPswitch2,DIP4and5:
• DIP4and5"OFF":Serviceintervaloff(factory
setting)
• DIP4ON:¼yearserviceinterval
• DIP5ON:½yearserviceinterval
• DIP4and5"ON":1yearserviceinterval
5.4.14. Switching monitoring of operating parameters
on/off (version S only)
To increase the operational reliability of the unit,
the following operating parameters can be moni-
toredontheconnectedpumps:
• Connections/h
• Connections/d
• running time/h
After the factory-set parameters have been
exceeded,avisualsignalisemittedviatheyellow
LED on the front. No audible signal is emitted and
the collective fault contact is not activated!
Counter reset must be carried out by Wilo Cus-
tomer Service.
Monitoring can be switched on/off individually via
DIPswitch2,DIP1to3:
• DIP1:Connections/h
• DIP2:Connections/d
• DIP3:Runningtime/h
Allmonitoringisdeactivatedasafactorysetting
(DIPin"OFF"position).
5.4.15. Adjusting the follow-up time
Follow-uptimeisthetimebetweentheoat
switch"OFF"signalandthepumpbeingdeacti-
vated by the switchgear.
The follow-up time is continuously adjusted via
thepotentiometer.Settingrange:
• Standardversion:0...120s
• VersionS:0...30s
• "O"version:0...120s
5.4.16. Installing the rechargeable battery
Byinsertingarechargeablebattery,alarmsignals
will be emitted independent of the electricity
network on power failure. An audible, constant
tone will be emitted as an alarm.
1. Place the rechargeable battery in the holder. Pay
attention to the correct polarity.
2. Secure the rechargeable battery using the en-
closed cable tie
NOTE
• To ensure perfect operation, the rechargeable
battery must have been fully charged prior to
insertion or have been charged for 24 h in the
switchgear.
• The capacity of the rechargeable battery will fall
if temperatures drop. This reduces the running
time of the rechargeable battery.
6. Operation and function
This section contains all information on operating
the switchgear and how it functions.
POTENTIALLY fatal danger due to electrical
voltage!
There is arisk of fatal electric shocks oc-
curring when performing work on the open
switchgear. Allwork on individual com-
ponents must be performed by aqualied
electrician.
NOTE
Followingapowersupplyinterruption,the
switchgear will automatically start up in the last
operating mode set!
6.1. Controls
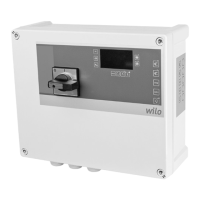
The switchgear is operated on the side control
panelvia5buttons.Thecurrentoperatingstateis
indicated via 11 LEDs on the front side.
6.1.1. Main switch (standard version only)
Disconnectionfromthemainsisviaamainswitch
on the standard version.
Position"0"=switchgearOFF
Position"1"=switchgearON
NOTE
The main switch can be secured against unau-
thorisedactivation/deactivationusingalock!
6.1.2. Buttons
Manual mode
By pressing this button for the relevant pump
(pump 1 = P1, pump 2 = P2), the pump is switched
on independently of the level control signal.
Thepumpoperatesaslongasthebuttonisheld
down. This function is intended for test mode.
Automatic mode
By pressing this button, automatic mode is activat-
ed.Thepumpsareactivateddependingonthelevel
control signal. When the pumps are deactivated,
the pump follow-up time is taken into account.
Stop
By pressing this button, automatic mode is deacti-
vated and the switchgear is set to stand-by mode.
Thepumpsarenotcontrolleddependentonthe
level.

 Loading...