en Installation and electrical connection
70 WILO SE 2019-10
WARNING
Separation of pressure hose!
Separation or movement of the pressure hose can lead to (serious) injuries. Securely
attach the pressure hose to the outlet! Prevent buckling of the pressure hose.
NOTICE
Pumping problems due to water level being too low
If the fluid is lowered too much, separation of the volume flow may occur. Further-
more, air cushions may form in the hydraulic system, resulting in undesirable beha-
viour during operation. The minimum permissible water level must reach the upper
edge of the hydraulics housing!
For portable installation, the pump must be equipped with a pump support foot. The
pump support foot ensures minimum ground clearance in the suction area and enables
secure footing if placed on a solid bearing surface. In this installation type, the pump
can be installed anywhere in the operating space/installation site. A hard base must be
used at the installation location to prevent sinking in case of soft bearing surfaces. A
pressure hose is connected on the pressure side. If operated for longer periods of time,
fix the pump firmly to the floor. This prevents vibration and ensures quiet and low-
wearing running.
Work steps
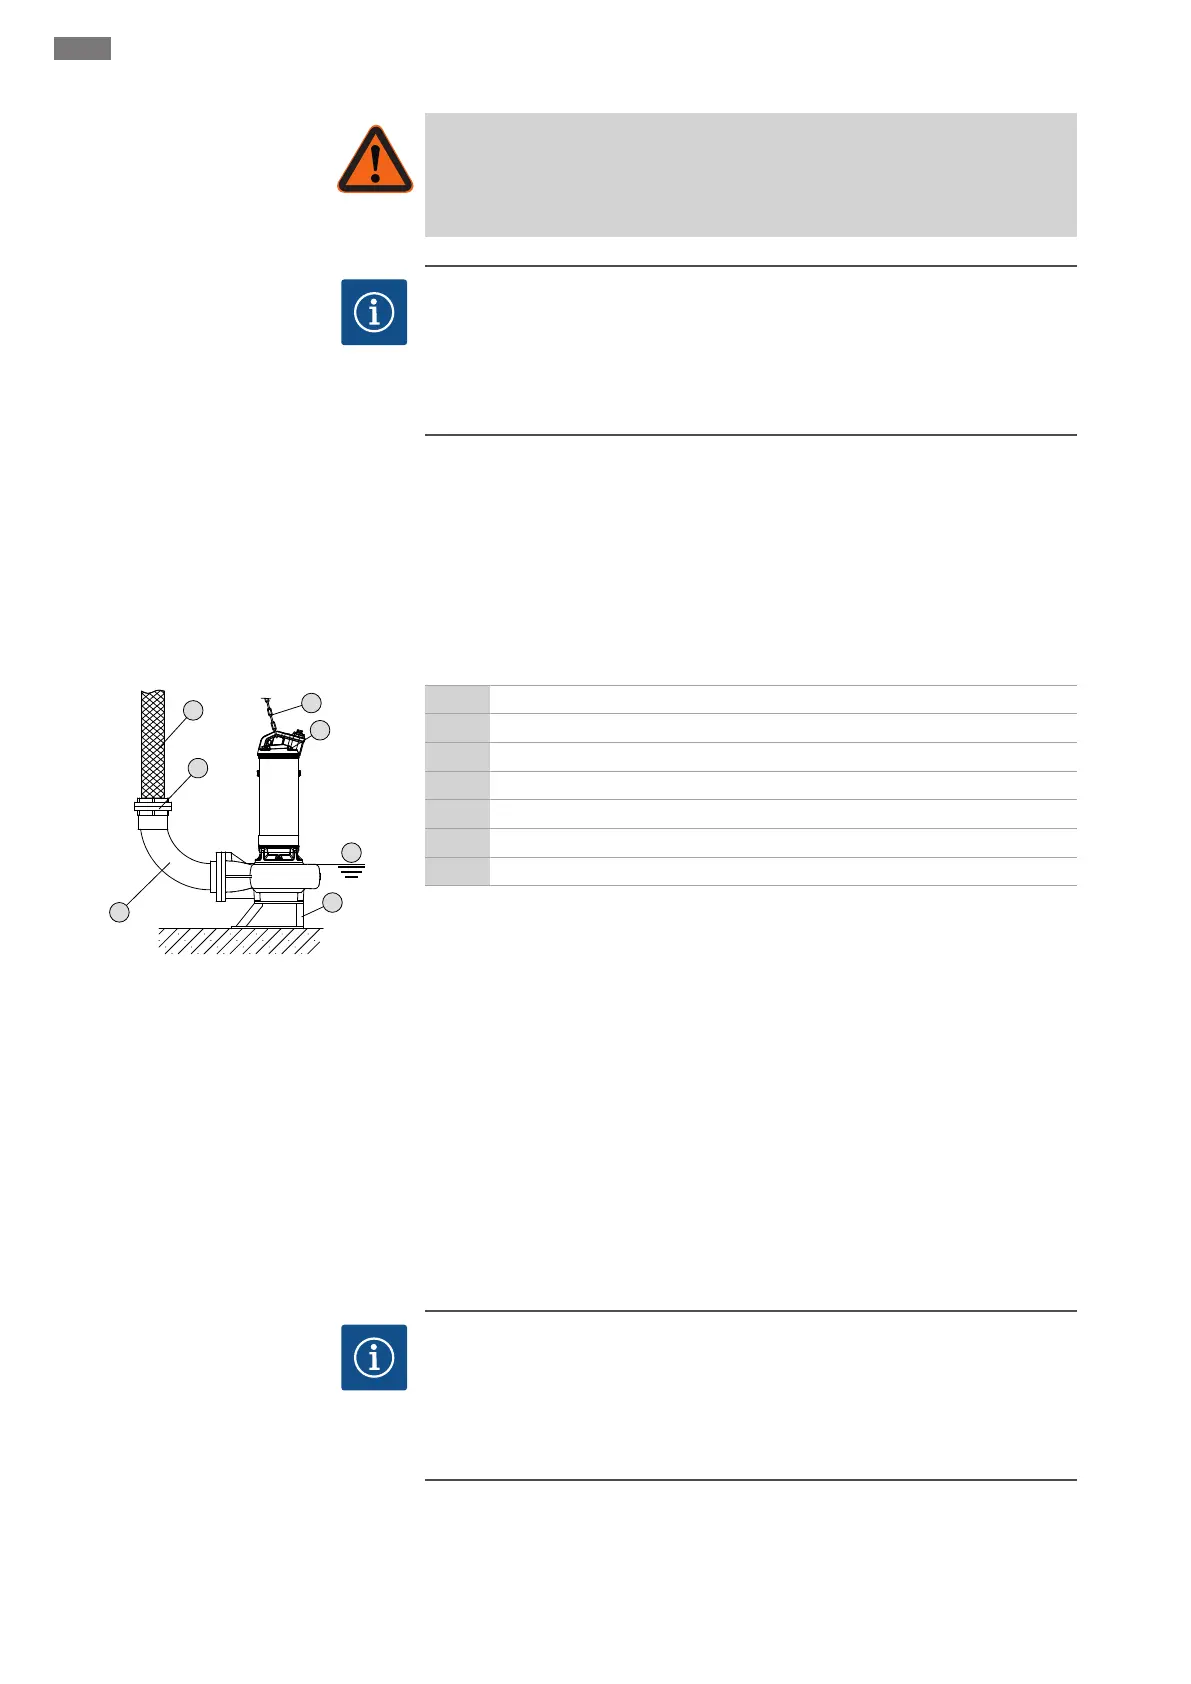
Fig.7: Wet well installation, portable
1 Pump support foot
2 Pipe elbow
3 Storz coupling
4 Pressure hose
5 Lifting equipment
6 Attachment point for lifting equipment
7 Minimum water level
‡ Pump support foot mounted.
‡ Pressure connection prepared: Pipe elbow with hose connection or pipe elbow with
Storz coupling mounted.
1. Use a shackle to attach the lifting equipment to the attachment point on the
pump.
2. Lift the pump and lower it to the intended location (chamber, pit).
3. Place the pump on a solid load bearing surface. CAUTION!Sinking must be pre-
vented!
4. Route the pressure hose and fasten it to an appropriate point (e.g. the drain off).
DANGER!Separation or movement of the pressure hose can lead to (serious) in-
juries! Secure the pressure hose at the outlet.
5. Correctly route the connection cables. CAUTION!Do not damage the connection
cable (no kinks, note the bend radius)!
▶ The pump is installed, the qualified electrician can make the electrical connection.
6.4.5 Stationary dry well installation
NOTICE
Pumping problems due to water level being too low
If the fluid is lowered too much, separation of the volume flow may occur. Further-
more, air cushions may form in the hydraulic system, resulting in undesirable beha-
viour during operation. The minimum permissible water level must reach the upper
edge of the hydraulics housing!
In dry well installation, the operating space is divided into the collecting space and the
machine room. In the collecting space, the fluid flows and is collected; the pump tech-
nology is installed in the machine room. The pump is installed in the machine room and
 Loading...