Installation and electrical connection en
Installation and operating instructions Wilo Motor T 17.3, 20.2:, EMU FA, Rexa SUPRA, Rexa SOLID 69
7. Clean the screw plug (-), replace the seal ring and screw it back in. Max. tightening
torque: 8Nm (5.9ft·lb)!
8. Pour new operating fluid in through the hole for the screw plug (+).
⇒ Comply with the specifications for the operating fluid type and quantity!
When recycling the operating fluid, check the quantity and adjust it, if re-
quired!
9. Clean the screw plug (+), replace the seal ring and screw it back in. Max. tightening
torque: 8Nm (5.9ft·lb)!
6.4.3 Stationary wet well installation
NOTICE
Pumping problems due to water level being too low
If the fluid is lowered too much, separation of the volume flow may occur. Further-
more, air cushions may form in the hydraulic system, resulting in undesirable beha-
viour during operation. The minimum permissible water level must reach the upper
edge of the hydraulics housing!
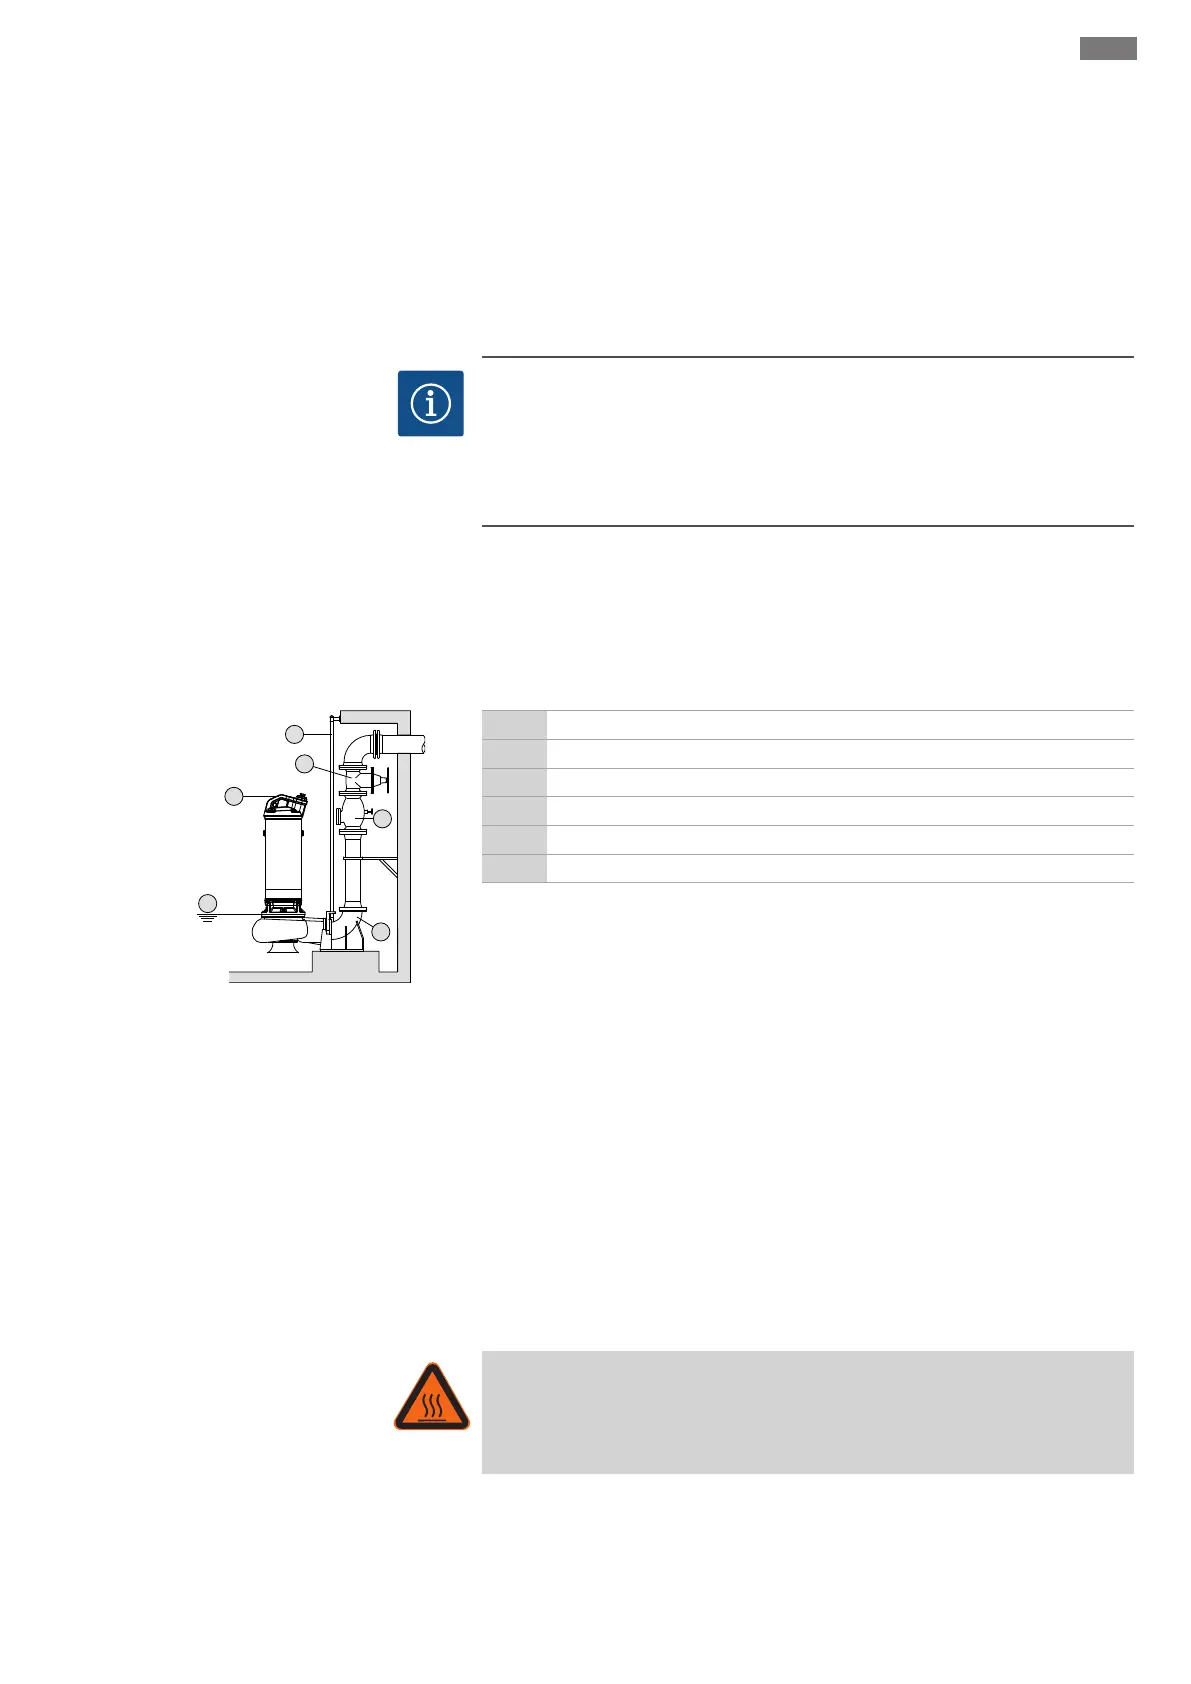
The pump is installed in the fluid for the wet well installation. For this, a suspension unit
must be installed in the chamber. On the pressure side, the on-site pipe system is con-
nected to the suspension unit and on the suction side to the pump. The connected pipe
system must be self-supporting. The suspension unit must not support the pipe sys-
tem!
Work steps
Fig.6: Wet well installation, stationary
1 Gate valve
2 Non-return valve
3 Suspension unit
4 Guide pipes (provided by the customer)
5 Attachment point for lifting equipment
6 Minimum water level
‡ Operating space/installation location has been prepared for the installation.
‡ Suspension unit and pipe system have been installed.
‡ Pump is prepared for operation on the suspension unit.
1. Use a shackle to attach the lifting equipment to the attachment point on the
pump.
2. Lift the pump, swivel it above the chamber opening and slowly lower the guide
claw onto the guide pipe.
3. Lower the pump until it sets on the suspension unit and is connected automatical-
ly. CAUTION!Hold the connection cable slightly taut when lowering the pump!
4. Loosen the lifting equipment from the lifting gear and secure it against falling at
the chamber outlet.
5. Have the connection cable routed into the chamber by a qualified electrician and
properly route it outside from the chamber. CAUTION!Do not damage the con-
nection cable (no kinks, note the bend radius)!
▶ The pump is installed, the qualified electrician can make the electrical connection.
6.4.4 Portable wet well installation
WARNING
Risk of burns from hot surfaces!
Motor housing can become hot during operation. It may cause burns. Allow the
pump to cool down at ambient temperature after switching it off!
 Loading...