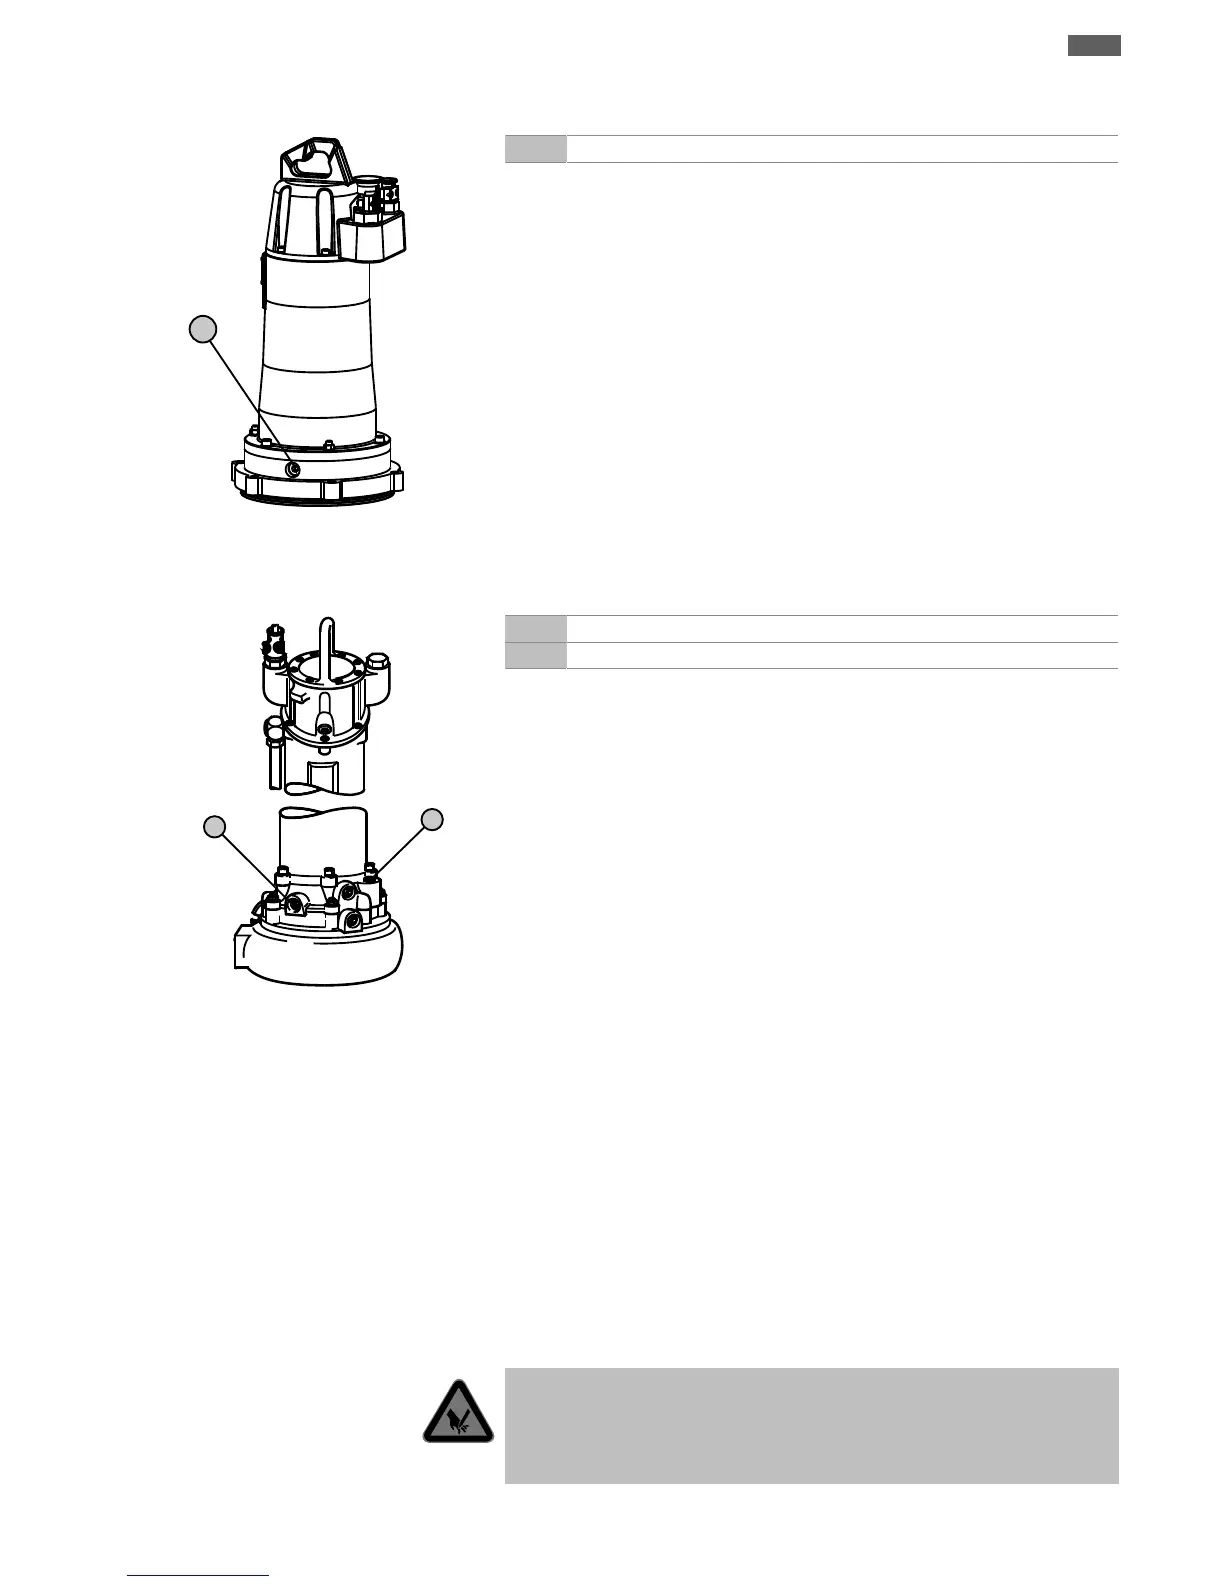
Fig.13: Sealing chamber: Oil change
+/- Fill/drain the oil in the sealing chamber
‡ Protective equipment has been put on!
‡ Pump has been dismantled and cleaned (decontaminated if required).
1. Place the pump upright on a firm surface.WARNING!Risk of hands being crushed.
Ensure that the pump cannot fall over or slip away!
2. Place a suitable tank to collect the operating fluid.
3. Unscrew the screw plug slowly, but do not unscrew it completely. WARN-
ING!Overpressure in the motor! Stop turning the screw plug further if hissing
or whistling is audible! Wait until the pressure has completely dissipated.
4. After the pressure has dissipated, fully unscrew the screw plug and drain the oper-
ating fluid.
5. Check the operating fluid: Notify customer service if an operating fluid contains
metal chips!
6. Pour the new operating fluid in through the opening.
⇒ Comply with the specifications for operating fluid locations and quantity!
7. Clean the screw plug, replace the seal ring and screw it back in. Max. tightening
torque: 8Nm!
Motors FK 202, FK 34, FK 42
Fig.14: Sealing chamber: Oil change
+ Fill the oil in the sealing chamber
- Drain the oil in the sealing chamber
‡ Protective equipment has been put on!
‡ Pump has been dismantled and cleaned (decontaminated if required).
1. Place the pump upright on a firm surface.WARNING!Risk of hands being crushed.
Ensure that the pump cannot fall over or slip away!
2. Place a suitable tank to collect the operating fluid.
3. Unscrew the screw plug (+) slowly, but do not unscrew it completely. WARN-
ING!Overpressure in the motor! Stop turning the screw plug further if hissing
or whistling is audible! Wait until the pressure has completely dissipated.
4. After the pressure has dissipated, fully unscrew the screw plug (+).
5. Unscrew screw plug (-) and allow the operating fluid to drain out. If a shut-off ball
cock is installed on the outlet opening, open the shut-off ball cock.
6. Check the operating fluid: Notify customer service if an operating fluid contains
metal chips!
7. If a shut-off ball cock is installed on the outlet opening, close the shut-off ball
cock.
8. Clean the screw plug (-), replace the seal ring and screw it back in. Max. tightening
torque: 8Nm!
9. Pour the new operating fluid in through the hole of the screw plug (+).
⇒ Comply with the specifications for operating fluid locations and quantity!
10.Clean the screw plug (+), replace the seal ring and screw it back in. Max. tightening
torque: 8Nm!
9.6.9 General overhaul
During the general overhaul, the motor bearings, shaft sealings, O-rings and power
supply cables are checked for wear and damage. Damaged components are replaced
with original parts. This will ensure correct operation.
The general overhaul is performed by the manufacturer or an authorised service centre.
9.7 Repairs
WARNING
Sharp edges on the impeller and suction port
Sharp edges can form on the impeller and suction port. There is danger of limbs be-
ing cut-off! Protective gloves must be worn to protect from cuts.
 Loading...