se C T i o n 3 � 3—mo u n T i n g T h e u P P e r ar r ay
25
Wilson Audio Specialties
Install the Upper Array As Follows
1. Install the front pair of short (“AA” length) spikes into the bottom of
each Upper Array. Use the 7/16” Wrench to tighten the spikes to the en-
closure. Do not over tighten spikes.
2. Refer to the table labeled “Midrange Spike Length” and install the ap-
propriate rear spike, if necessary. Use the 7/16” Wrench to tighten the
spike to the enclosure. Do not over tighten spikes.
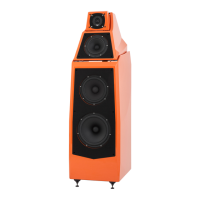
3. Refer to table labeled “Upper Array Alignment Block Position.” Using the
rear edge of the Alignment Block as the guide, align the block to the
proper front-to-back setting for the Upper Array. Once the block is in
its proper position, lock it down by twisting the locking bolt (no tools
needed).
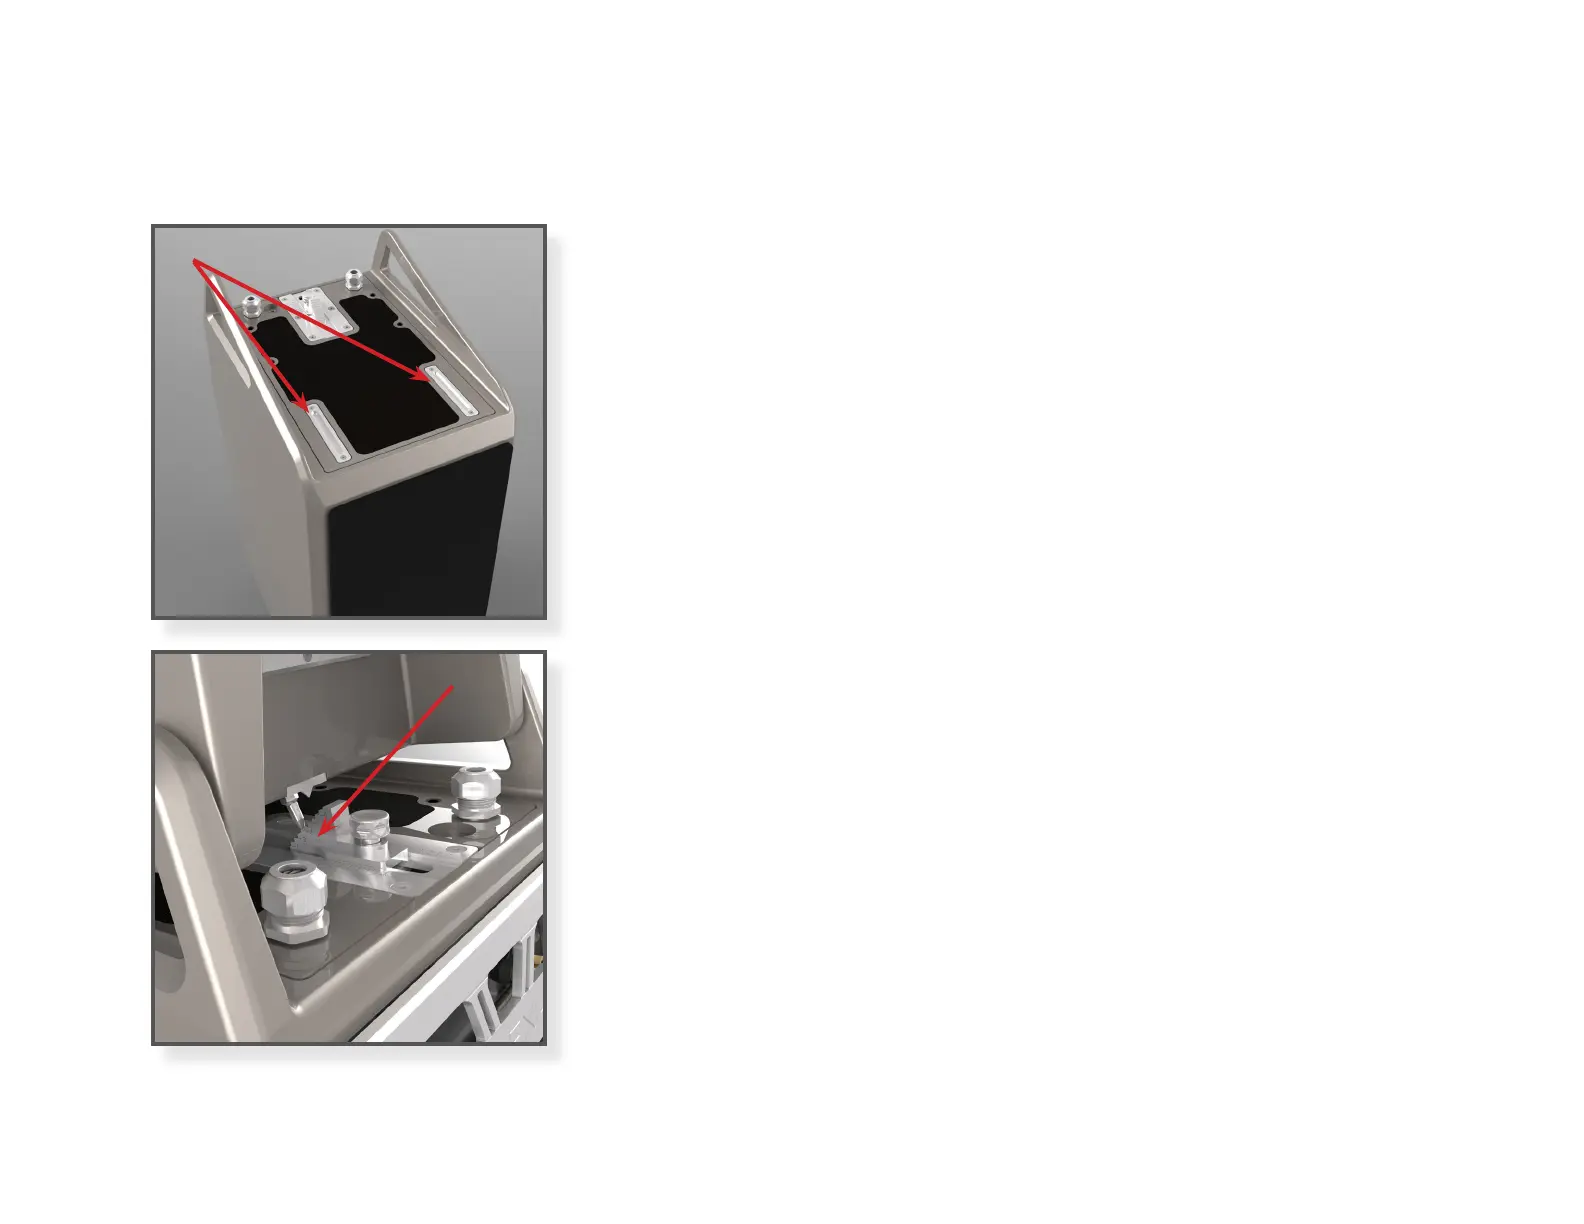
4. Refer to the table labeled “Upper Array Alignment Block Step”. With the
front spikes pointing down, carefully lower the Upper Array between
the woofer blades and set the spikes down on the front spike tracks.
Rest the rear spike on the step on the alignment block step indicated on
the chart.
NOTE: Take caution not to scratch the painted surface with the alignment spikes as
you install the Upper Array. The front bevel on the Woofer Module is particularly
vulnerable.
Front Spike Tracks
Alignment Block


 To Next Page