Never leave the tool unattended while it’s
running – turn OFF the power. Do not leave the tool
unattended until it reaches a complete stop.
Drugs, Alcohol, Medication – are not to be used
when operating the tool.
Wear a face mask or dust mask – when sawing.
Some dust created by power sanding, sawing,
grinding, drilling, and other construction activities
contain chemicals known to cause cancer, birth
defects, or other reproductive harm. Examples of
these chemicals include:
– Lead from lead-based paints
– Crystalline silica from bricks, cement, and other
masonry products
– Arsenic and chromium from chemically treated
lumber.
To reduce your exposure to these chemicals: work in
a well-ventilated area, use approved safety
equipment, and use dust masks that are specially
designed to filter out microscopic particles.
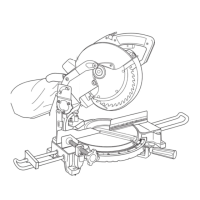
SPECIAL SAFETY RULES FOR
MITER SAWS
WARNING:
Do not operate or plug in your miter saw
until it is completely assembled and installed according to the
instructions. Read and understand the following operating
instructions and safety warnings in the manual and on the miter
saw.
Before Operating Your Miter Saw
Check for proper assembly and proper alignment of
moving parts.
Understand the function and proper use of:
●
Trigger switch/start button
●
Lower blade guard
●
Miter locks
●
Bevel lock knob
●
Handle latch
●
Arbor lock
Know the condition of your miter saw. If any part is
missing, bent, or does not operate properly, replace
the component before you continue to use your saw.
Determine the type of work you are going to be doing
before you operate your saw. Properly protect your
body including your eyes, hands, face, and ears.
Avoid injury from jams, slips, or thrown pieces
●
Use the correct 10-inch blade for the material and
type of cut. Do not cut materials which shatter, grab
the blade, or cause other danger.
●
The arrow on the blade must correspond with the
arrow on the upper blade cover. When you are
facing the front of the saw, teeth on the blade
should point downward.
●
Only use a sharp blade that is in good condition.
Check alignment of the blade after it is installed.
Unplug the saw and carefully spin the blade using
your hand. The blade should not contact any
components of the saw. If it does, correct the
problem before operating the saw.
●
Make sure the blade and blade collars are clean
and the blade collar is properly installed.
●
Make sure the arbor bolt is properly installed and
tightened.
●
Ensure all clamps and locks are tight. Verify there is
no excessive play in any parts.
●
Allow the blade to reach full speed before cutting.
Do not cut freehand
●
The workpiece should be tight against the fence.
Verify the workpiece will not rock or twist when it is
being cut. The area between the workpiece and the
saw must be free from debris.
●
Make sure there is no gap between the workpiece,
fence, and base of the saw. A gap could allow the
workpiece to move when it is being cut.
●
Use clamps, fixtures or other devices to hold an
unstable workpiece. Do not secure waste piece.
Do not cut more than one workpiece at a time
●
Allow room so the cut-off workpiece can move after
it is cut. It could create a hazard by becoming
wedged against the blade.
Be very careful when cutting odd shaped,
extremely large, or very small workpieces
●
Plan your work so an odd shaped workpiece cannot
slip or pinch the blade. When cutting material like
molding, it must lie flat or be held by a fixture. Do
not allow the material to rock, twist, or slip.
●
Secure sagging workpieces with saw horses, tables
or other additional supports.
●
Do not cut small workpieces that must be held
closer than 4 inches (102 mm) from the blade.
●
Properly support round material when cutting.
Dowel rods and tubing have a tendency to roll while
being cut. This could allow the blade to “bite” into
the material causing a hazardous condition. Hold
round material in place using clamps or other
fixtures.
SAFETY
4
SAVE THESE SAFETY INSTRUCTIONS