Connecting to WiFi
1. Reboot the terminal by holding the Clear and
Func keys while the terminal is on its base.
As soon as you see the Windcave logo press the
Clear key, please note that this only appears for
about 3 seconds so you will need to be quick.
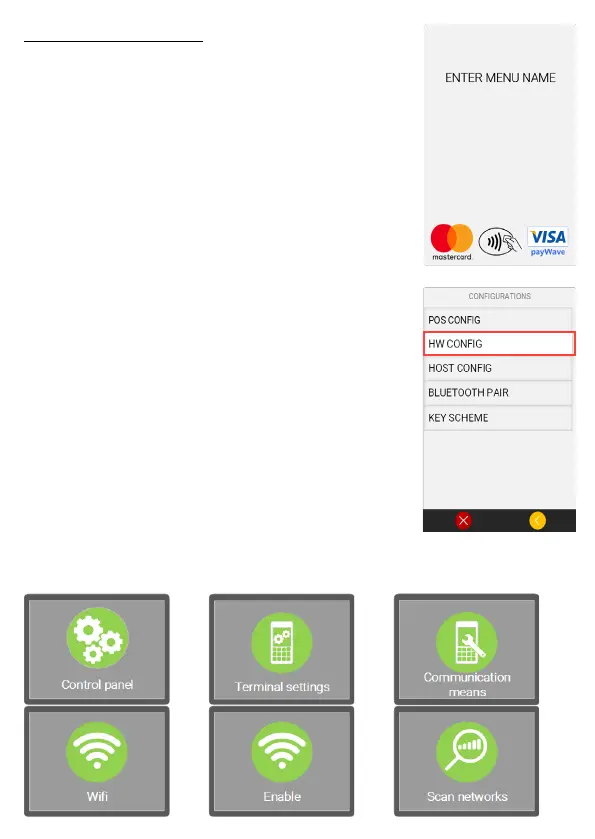
When prompted with Enter Menu Name enter in
the code ‘5210’.
2. From the available menu options select HW
CONFIG, then press the Menu key on the terminal.
3. Select the Control Panel option.
4. Select the Terminal Settings option.
5. Select the Communication Means option.
6. Select the WiFi option.
7. If not enabled select the Enable option, if this
option is not showing proceed to the next step.
8. Select the Scan Networks option, when
prompted select your WiFi network name from
the available networks.
9. When prompted enter your WiFi password then
press Enter.
10. Reboot the terminal by holding Clear and Func.
Your terminal will reboot and attempt to connect
to the WiFi network, a Logon can be performed to
test network connectivity.