Start-up program
Unpacking and setting up
> Unpack coffee machine and set it up on a stable, horizontal surface
You must protect a sensitive installation surface against damage using a waterproof,
heat-resistant, non-slip mat.
Regularly check the coffee machine and keep the installation surface dry.
If liquid leaks regularly, this is a machine malfunction that must be checked immediately.
Always follow the safety instructions in the “Safety” chapter, starting on page 60.
Inspect the coffee machine for possible shipping damage
>
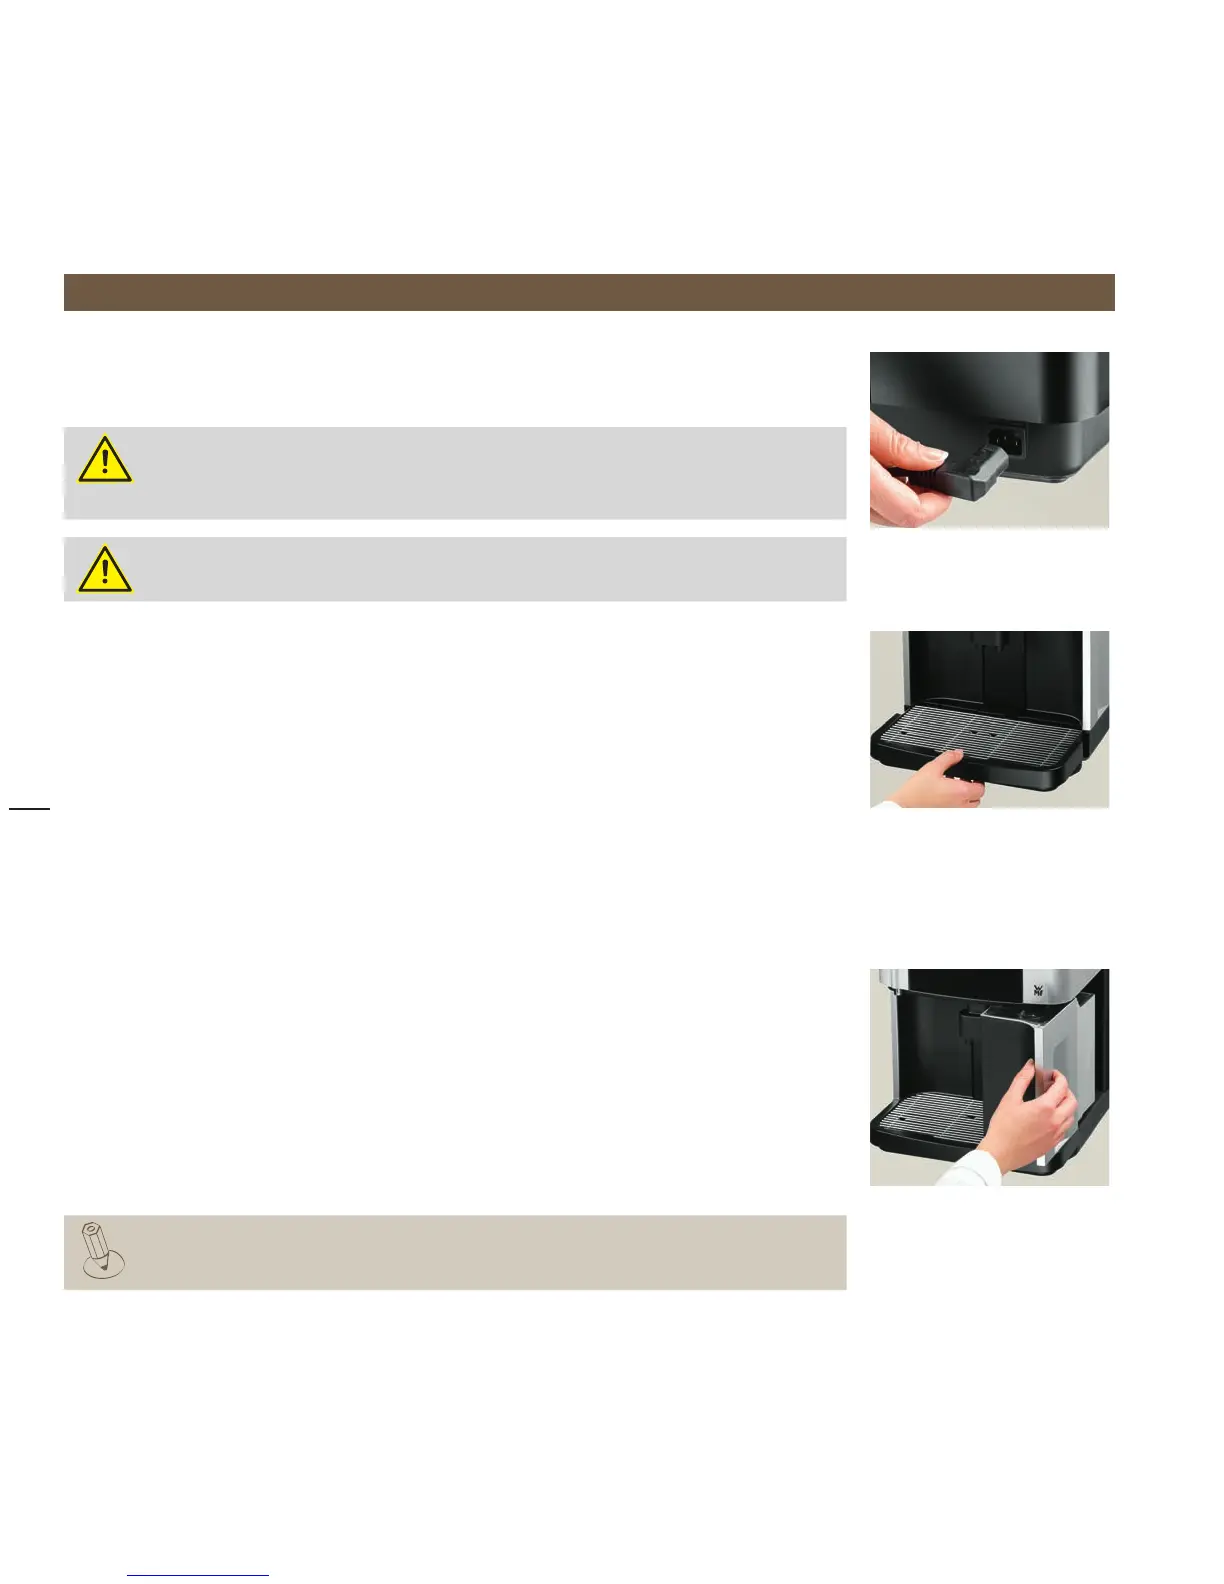
Connect the included power cord to the machine (connection on the rear of the machine) >
>
Plug the cord into a grounded outlet
Place the drip tray grid into the drip pan
>
Place the drip tray in the machine >
Test the water hardness
Briefly dip a carbonate hardness test strip into water (approx. 1 second) >
One minute later, read the degree of hardness on the colour scale of the test strip package >
The water hardness is set during start-up.
Prepare the water tank
> Lift the water tank slightly and remove from the coffee machine
Remove all accessories from the water tank
>
Rinse the water tank thoroughly with clear water >
Insert the WMF water filter
The optional WMF water filter ensures the best coffee quality and protects the coffee machine from
calcium deposits.
For water hardness 0-4, do not use a water filter.
Power cord connection
Drip tray and drip tray grid
Water tank






 To Next Page