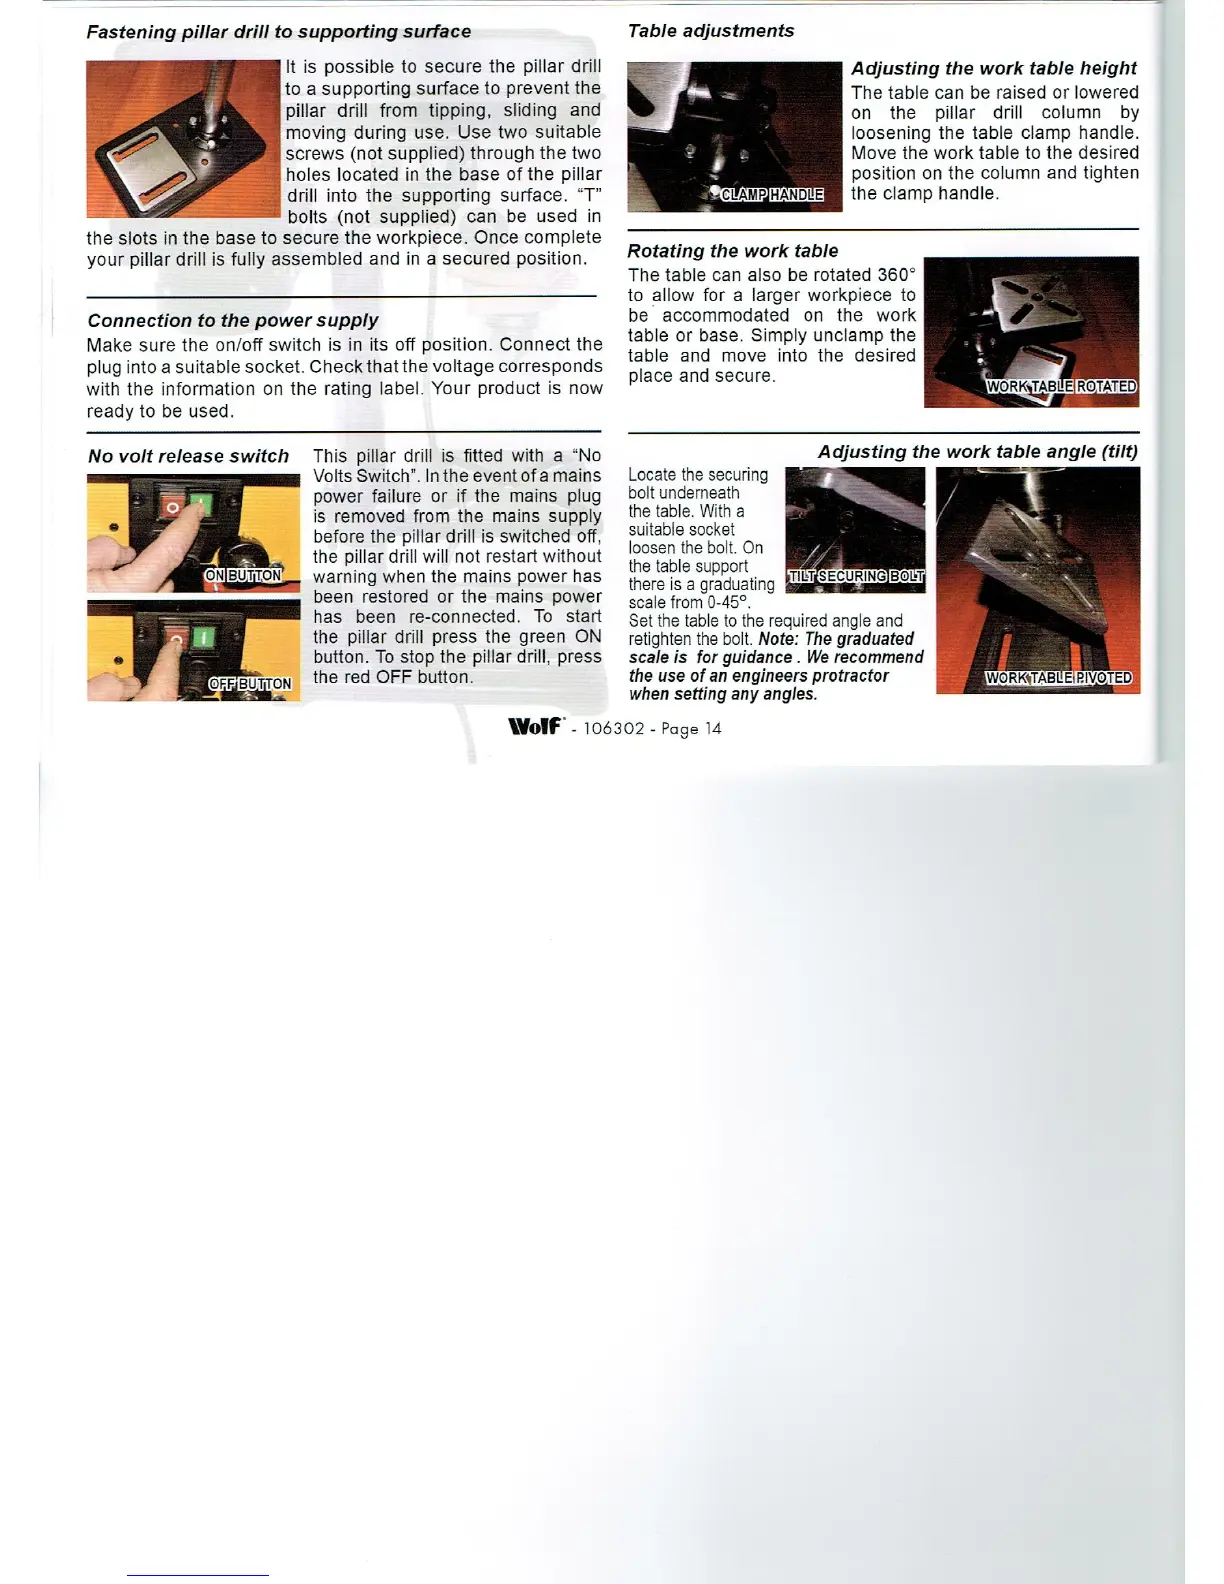
Fastening pillar
drill to
supporting
surface
It is
possible
to secure
the
pillar
drill
to a
supporting
surface to
prevent
the
pillar
drill from
tipping,
sliding
and
moving during
use. Use two
suitable
screws
(not supplied)
through
the two
holes located in the
base of the
pillar
drill into the
supporting
surface. “T"
bolts
(not
supplied)
can be
used in
the slots in the base to
secure the
workpiece.
Once
complete
your pillar
drill is
fully
assembled
and in a
secured
position.
Connection to the
power supply
Make sure the
on/off switch is in its
off
position.
Connect the
plug
into a suitable
socket. Checkthatthe
voltage
corresponds
with the information on
the
rating
label.
Your
product
is now
ready
to be used.
No volt release switch This
pillar
drill is fitted with a “No
Volts Switch". In the event ofa mains
power
failure
or if the mains
plug
is removed from the
mains
supply
before
the
pillar
drill is switched
off.
the
pillar
drill will not restart
without
warning
when the mains
power
has
been restored
or the mains
power
has been re-connected.
To start
the
pillar
drill
press
the
green
ON
button. To
stop
the
pillar
drill,
press
the red OFF button,
Table
adjustments
Adjusting
the work table
height
The table can be raised or
lowered
on the
pillar
drill column
by
loosening
the table
clamp
handle.
Move the work table to the desired
position
on the
column and
tighten
the
clamp
handle.
Rotating
the work table
The table can
also be rotated 360°
to allow for a
larger workpiece
to
be accommodated on the work
table or base.
Simply unclamp
the
table
and move into the desired
place
and secure.
Locate the
securing
bolt underneath
the table. With a
suitable socket
loosen the bolt. On
the table
support
there is a
graduating
.
scale from 0-45°.
Set the table to the
required angle
and
retighten
the bolt. Note: The
graduated
scale is for
guidance.
We recommend
the use of an
engineers protractor
.
WORK‘TABLE
EVOTED
when
setting any angles.
\Volf‘.106302.Pagei4