Gas Range (GR) Series
Gas Range (GR) Series
Installation Information
2-10
#822634 - Revision A - January, 2013
• A CHILD OR ADULT CAN TIP THIS APPLIANCE
AND BE KILLED.
• VERIFY THE ANTI-TIP DEVICE HAS BEEN
PROPERLY INSTALLED AND ENGAGED.
ENSURE THE ANTI-TIP DEVICE IS RE-
ENGAGED WHEN THIS APPLIANCE IS MOVED.
REFER TO THE ILLUSTRATIONS ON THIS AND
THE PREVIOUS PAGE FOR HOW TO VERIFY
CORRECT INSTALLATION.
• TO REDUCE THE RISK OF BURNS, DO NOT
MOVE THIS APPLIANCE WHILE HOT.
• DO NOT OPERATE THIS APPLIANCE WITHOUT
THE ANTI-TIP DEVICE IN PLACE AND
ENGAGED. FAILURE TO DO SO CAN RESULT IN
DEATH OR SERIOUS BURNS TO CHILDREN OR
ADULTS.
Leveling the Range
Raise the unit to the desired height by adjusting the
front legs and rear casters. The front legs can be
adjusted by rotating the hexagonal leg clockwise to
raise and counterclockwise to lower. The rear casters
(wheel assemblies) can be adjusted by rotating them
clockwise to raise and counterclockwise to lower. For
fine adjustments of the rear wheel assembly, a long
sturdy screwdriver or bar can be used when the appli-
ance is in place by inserting the tool between the wheel
brackets and spinning the rear wheel assembly with the
tool as needed.
NOTE: If necessary, perform pre-leveling of the range
before pushing it into its installation, with fine adjust-
ments made after the appliance is installed.
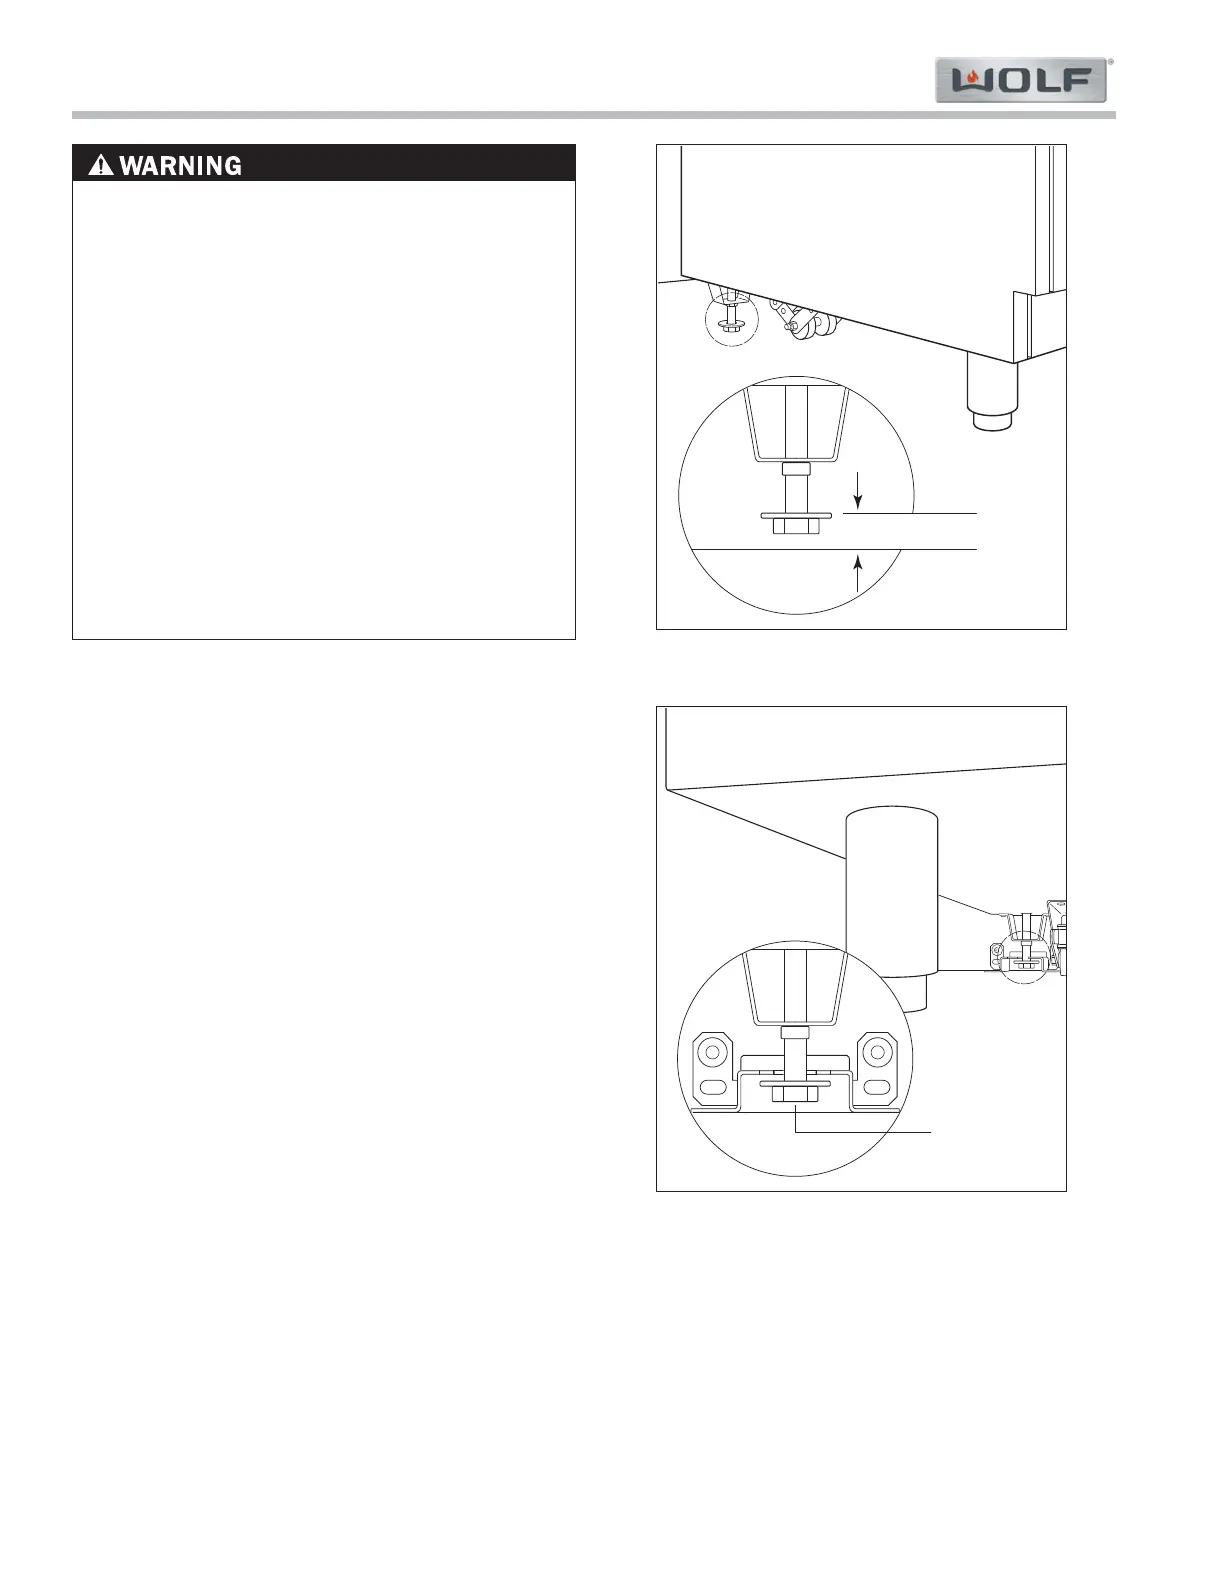
Anti-Tip Bolt Adjustment
Once the anti-tip bracket is secure and the appliance is
installed and leveled, adjust the anti-tip bolt so the top
of the washer is 7/8” (22) maximum from the floor.
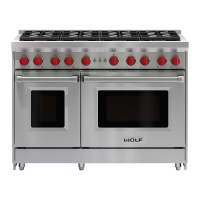
Slide the range into the opening and verify the anti-tip
bolt is engaged. Refer to Figures 2-8 and 2-9.