SERVICING AND SPARES
6 720 815 725 (2015/05)48
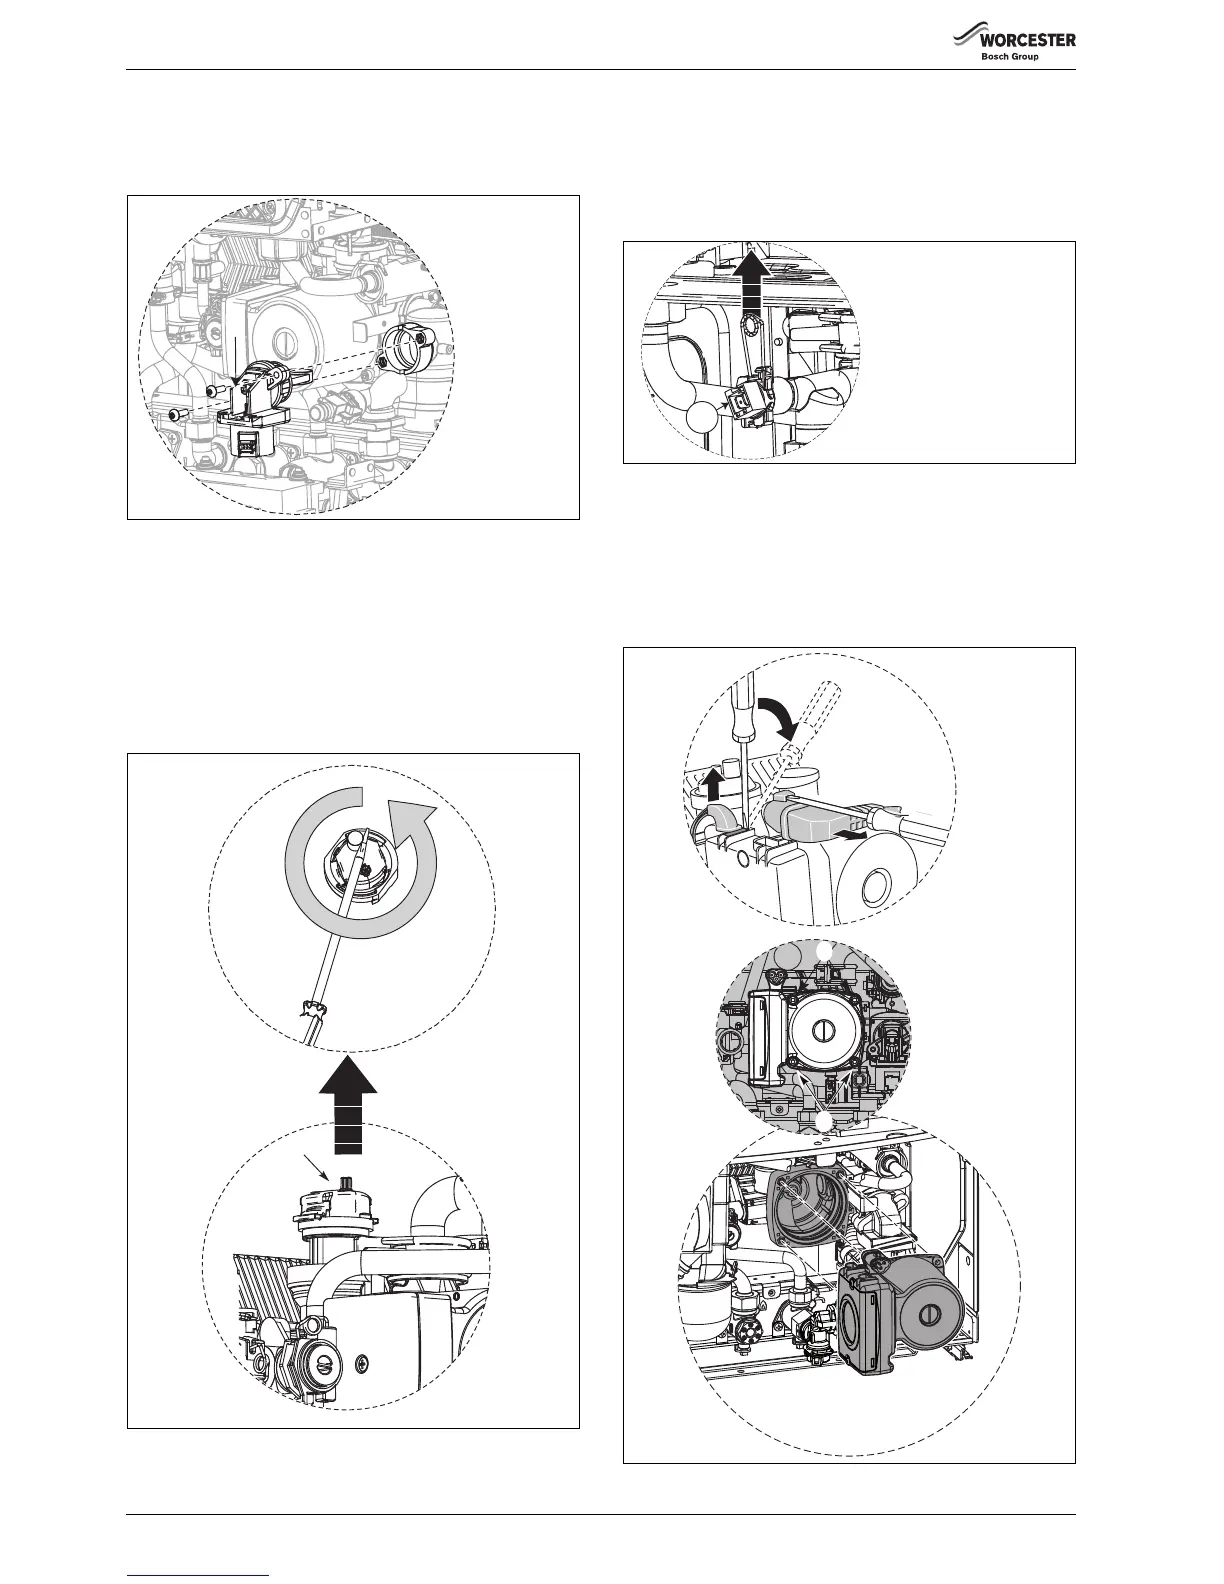
18. DIVERTER VALVE
▶ Ensure the appliance has been fully drained.
▶ Disconnect the electrical connector from the diverter valve motor.
▶ Undo the two screws holding the valve to the plastic housing.
Fig. 91 Diverter valve removal
1. Withdraw the valve (B) and clean the valve chamber if necessary.
▶ To refit, follow the above in reverse.
Ensure any seals that have been disturbed are renewed.
19. AUTO AIR VENT
▶ Ensure the appliance has been fully drained.
1. Use a screwdriver or similar to rotate the air vent anti-clockwise.
2. Lift the air vent (C) out of the housing and remove.
▶ To refit, follow the above in reverse.
Fig. 92 Auto Air Vent removal
20. DHW TEMPERATURE SENSOR
▶ Ensure the domestic hot water circuit is fully drained.
▶ Disconnect the electrical connection from the sensor.
▶ Withdraw the spring clip.
▶ Withdraw the sensor (D) from the housing.
▶ To refit, follow the above in reverse.
Fig. 93 DHW Temperature sensor removal
21. PUMP HEAD
▶ Ensure the appliance has been fully drained.
1. Disconnect the pump connections following steps i to iv.
2. Remove the four Allen bolts (A) securing the pump at each corner.
3. Gently pull the pump towards you and remove.
▶ To refit, follow the above in reverse.
Fig. 94 Pump head removal
1.
B
6720647361-50.1Wo
6720647361-51.1Wo