4 5
AFTER SALES SUPPORT 0800 / 328 6020 info@dariolondon.com
00800 / 4467 5888
GT-DC-02, 02/13, E45316
AFTER SALES SUPPORT 0800 / 328 6020 info@dariolondon.com
00800 / 4467 5888
GT-DC-02, 02/13, E45316
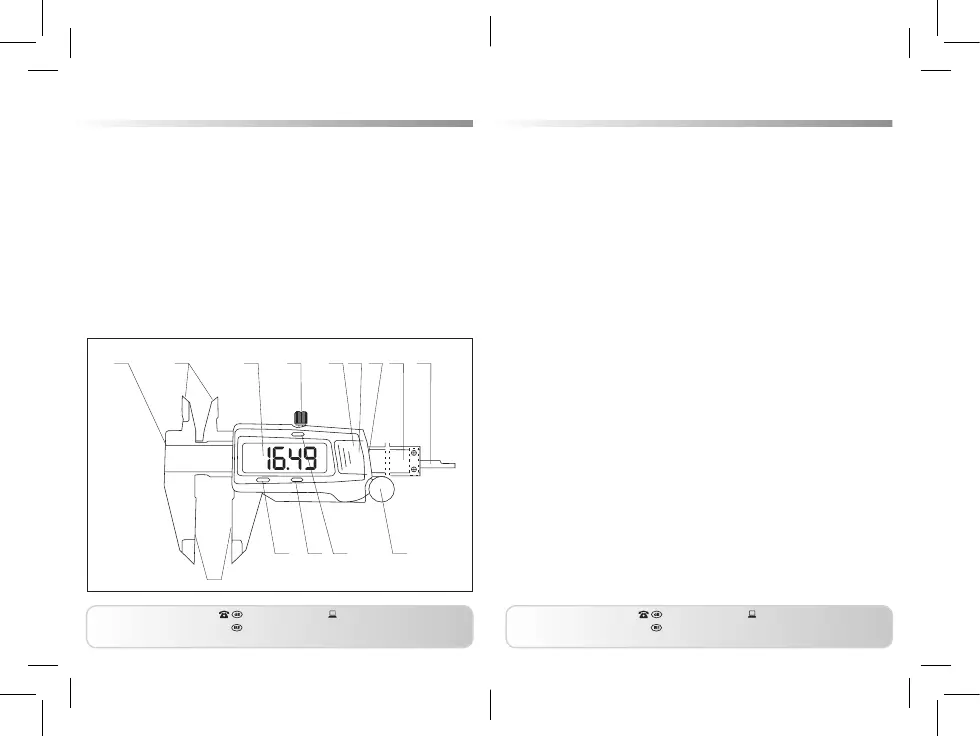
Assembly diagram
1. Staged measuring surface 9. Depth bar
2. Inner measuring surface 10. Outer measuring surface
3. LCD display 11. Power on and off
4. Safety screw switch (ON/OFF)
5. Button cell (1.5 V) 12. Zero gauge (ZERO)
6. Battery lid 13. Switch for metric / inches
7. Slider (mm/inch)
8. Protective cover 14. Fine-tuning wheel
OFF
ZERO
mm/inch
ON
mm
12 3 4 56 7 8 9
10
11 12 13 14
Safety instructions
• Injury hazard: The measuring edges are sharp and pointed!
Therefore, only hold the measuring device on the handles.
• Do not let children play with the measuring device. They can
injure themselves on the sharp measuring edges or swallow the
battery/battery compartment lid.
• Measure very carefully on sensitive surfaces, in order to avoid
leaving scratch marks.
• Do not connect any voltage to any part of the digital caliper
gauge (e.g. for engraving with an electric pen), as the switch
could otherwise be damaged.
• The digital caliper gauge is designed for private household use.
It is unsuitable for use in workshops, jewellery shops, etc.