SYNCING THE DRONE TO THE TRANSMITTER
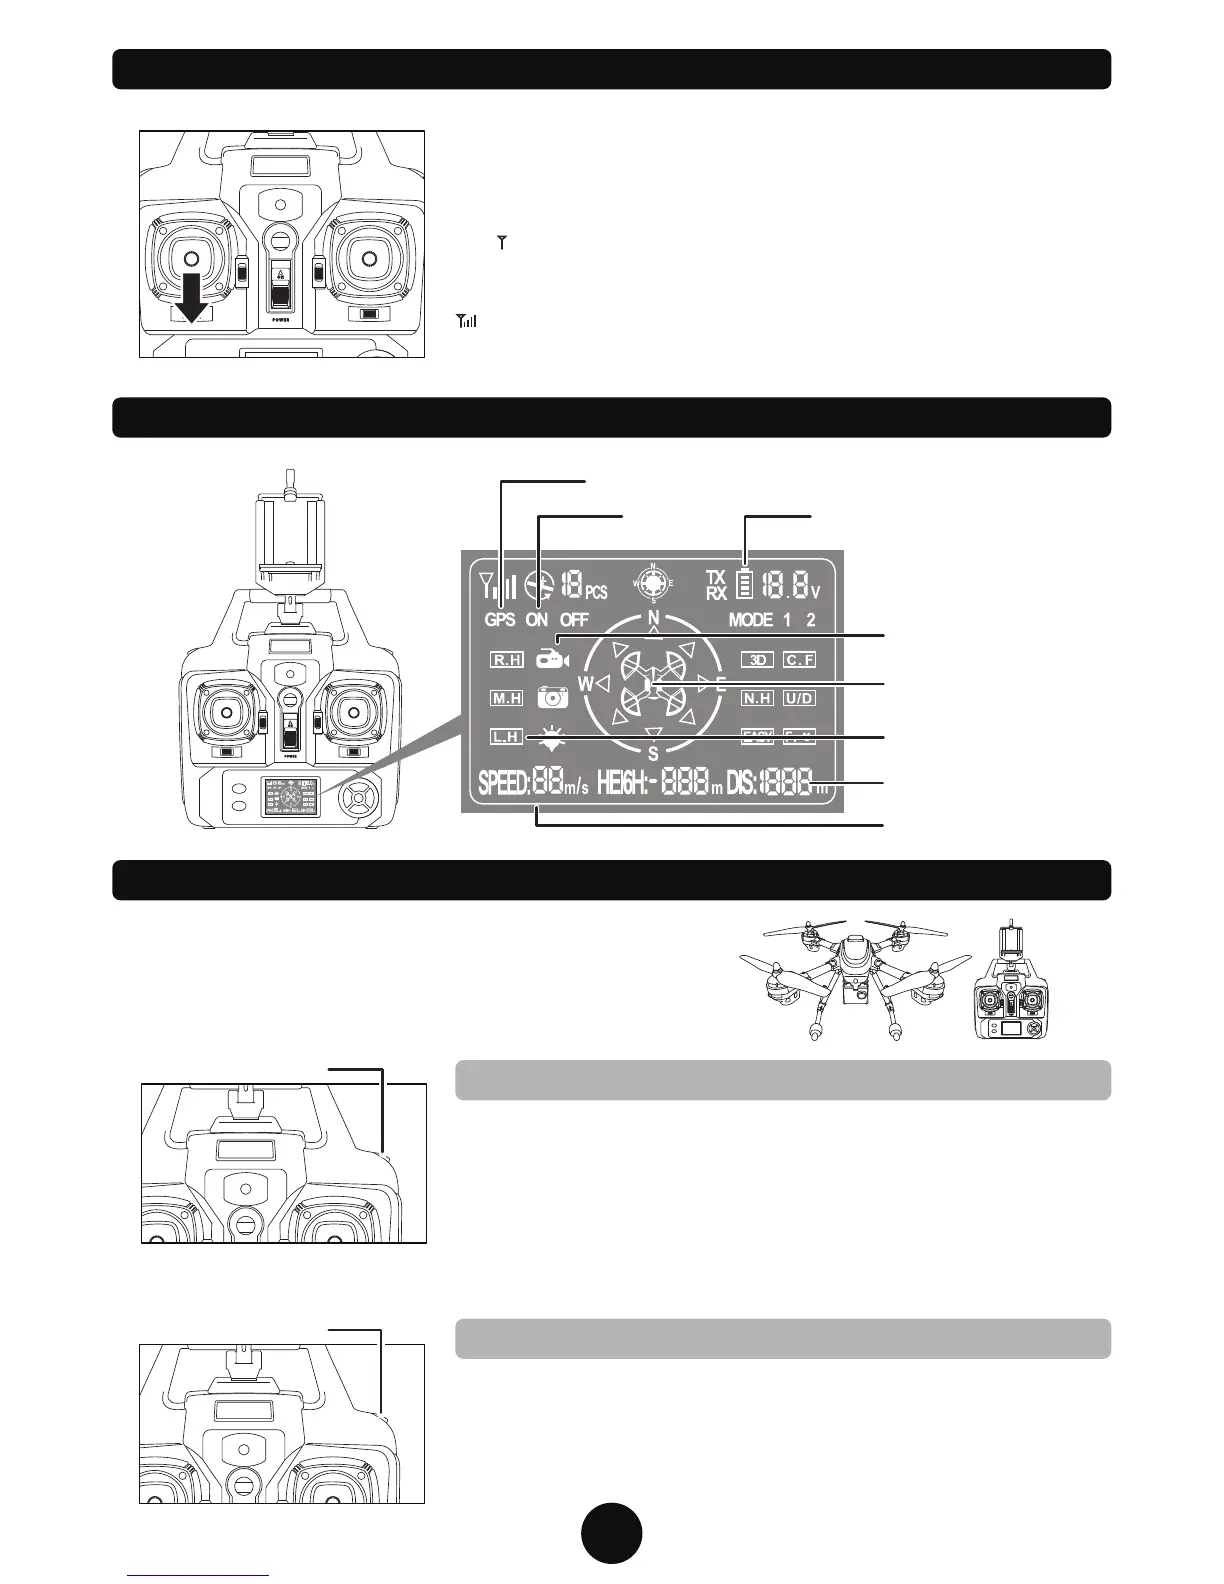
TRANSMITTER LCD INTERFACE
Switch ON the drone and place it on a flat surface. The drone’s LED lights
will start flashing. Switch ON the transmitter and position the
Ascend/Descend joystick (left joystick) straight down. The transmitter will
emit 2 short beeps and the drone’s LED lights will stop flashing. The signal
icon “ ” will appear on the top left of the LCD screen indicating there is no
signal. The power indicator will flash for approximately 5 seconds. After the
transmitter successfully pairs with the drone, the signal icon will change to
“ ”. The transmitter has successfully paired with the drone and control
information will now appear on the LCD screen.
Battery Level
Forward/Backward
Trim Display
GPS Display
Speedometer
Camera Indicator
7
FLIGHT CONTROLS - AUTOPILOT: TAKE OFF/LANDING
AUTOMATIC TAKE OFF
AUTOMATIC LANDING
AUTO PILOT
Once you’ve gone through the flight preparation, press the
AUTO PILOT button once and the drone’s rotors will start to
spin. You can now slowly press up on the Ascend/Descend
stick (left joystick) and the drone will take off.
When you are ready to land, press the AUTO PILOT button
and the drone will slowly descend and land from an elevation
of approximately 2 meters. Pressing again will cancel the
operation.
YOU MUST PRESS THE A KEY OFF BUTTON TO START
THE ROTORS SPINNING. YOU WILL NOT BE ABLE TO
TAKE OFF UNTIL YOU PRESS THIS BUTTON.
Before flying the drone for the first time please read the
instructions carefully and make sure you fully understand
how to control your drone.
Signal Icon
Height/Distance Display
AUTO PILOT
Speed Mode (Low/High)