Memory Card Installation: The gold contact points on the memory card should be facing you. Insert the
memory card into the slot, lightly press until the memory card clicks into place.
Removing Memory Card: Press the memory card to eject the card. If the drone is on you will see a
steady BLUE LED LIGHT and a BLINKING RED LED LIGHT unless the memory card is properly
inserted.
INSTALLING THE MEMORY CARD
CAMERA INDICATOR LIGHT
RECORDING VIDEO: Make sure both the remote and
drone are on and you’ve gone through the syncing
process first. Press the Record Video button to start
recording video, you should hear a single beep from the
remote. Press the button again to stop recording, you will
hear another single beep from the remote. The video will
be saved to the installed memory card. Video is recorded
at 720p 30fps in .avi format.
TAKING PHOTOS: Make sure both the remote and
drone are on and you’ve gone through the syncing
process first. Press the Photo button to take a single
image. The remote will beep once and the RED LED on
the camera will flash once to indicate a picture has been
taken. The photos will be saved to the installed memory
card. Photos taken are 1.92 megapixels (1600 x 1200
resolution) and saved in .jpeg format.
NOTE: Pictures cannot be taken while camera
Recording Video.
• BLUE: Camera Standby Status • BLUE + RED: Recording Video
• BLUE + RED FLASHES ONCE: Taking Photo
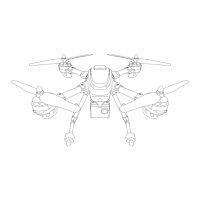
The Camera indicator light is located underneath
the drone’s camera. The illustration to the right
points out where it is located.
CAMERA INDICATOR LIGHT
PHOTO
BUTTON
RECORD VIDEO
BUTTON