10
EN
2.3 NOW ROLL YOUR SLEEVES UP. WHEN IT’S DONE IT’S DONE!
Now that you have planned the installation in every detail, you are ready to take action. Before starting, you may want to use your old mower
for the last time to clean up your lawn and make the installation easier.
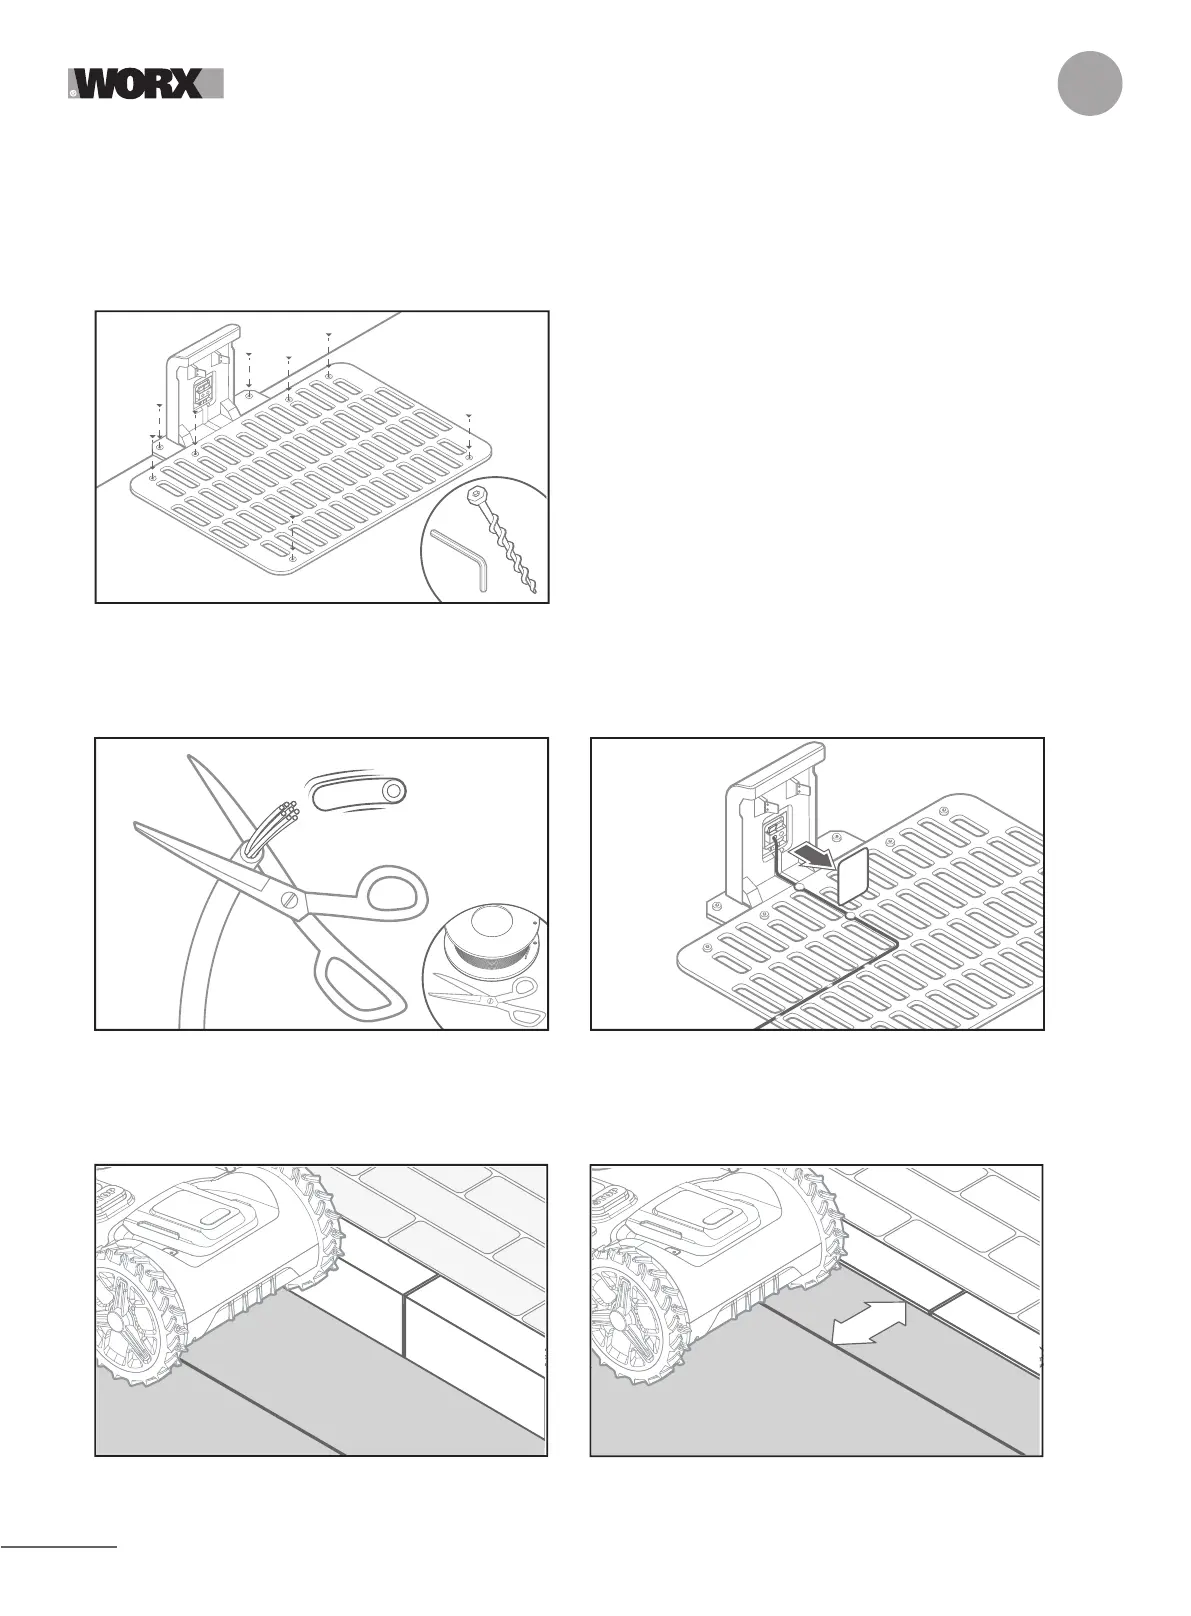
2.3.1 Fix the charging station in the selected location
A, Secure the base to the ground by means of the supplied screws, using the supplied Allen key (fig.1)
B. If you position the base on hard surface, fix it with plug and screw fixings (not supplied)
2.3.2 Connect one end of the boundary wire to the charging station
A. Strip the end of the wire with a pair of scissors (fig. 2)
B. Open the plastic door and insert the stripped end into the red left clamp (fig. 3)
C. Pass the wire through the guide of the base, as shown in fig. 3
2.3.3 Lay the boundary wire around your lawn
A. Use the supplied gauge to set the distance wire to edge
B. If there is a step at the edge of your lawn, keep the wire at 26cm from it (fig. 4)
C. If there is no step, keep the wire at 10cm from the edge (fig. 5)
1
OUT
3
2
26cm
4
5
5
4

 Loading...