Quick reference
EN
27
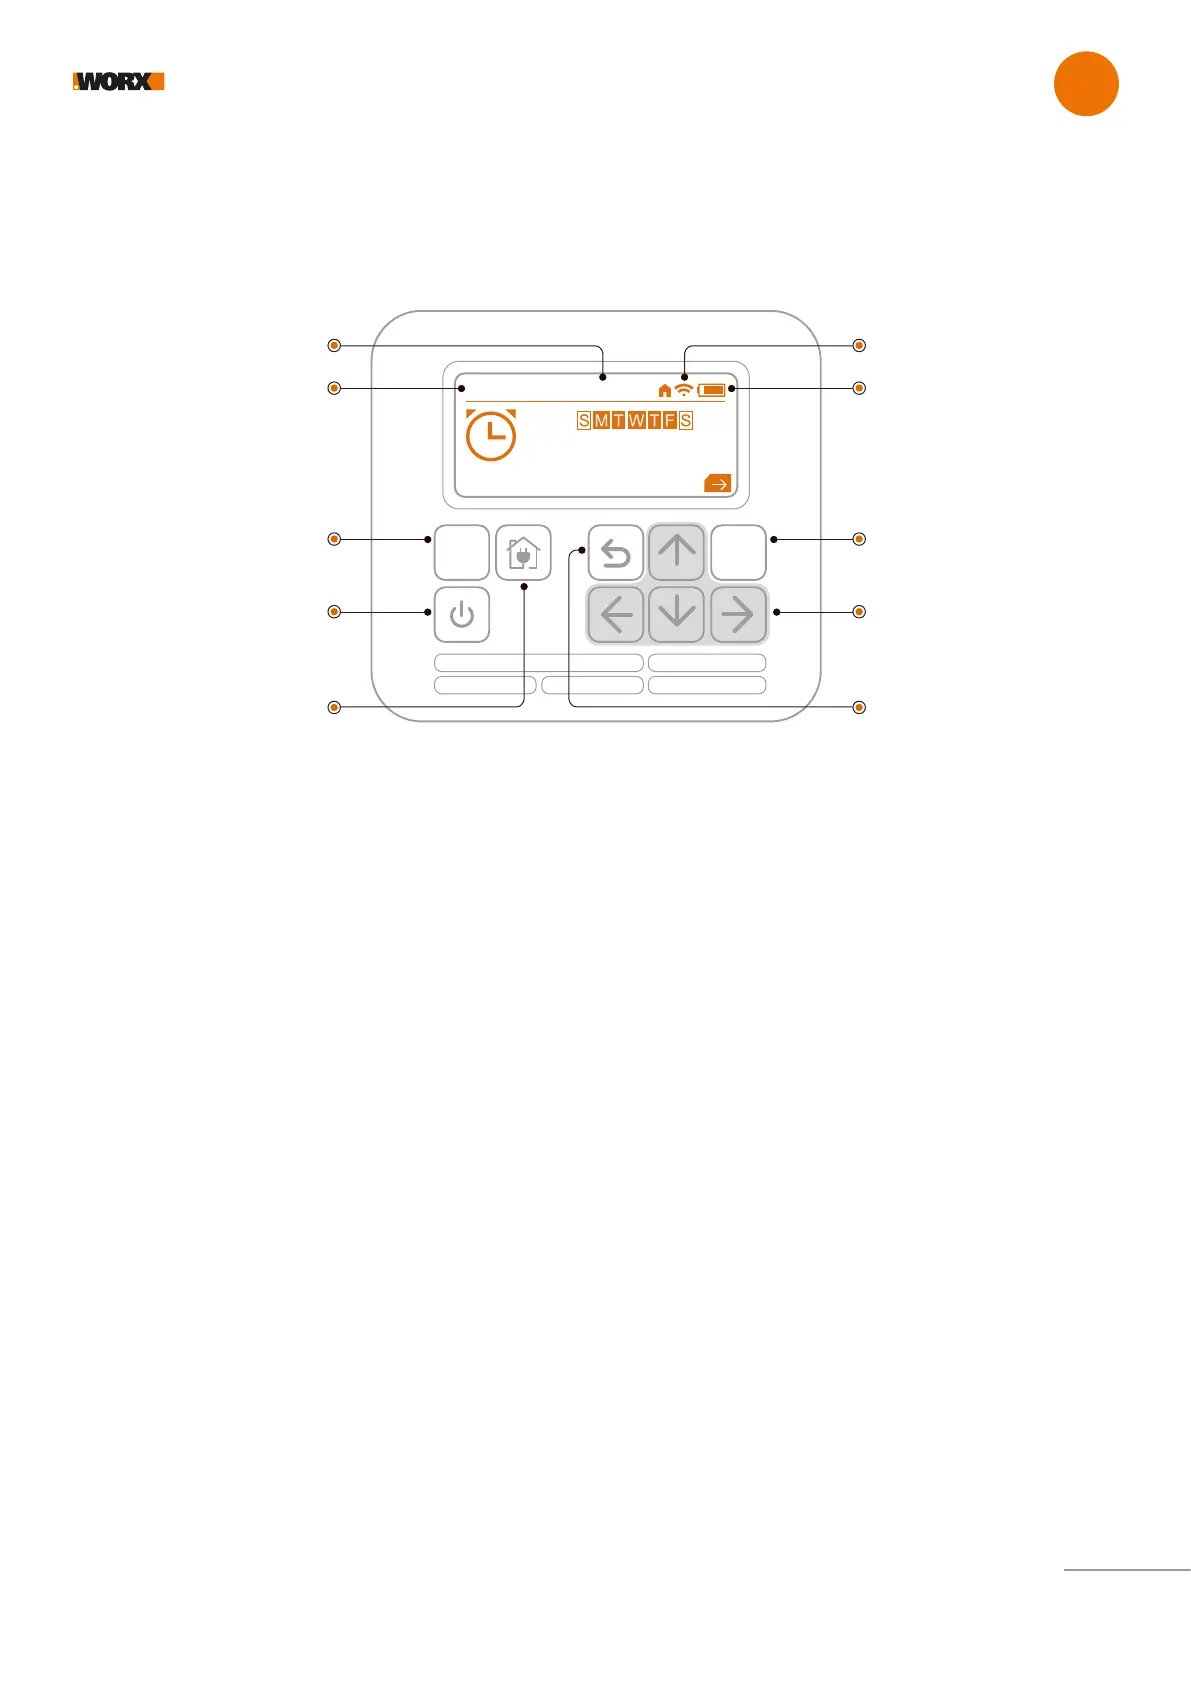
LANDROID CONTROL PANEL
Advanced functions via the built-in interface
Despite its minimalistic design, you can set several advanced functions through the built-in control panel.
However, for the best user experience we recommend you use the free Landroid app to do this, given its much richer and intuitive interface.
START
OK
A
BC D
Mon 11/07 00:00
Work done today
Charging 50%
NAVIGATE:
move up/down and back/forth
through menus. Input PIN
POWER
On/Off
OK: confirm
selected choice
START: start mowing/
reset problems
Battery charge statusDay and date
Wi-Fi signal strengthTime
RETURN: back one step
to former menu
HOME: send Landroid
to charging station
Choose your time format of preference — 24h or 12h (AM/PM)
• Turn on Landroid and insert PIN
• Press the → (D) key; screen displays the menu
• Select the gear icon with the navigation keys, confirm with OK button
• Scroll down to ‘Time format’ using the ↑(A) and ↓(B) keys. Press OK to confirm
• Select your option between ‘24 hour’ and ‘12 hour’ using the ↑(A) and ↓(B) keys
• Press OK to confirm your option
Choose your Date format of preference
• Turn on Landroid and insert PIN
• Press the → (D) key; screen displays the menu
• Select the gear icon with the navigation keys, confirm with OK button
• Scroll down to ‘Date format’ using the ↑(A) and ↓(B) keys. Press OK to confirm
• Choose among the three options YYYY/MM/DD, DD/MM/YYYY and MM/DD/YYYY using the ↑(A) and ↓(B) keys
• Press OK to confirm your option
Date and Time setting
• Turn on Landroid and insert PIN
• Press the → (D) key; screen displays the menu
• Select the gear icon with the navigation keys, confirm with OK button
• Scroll down to ‘Set date & time’ using the ↑(A) and ↓(B) keys. Press OK to confirm
• Date is highlighted
• By pressing OK, the first digit highlights
• Use the ↑(A) and ↓(B) keys to change the highlighted digit
• Use the ←(C) and →(D) arrows to select other digits of the date
• Use the ↑(A) and ↓(B) keys to input a new value
• Press OK to confirm the date
• Move down to time with the ↓(B) key. Time gets highlighted. Press OK to select
• Change the time with the same procedure as for the date. Press OK to confirm
• Time and date have now been set














 To Next Page