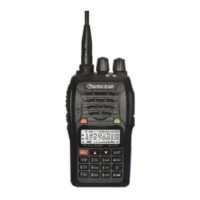
Wouxun
KG-UV1D/UV2D/UV3D
Basic Operations
•
Radio has two VFO’s but can only receive one at a time. Press [A/B] to select between the upper and
lower VFO. The icon shows which VFO will transmit and accept changes.
•
Pressing the [TDR] button will switch between single VFO and dual VFO operation. Pressing [TDR] while
transmitting will toggle between high power (5W) and low power (1W) operation.
•
Pressing [MENU] accesses the setup menus.
•
Pressing [ ] for 1 second locks and unlocks the keypad.
•
Pressing [MENU] [TDR] toggles between VFO and Memory Channel Operations.
• Pressing [PF2] (Left side, second switch below PTT) toggles the flashlight LED on and off. Pressing [PF2]
for 2 seconds overrides the tone and level squelch to monitor frequency.
Miscellaneous Operations
Accessing the Menu (If the menu times out, press [MENU] again to re-enter)
1. Press [MENU]
[KNOB] to select a menu, or enter the menu number (2 digits).
Instead of the
[KNOB] you can also use the [
] & [
] keys to navigate the menus.
2. Press [MENU]
[KNOB] to alter the setting.
Instead of the
[KNOB] you can also use the [
] & [
] keys to navigate the menu settings.
3. Press [MENU] [EXIT] to save the setting.
Squelch Level Adjustment
1. Press [MENU] [SQL/2] to go to the Squelch Level Menu.
2. Adjust level as desired, press [MENU] to save the setting.
Turning On (or Off) the Operation Voice Prompts
1.
Access Menu 09 VOICE and select ENGLSH to enable English Voice Prompts for radio operations. (Select OFF to turn off voice prompts).
The voice prompt uses phrases that can be confusing. VFO is called “Frequency Mode”, Memory is call “Channel Mode”, and selecting [MENU] responds with “Function
Select”
Selecting the Power On Display
1. Access Menu 12 PONMSG and select BATT-V or with later model programming software you can program your call sign.
Programming the Radio
Follow the appropriate steps below to enter a VFO frequency and program a Memory Channel.
STEP 1 – Set the VFO Frequency and Power Level
1. Press [A/B] to select either VFO A or B.
2. If necessary press [MENU] [TDR] to select VFO mode. (Voice Prompt “Frequency Mode”).
3. Press 6 digit [KEY]s to enter the Rx frequency (entered in kHz).
4. Press [MENU] [TXP/4] to select the power level menu.
5. Press [MENU]
[KNOB] (or [
] & [
]) to set Hi / Low Power.
6. Press [MENU] [EXIT] to save the power level setting.
For memory programming, leave in VFO Mode until STEP 6.
STEP 2 – Set Simplex or Repeater Offset Direction
1. Check the offset direction +/- at the top of the screen and if necessary access Menu 24 SFT-D to change the direction.
To set the direction for a repeater select + or – as appropriate. For an odd-split offset or for simplex select OFF.
STEP 3 – Verify or Set Repeater Offset Frequency
If setting or programming a Simplex Frequency, skip this step and go to STEP 4.
1. Access Menu 23 OFFSET to check and if necessary change the offset frequency. Offset is entered by typing 5 digits.
2-meter standard offset is 0.600 MHz (Enter 00600). 7-cm standard offset is 5.000MHz (Enter 05000).
STEP 4 – Repeater Access Mode & CTCSS Tone (or DCS)
If CTCSS and DCS are not required, make sure to set all transmit (Tx) and receive (Rx) tones to OFF.
1. Access Menu 16 T-CTC to select the Tx tone frequency, or set to OFF to inhibit transmitting a tone.
2. To enable tone squelch on Rx, access Menu 15 R-CTC to select the Rx tone, or set to OFF to inhibit receiver tone squelch.
If DCS is required for Rx or Tx, set Menu 17 R-DCS & Menu 18 T-DCS, otherwise verify both Menu 17 R-DCS & Menu 18 T-DCS are set to OFF.