3.2.2 Communication With BEAR
0) Open a VISA port Use VISA Configure Serial Port followed by VISA Set I/O Buffer Size and
VISA Flush I/O Buffer to properly establish communication with your BEAR via USB.
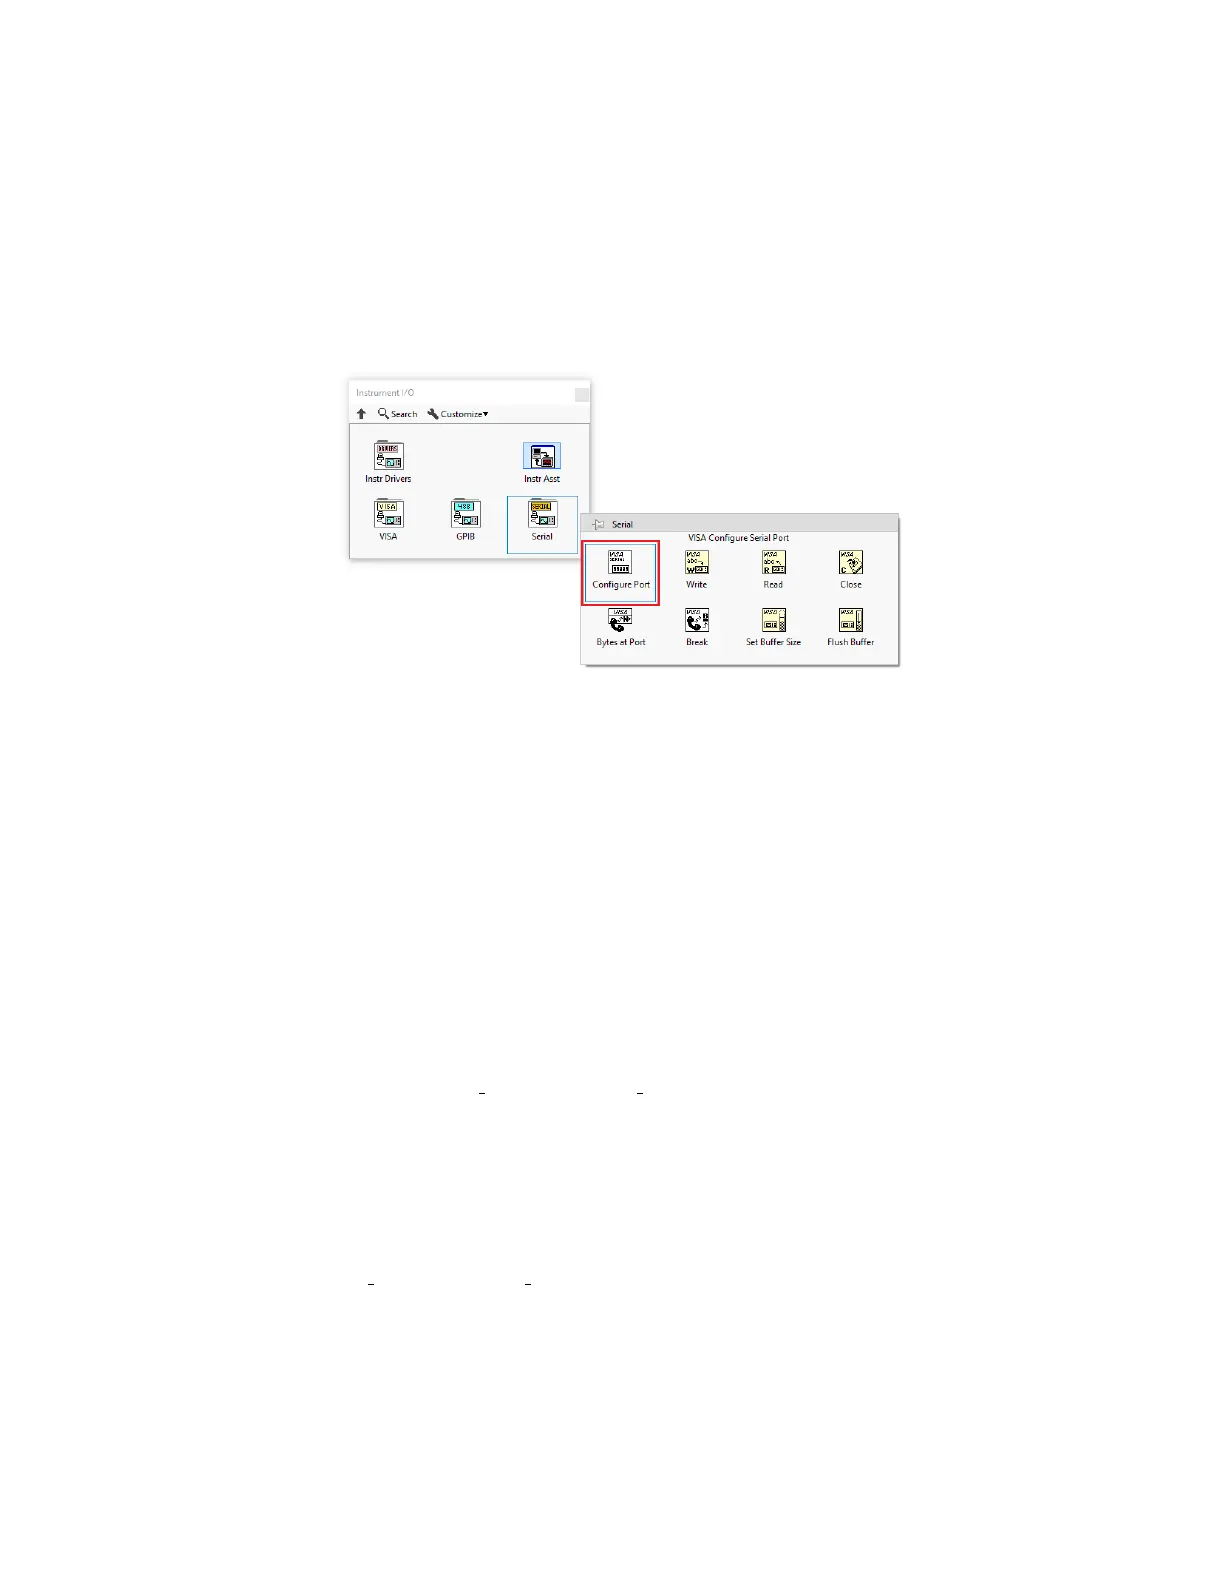
Find VISA Configure Serial Port subVI under: Instrument I/O → Serial as shown in figure
10.
Figure 10: VISA Configure Serial Port
Then Find VISA Set I/O Buffer Size and VISA Flush I/O Buffer under: Instrument I/O → VISA
→ Advanced → Bus Specific as shown in figure 11.
Connect the above subVIs as shown in figure 12, connect controls for VISA resource name
and baud rate on VISA Configure Serial Port and specify 200ms for timeout and FALSE for
termination char. Pass on the VISA resource name and error to VISA Set I/O Buffer Size and
specify an I/O Receive Buffer of 10000 bytes. Finally pass on the VISA resource name and
error to VISA Flush I/O Buffer, and VISA resource name and error lines are ready for use.
Note that if the com port name and baud rate is predetermined, you can use constants
instead of controls for them. Otherwise, specify the corresponding port name and baud rate
in the front panel as shown in the example in figure 12.
1) Read from BEAR The value of configure and status registers of BEAR can be read by
respectively using the Read Config and Read Stat subVIs, as shown in figure 13.
To use the read subVIs, connect VISA resource and Error lines to corresponding terminals,
then specify the ID of the target BEAR as well as the address of the target registers to read
from. This can be done by creating controls from the corresponding terminals. Multiple
registers can be read at once as shown in figure 13. Both subVIs return the requested data
as well as error code from the target BEAR.
2) Write to BEAR You can write to supported configure and status registers by respectively
using the Write Config and Write Stat subVIs, as shown in figure 14.
31