A radio capable of AM/FM Modes of operation between 29.7 to 960 MHz e.g. another C-5000
system with similar radio(s) connected; AM and FM handheld radios, AM and FM base stations,
etc.
Aircraft headset with microphone
Available aircraft power
Antennas connected to proper radio RF ports
C-5000 Pilot’s Guide and Operation and Programming Manual on hand for reference
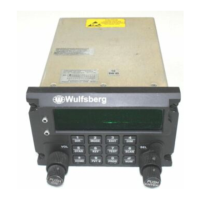
C-5000 Operator’s Manual, P/N 150-041102
C-5000 Pilot’s Guide P/N 150-041103
Laptop loaded with latest version of RpWin software P/N 404-041382-01xx (optional)
C-5000 PC Cloning Cable Only P/N 124-015911-02 (optional)
Ensure all system connectors are securely connected
C. Checkout Procedure
(1) Check the condition and mounting of the equipment including C-5000 mating connectors and
mounting hardware, the RT-5000 mounting rack, hardware, and connections, and antenna
condition, mounting hardware, weather seal, and cable connections.
(2) Apply power to the system. If the C-5000 does not turn on automatically, push the "ON" button.
The C-5000 display will show various initialization screens and after 1-2 minutes will display the
main page.
(4) Verify keyboard and backlit dimming functions work properly if the installation is set up with
backlight control. This is especially important for night vision ops.
(5) At this point the C-5000 must have its configuration settings programmed or verified. Using either
the Cobham RpWin software, or the front panel knobs and buttons, verify/program the required
system configuration data.
(7) Program the desired preset channels into the C-5000 using either the Cobham RpWin software or
using the front panel knobs and buttons.
Program a set of typical channels/frequencies utilized using presets, or manually across the
radio spectrum of use/capability.
(a) Set C-5000 for the first test channel.
(b) Press the "Test" Button and verify the receive indicator is visible and noise audio is heard in
the headsets. Adjust RT #1 volume control (the small inner knob on the left side) so that the
noise can be heard.
(c) If a single channel guard receiver or synthesized guard receiver is present (-0201, -0301, -
0401, -0501), select the guard receiver and press the "TEST" button. Verify the receive
indicator is visible and audio is heard. Program the Guard receiver to operate on the
frequencies (1 and/or 2) that are the channels you normally guard. Use these frequencies for
Guard test frequencies.
(d) Perform steps a-c for RT #2, if present.
3. Transmitter Tests
 Loading...