Do you have a question about the WYBOT A1 and is the answer not in the manual?
Insert the flipper into the cleaner with its notch aligned with the groove on the right side cylinder.
Uncover the rubber cap of the charging port and ensure it is dry.
Insert the charger cable and keep the device at least 3m away from the pool.
Fully charge your device before first use.
Turn on the device; a beep and solid blue LED lights indicate activation.
Press the power button to choose a suitable cleaning cycle from available options.
Submerge the device into the pool gently.
Wait for 15 seconds for auto-calibration; LED turns flashing blue to start cleaning.
The device auto-parks by the wall upon cleaning completion. Leave robot in pool for custom cycles.
Insert the included hook into a pool pole and use it to hook the device out of the pool.
Clean the filter after use; insufficient cleaning may affect pool cleaning effect.
Store in a ventilated place away from direct sunlight. Charge every 3 months for off-season.
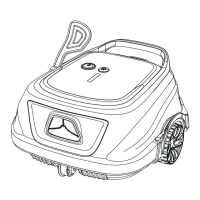
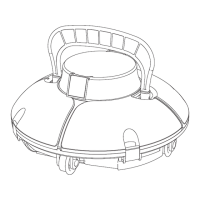
The WYBOT A1 (OS2010) is an autonomous robotic pool cleaner designed to simplify pool maintenance by automatically cleaning the pool floor. This device offers a user-friendly experience from assembly and charging to operation and maintenance, ensuring a clean pool with minimal effort.
The primary function of the WYBOT A1 is to clean the floor of a swimming pool. It operates autonomously once submerged and a cleaning cycle is selected. The robot is equipped with a filtration system that captures debris and particles from the water, contributing to overall pool hygiene. Its intelligent design allows it to navigate the pool, ensuring comprehensive coverage of the cleaning area. The device is powered by a rechargeable battery, making it cordless and easy to deploy without the need for external power connections during operation.
The initial setup of the WYBOT A1 is straightforward. Users begin by inserting the included flipper into the cleaner. The flipper has a notch that needs to be aligned with a groove on the right-side cylinder of the cleaner, ensuring it is correctly seated. Once the flipper is in place, the device is considered fully assembled and ready for charging.
Before its first use, and periodically thereafter, the WYBOT A1 must be fully charged. The charging process involves several steps:
Once the WYBOT A1 is fully charged, users can customize the cleaning cycle to suit their pool's needs.
After selecting a cleaning cycle, the robot is ready to be placed in the pool.
When the cleaning cycle is complete, the WYBOT A1 will automatically park itself by the wall of the pool, making it easy to retrieve.
Regular cleaning of the filter is crucial for maintaining the WYBOT A1's performance and ensuring effective pool cleaning.
Proper storage of the WYBOT A1 helps prolong its lifespan and maintain its condition.
To maintain optimal battery performance, especially during periods when the pool cleaner is not in regular use (off-season):
| Type | Robotic Pool Cleaner |
|---|---|
| Climbing Ability | Yes |
| Smart Navigation | Yes |
| Remote Control | No |
| App Control | Yes |
| Pool Type | In-ground and above-ground |
| Power Supply | 100-240V |
| Cleaning Time | 2.5 hours per charge |