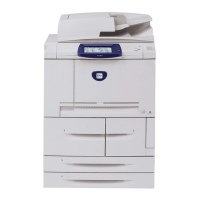
XEROX 4595 Copier/Printer Basic Navigation
Quick Reference for Users
701P46245, Version 1.0, April 2007
4
Scan
Scan, save, and/or send/email documents over the
network to specified destinations.
The scan modes are: Email, Scan to Mailbox,
Network Scanning, and Scan to FTP/SMB.
Tip: Do not confuse the Scan modes with the
Copy & Save or Save Only features which only
scan and save documents to the machine’s local
disk.
E-mail a Document
1. Press All Services > E-mail.
2. Select a recipient from the Address Book or
enter one using the keyboard.
3. Select From to specify who is sending the e-
mail. Select Save.
4. Select Subject to enter the subject of the e-
mail. Select Save.
5. Select Message Content to add a message to
accompany the document.
6. Select the file format (TIFF or PDF).
7. 7.Load the documents and press Start. Once
the document is scanned, it will be sent to the
recipients selected.
More? In the User Guide, check the Scan
chapter for E-mail.
Reprint a Saved Document
To print a saved document:
1. Press All Services.
2. Select Check Mailbox > Copy & Print Jobs.
3. Select the mailbox where the document
resides and select Document List.
4. Select the document to reprint and select
Change Settings/Print.
5. Check the settings and may any necessary
changes.
6. Select Print.
More? In the User Guide, check the Mailbox
Management chapter for Printing Copy and Print
Job Documents.
Z-fold/Bi Fold/Tri-fold
To fold documents:
1. Select the method to use (Copy Only, Copy &
Save, Save Only).
2. Select the Output Format tab and then Fold-
ing.
3. Select the type of fold and if the print will be on
the inside or outside.
4. Select Save and proceed with the job setup.
More? In the User Guide, check the Copy
chapter or the Mailbox Management chapter for
Folding.
Copying on Tab Stock
To copy on tab stock:
1. Select the method to use (Copy Only, Copy &
Save, Save Only).
2. Select the Output Format tab and then Tab
Margin Shift.
3. Select Shift to tab to copy only the tab area of
the original or Shift All to copy the entire origi-
nal to the tab stock and select Save.
4. The Output Format tab reappears. Select Out-
put Orientation, Face Down and then Save.
5. Load the original as shown on the User Inter-
face, select the tray where the tab stock is
located and select Save.
6. Ensure the tab stock is loaded and the media
settings are correct. Press Start to print.
More? In the User Guide, check the Copy
chapter for Tab Margin Shift.

 Loading...


