78 A Appendix
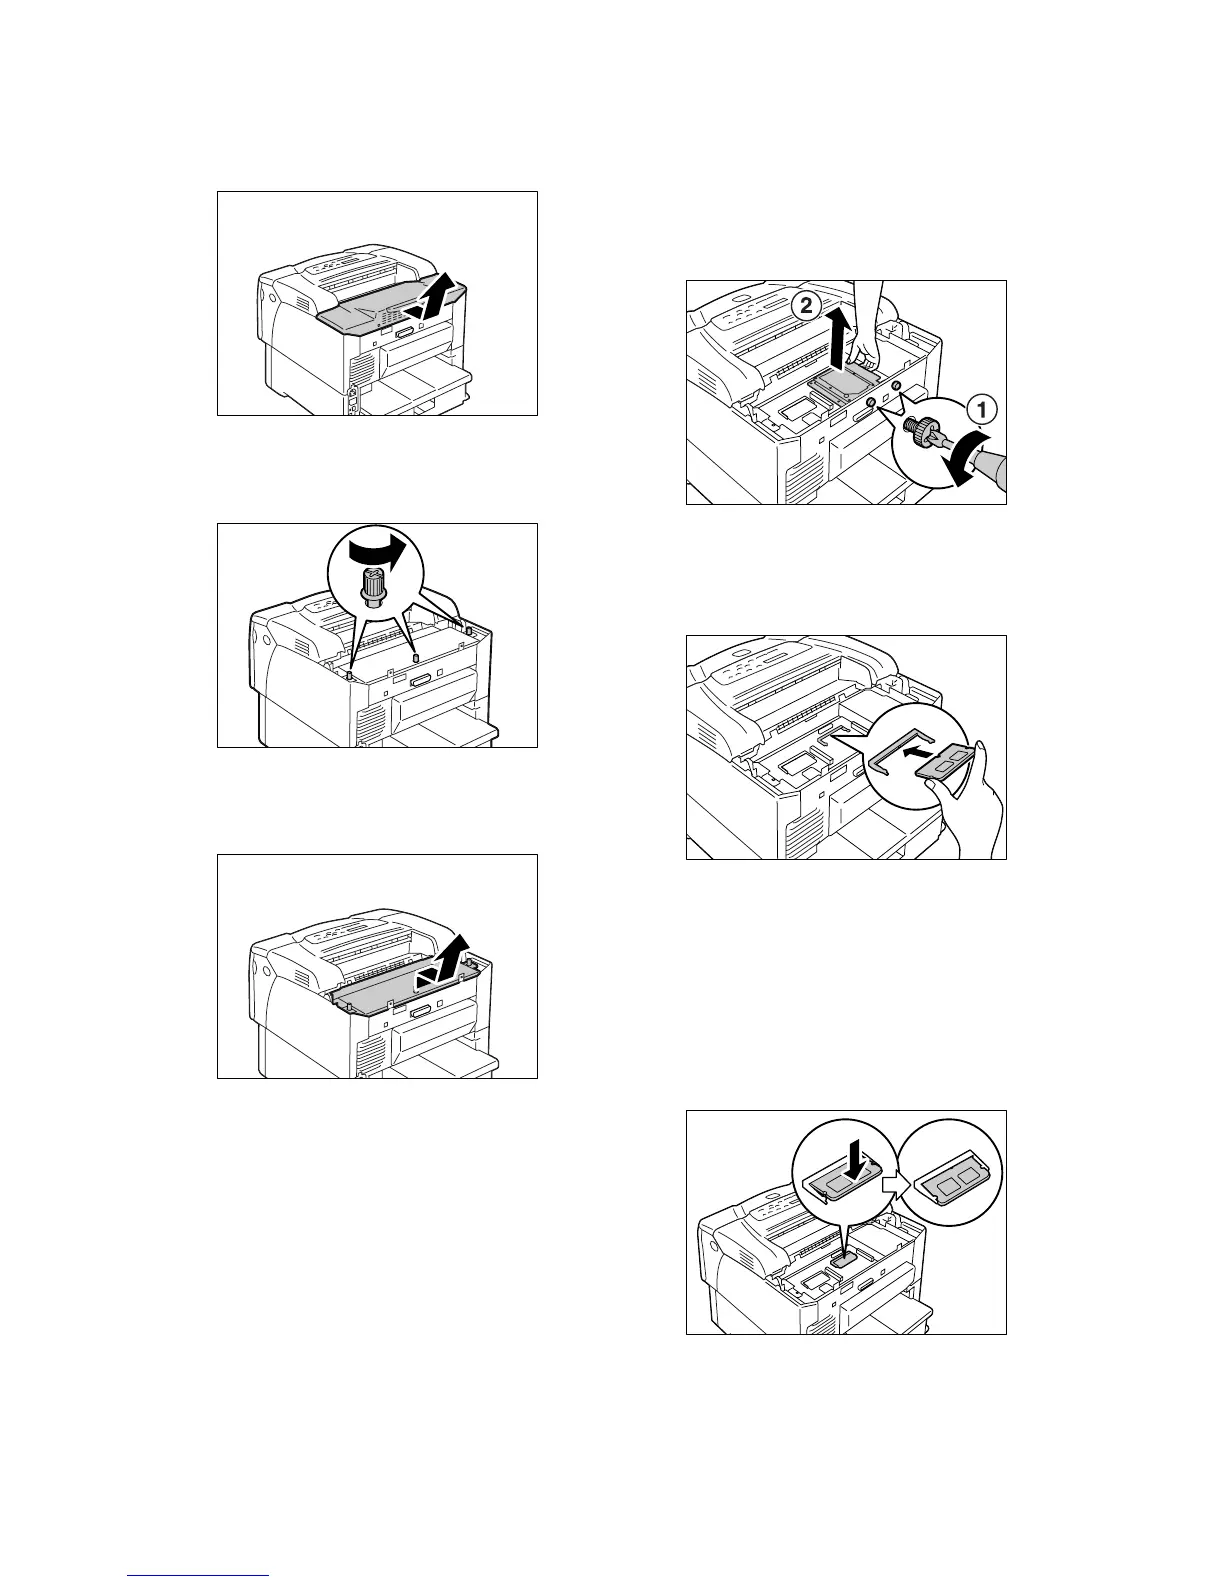
3. Pull the rear cover forward and remove it
from the printer.
4. Loosen the three screws that secure the
metal plate cover inside the printer.
5. Pull the metal plate cover forward and
remove it from the printer.
6. If an internal hard disk is installed, remove it
temporarily.
Use a screwdriver to remove the two screws
from the outside of the printer. Hold the
internal hard disk by the part shown in the
figure and pull it out upward.
7. Align the notch on the font ROM with the
projection on the ROM slot and insert the
ROM at an angle into the slot.
Important
• The font ROM should be installed at the right of the
controller board. The slot at the left of the controller
board is for a memory card (optional). Make sure to
insert the font ROM into the correct slot.
8. Push the font ROM as shown in the figure.
When the ROM is inserted correctly, it clicks
into place.
Note
• To remove the font ROM, push the retaining clips on
both ends in the outward directions and pull the ROM
out of the slot.
 Loading...


