Density Uniformity Adjustment
Use this feature to correct image quality issues on the output when that image quality
is not consistent throughout the entire output. For example, the image quality is lighter
(faded) or heavier (thicker) on the left or right sides of the output (inboard/outboard).
Adjusting Automatic Density Uniformity
1. Select the Tools button on the Control Panel.
2. Select the Full Width Array Density Uniformity Adj.
3. Select the Paper Supply button.
4. Select the tray containing 11 x 17 in. (A3) or 12 x 18 in. (SRA3) paper and select Save.
5. Select Start.
You may have to wait up to a minute for the Full Width Array feature to be ready.
The press prints the Density test patterns, measures them, and automatically adjusts
the dry ink/toner density for consistent application across the page. The printed
sheets do not yet reflect the new settings but are the sheets that were used to make
the adjustments.
6. Select one of the following:
• If you do not want to print sheets with the revised settings, select Save and Close.
• If you do want to print sheets with the revised settings, select the Sample Printout
button to view the adjustment prints. Sample sheets will print using the updated
settings.
7. Check the printed samples for density uniformity.
• If acceptable, select Save.
• If not acceptable, repeat the adjustment procedure.
8. Select Close to complete the Density Uniformity Adjustment.
Clean Fuser Assembly Information
Cleaning the fuser assembly is an automated routine you select to address and improve
any image quality issues on your print output, such as dry ink/toner debris on the back
of a printed sheet. This maintenance task is described in the (Clean Fuser Assembly)
procedure.
Xerox
®
Versant
®
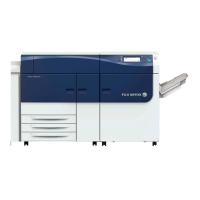
2100 Press8-2
User Guide
Calibrating the Press
 Loading...
