Installation
Xerox® Smart Card
Installation Guide
21
Configuring Authentication
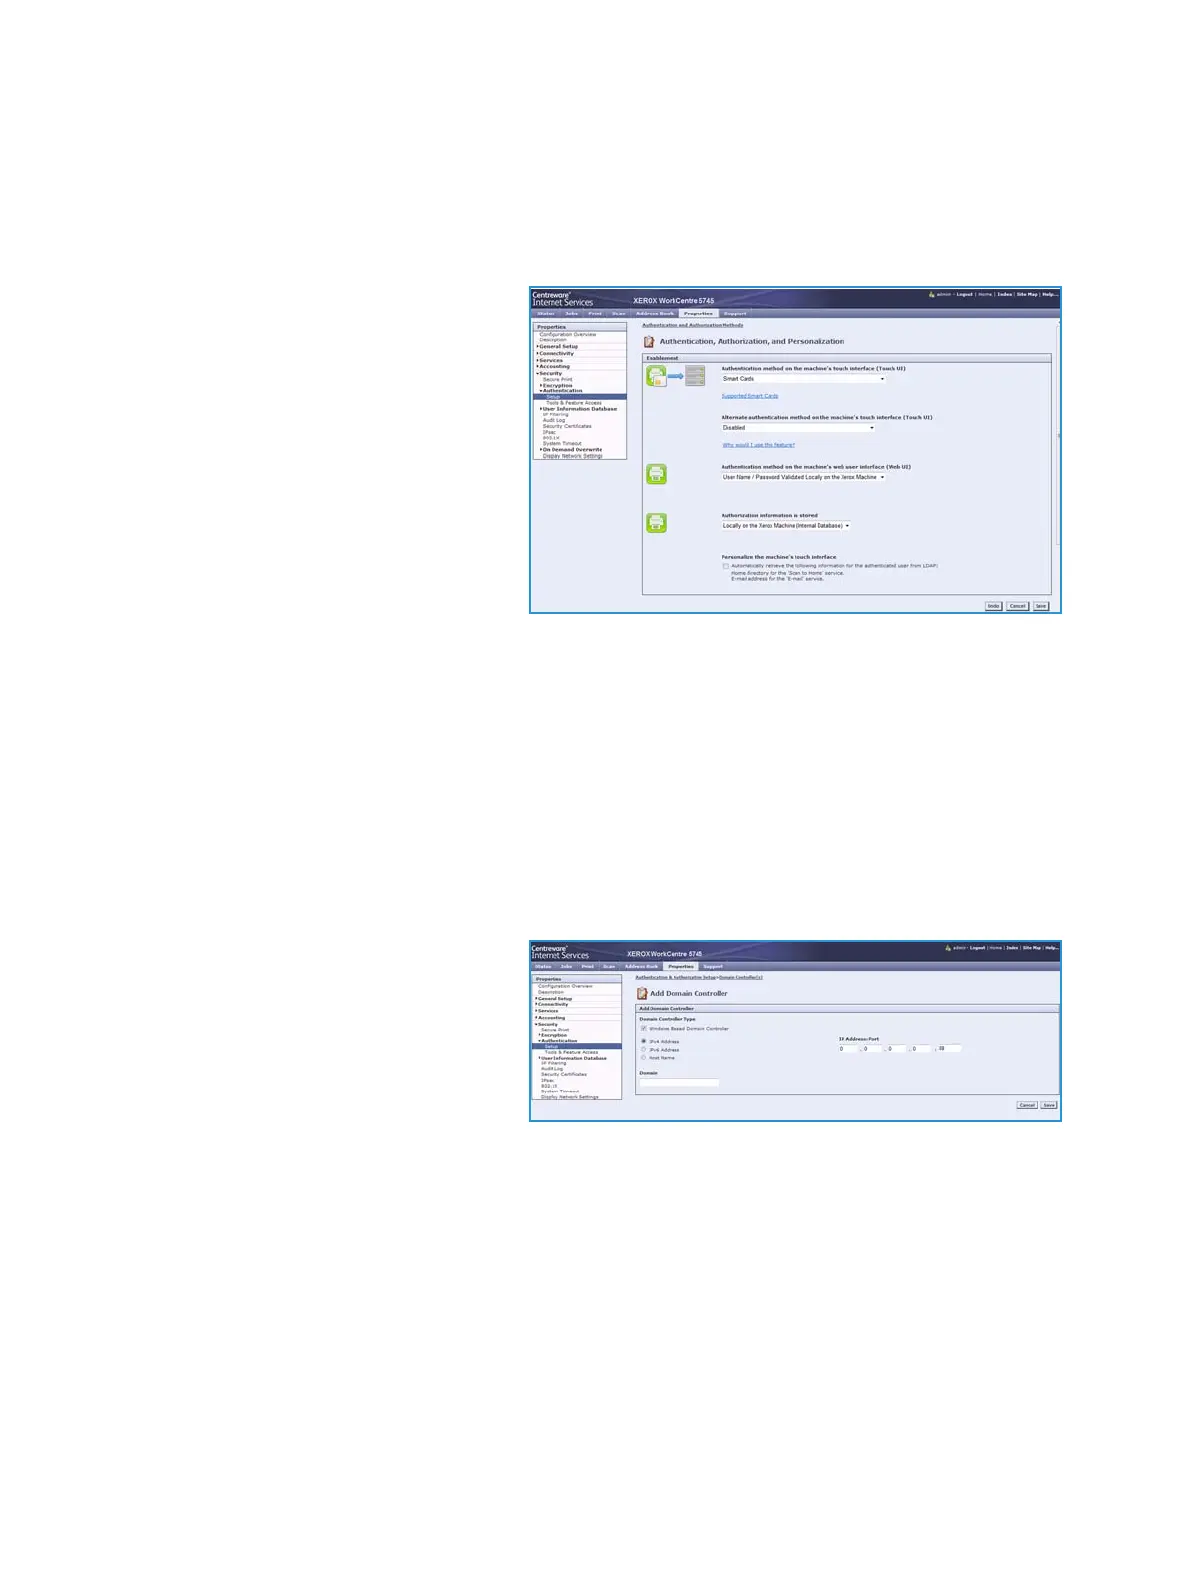
1. In CentreWare Internet Services, click Properties > Security > Authentication.
2. Click Setup.
3. Click Edit.
4. Under Authentication method on the
machine's touch interface, select
Smart Cards.
5. You can configure an alternate
authentication method to allow users
to access the printer without a Smart
Card. Under Alternate authentication
method on the machine's touch
interface, select User Name /
Password Validated Remotely on the
Network.
6. Specify a method for the printer to
authenticate users who access
CentreWare Internet Services from their computer. Under Authentication method on the
machine's web user interface, select User Name / Password Validated Locally on the Xerox
Machine or User Name / Password Validated Remotely on the Network.
7. Under Authorization information is stored:, select Locally on the Xerox Machine, or Remotely on
the Network.
8. Click Save.
9. A list of configuration settings appears at the bottom of the Authentication Setup page.
10. Click Edit to configure any settings that are marked in red text as Required; Not Configured.
Configuring Domain Controller Settings
1. In the related services table on the
Authentication Setup page, click
Edit... on the Domain Controller(s)
row. The domain certificate on a
Smart Card of a user must be
validated on the domain controller
server before they can access the
printer.
2. Click Add Domain Controller.
3. Under Domain Controller Type, select Windows Based Domain Controller if you are using one.
4. Type the domain controller server address information.
5. Click Save to apply the new settings or Cancel to return to the previous screen.
6. If you have added more that one domain controller server, you can prioritize the alternate servers.
7. Click Change Domain Priority.
a. On the Change Domain Priority page, select a domain controller in the list.
b. Click the Up Arrow or Down Arrow to change the search priority of the server.
c. Click Close.
 Loading...


