Installation
Xerox® Smart Card
Installation Guide
22
8. To configure NTP settings, under Action, click Edit... next to NTP. The domain controller time and
the time set on the printer must be synchronized. Xerox recommends that you enable NTP to
ensure time synchronization.
9. Click Close to return to the Authentication Setup page.
Configuring OCSP Validation Server Settings
If you have an OCSP server, or an OCSP certificate validation service, you can configure the printer to
validate certificates installed on the domain controller.
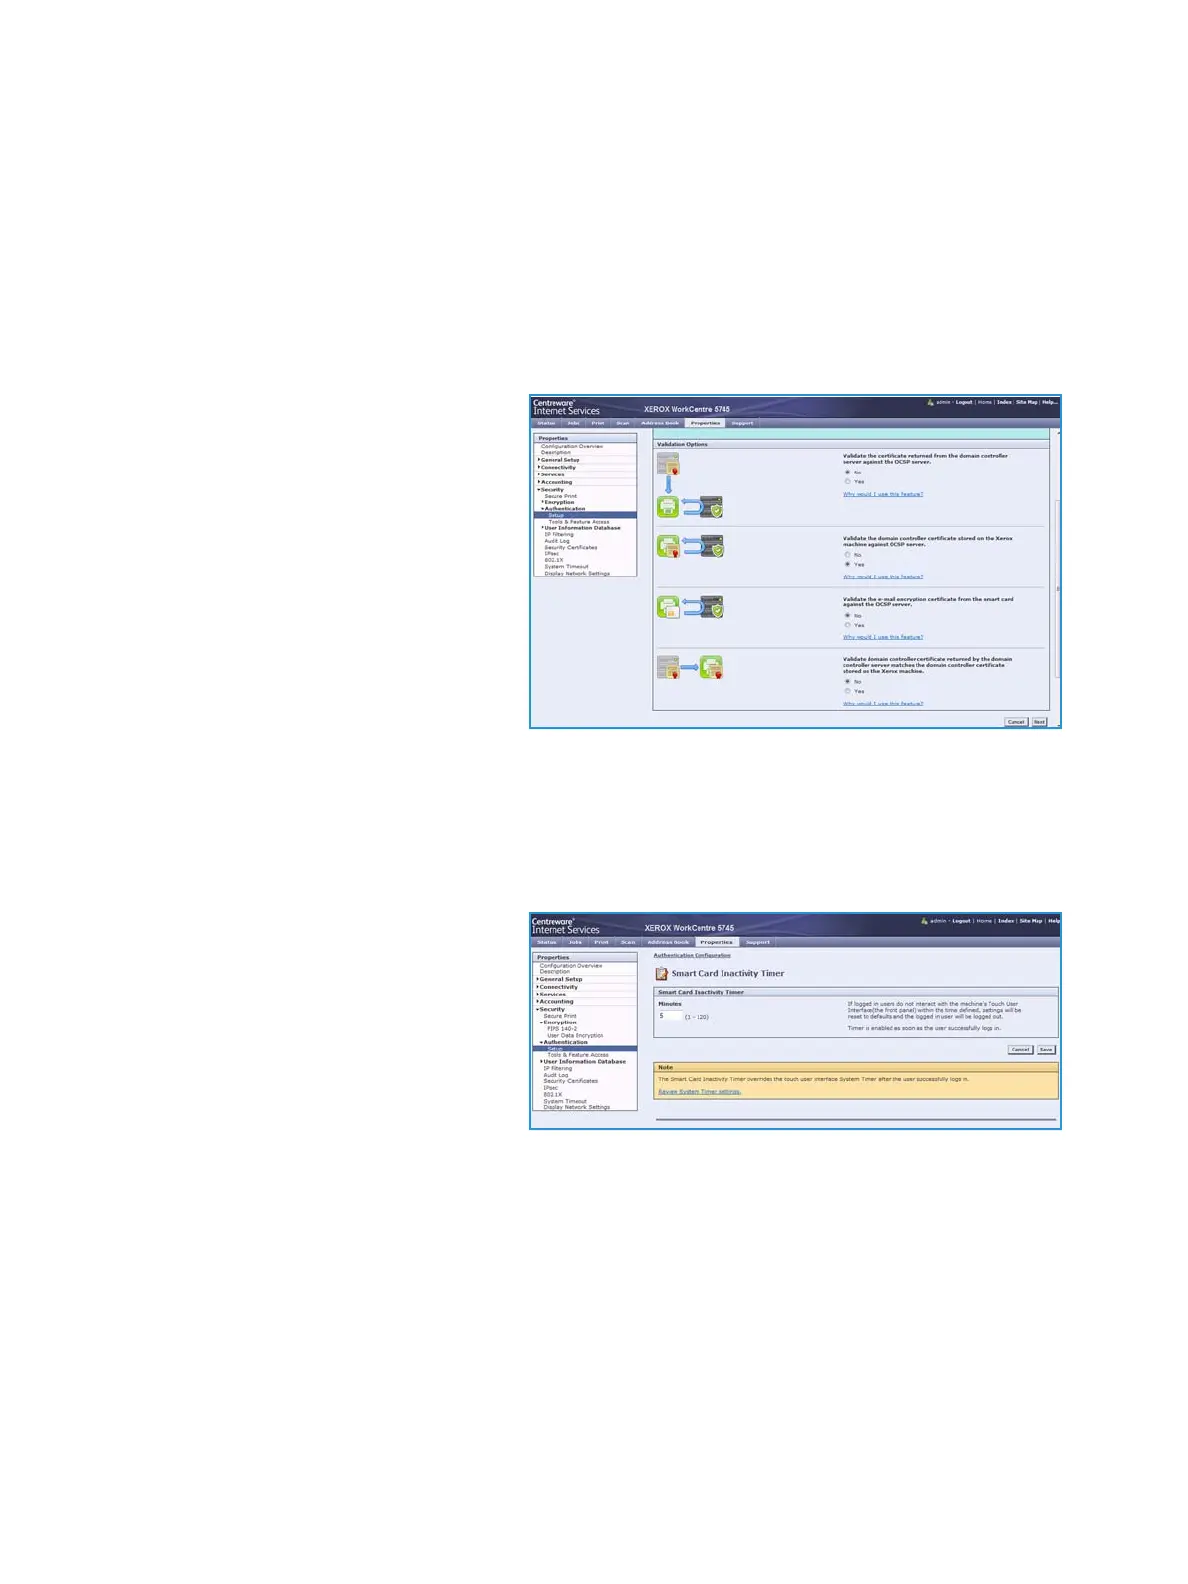
1. On the Authentication Setup page,
under Action, click Edit next to
Certificate Validation.
2. Select a validation method and click
Next.
3. On the Required Settings page, type
the URL of the OCSP server.
4. To ensure that the printer can
communicate with the OCSP server
and the domain controller, configure
your proxy server settings if
necessary.
5. Click the appropriate link to install the
root CA certificates for the OCSP server and your domain controller.
6. Click Save to apply the new settings and return to the Authentication Setup page. Click Cancel to
return to the Authentication Setup page.
Setting the Inactive Time Limit
1. In the related services table on the
Authentication Setup page, click
Edit... on the Smart Card Inactivity
Timer row.
2. Specify the maximum amount of
time before a user is automatically
logged out. Type the time in minutes.
3. Click Save to apply the new settings
and return to the Authentication
Setup page. Click Cancel to return to the Authentication Setup page.
 Loading...


