1. Connect the PC to the KV260 Starter Kit via Ethernet as shown in Figure 5.
2. Set the PC to a stac IP address that is on the same subnet as the recovery tool
(192.168.0.XYZ), but not 192.168.0.111.
3. Hold the rmware update buon when powering on the device. You should also see the
UART print outs from the recovery applicaon.
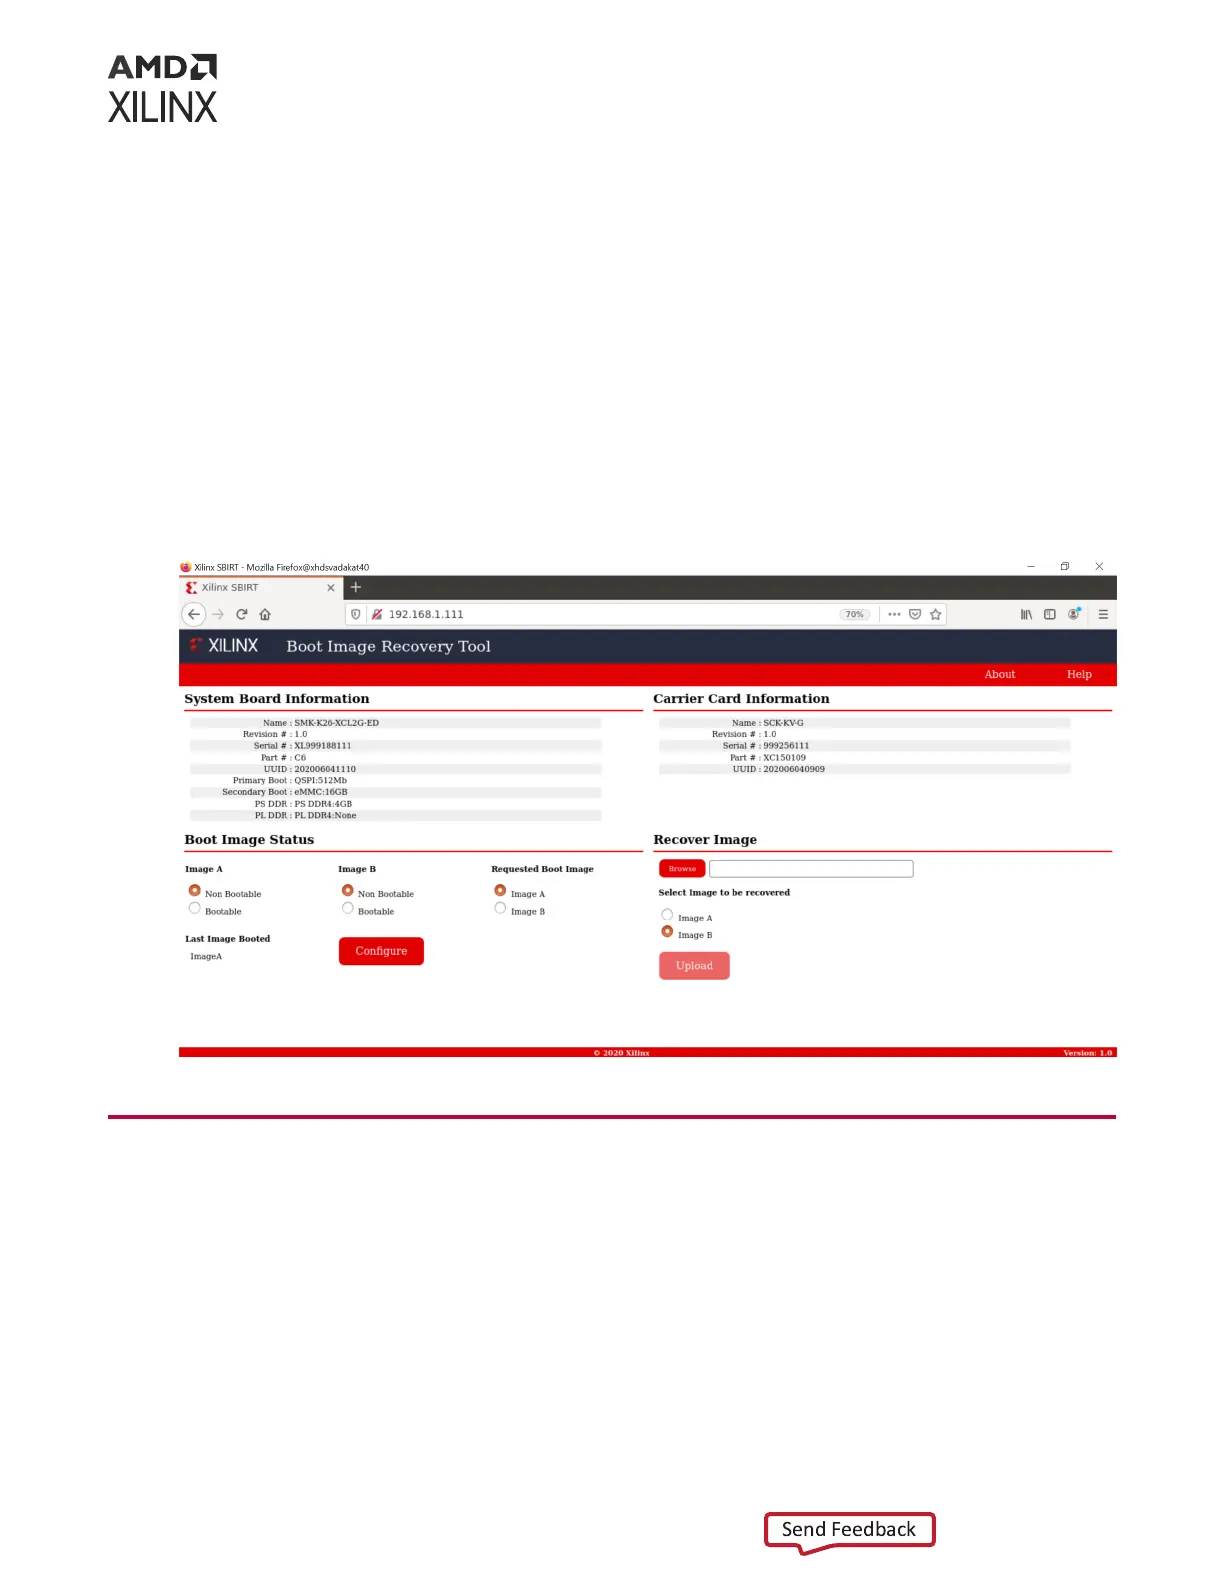
4. Use a web-browser (e.g., Chrome or Firefox) on the PC to navigate to the URL http://
192.168.0.111 for access to the Ethernet recovery tool.
5. Use the Ethernet recovery tool GUI in the web-browser to update either the A or B boot
rmware parons with a BOOT.BIN le from the le system on the PC. The Ethernet
recovery tool interface is shown in the following gure.
Figure 6: Ethernet Recovery Tool Interface
Boot Firmware A/B Update
As outlined in the Chapter 3: Boot Devices and Firmware Overview secon, the Xilinx starter kit
and SOM provide two copies of the boot rmware in the QSPI device. This mechanism has a
robust update infrastructure through a ping-pong methodology, where the last known good boot
image is always kept available in the plaorm. The Xilinx starter kit Linux provides a ulity for
doing these updates enrely on-target. The steps for using the Xilinx SOM A/B update tool are:
1. Place the new BOOT.BIN in the Linux le system.
Chapter 6: Board Reset, Firmware Update, and Recovery
UG1089 (v1.2) July 26, 2022 www.xilinx.com
KV260 Starter Kit 22

 Loading...