EasyManua.ls Logo

Xomax S64 - User Manual

Xomax S64
15 pages
Print Icon
To Next Page IconTo Next Page
Loading...
CHILD RESTRAINT SYSTEM
0-36kg
PRODUCT TYPE: S64
0+I II III
Question and Answer IconNeed help?

Do you have a question about the Xomax S64 and is the answer not in the manual?

Summary

1. Notice

Universal Category Usage

Information on using the child restraint as a Universal category restraint.

Semi-Universal Category Usage

Information on using the child restraint as a Semi-Universal category restraint.

ISOFIX System Notice

Notice specific to the ISOFIX system for rearward-facing use.

2. Structure Name

3. Product Information

4. Warnings and Precautions

General Safety Warnings

Important warnings regarding the use of the child safety seat and potential risks.

Specific Safety Prohibitions

Lists specific actions or conditions to avoid for child safety.

5. Safety Seat Use Method

5.1 Install Location

Guidance on selecting the correct location within the vehicle for installation.

5.2 Harness Buckle Operation

Step-by-step instructions on operating the child restraint's harness buckle.

5.3 Adjust Headrest and Shoulder Belts

Instructions for correctly adjusting the headrest and shoulder belt height.

5.4 Adjust Safety Belt Length

Guide on how to tighten and loosen the safety belts for a secure fit.

5.5 Adjust Seat Rotation Angle

Instructions on how to rotate the child safety seat for different positions.

5.6 Adjust Seat Recline Angle

Guide on adjusting the recline angle of the child safety car seat.

5.7 Removing Harness and Pads

Steps for removing the 5-point harness, sleeping pad, and other components.

5.8 Remove Triangle Pad and Sleeping Pad

Instructions for removing specific pads from the child seat based on weight.

5.9 Removing the Fabric Cover

Steps to remove the fabric cover for cleaning or maintenance.

6. Installation in Car

6.1 Rearward Facing Installation

Guide on how to install the child seat in a rearward-facing orientation using vehicle belts or ISOFIX.

6.2 Forward Facing Installation

Guide on how to install the child seat in a forward-facing orientation using vehicle belts or ISOFIX.

7. Care and Maintenance

Cleaning the Buckle

Instructions for cleaning the harness buckle to ensure proper function.

Cleaning Harness and Shell

Guidance on cleaning the harness and shell of the child restraint.

Storage Instructions

Recommendations for storing the child safety seat safely.

8. Main Technical Parameters

Overview

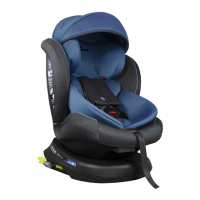
This document describes a child restraint system, product type S64, designed for children weighing 0-36 kg. It is a 360-degree rotating child restraint system approved according to ECE R44/04.

Function Description:

The child restraint system is designed to safely secure a child in a vehicle. It can be installed in both rearward-facing and forward-facing positions, depending on the child's weight group. The system features a 5-point harness for younger children and can be adapted for older children using the vehicle's adult seat belt. The 360-degree rotation feature allows for easy placement of the child in the seat and adjustment between rearward and forward-facing positions. The headrest and shoulder belts are adjustable to ensure optimal protection and comfort as the child grows.

Important Technical Specifications:

  • Product Type: S64
  • Weight Group: 0-36 kg (Group 0+ | I | II | III)
    • Group 0+ (0-13kg): Rearward facing, installed with Adult seat belt.
    • Group 0+I (0-18kg): Rearward facing, installed with ISOFIX + Top Tether.
    • Group I (9-18kg): Forward facing, installed with Adult seat belt or ISOFIX connector + Adult seat belt, or ISOFIX connector + Adult seat belt + Top Tether.
    • Group II III (15-36kg): Forward facing, installed with ISOFIX connector + Adult seat belt or Adult seat belt.
  • Approval: Tested and approved according to ECE R44/04.
  • Dimensions:
    • Length: 466mm
    • Width: 440mm
    • Height: 577-774mm
  • Rotation: 360-degree rotating system.
  • Recline Positions: 5 recline positions.
    • Rearward facing (Group 0+ I (0-18KG)): Fifth Level.
    • Forward facing (Group I (9-18KG)): First Level to Fourth Level.
    • Group II III (15-36KG)): First Level.
  • Installation Methods:
    • Vehicle's 3-point safety-belts (lap/3 point/static/with retractor safety-belts, approved to UN/ECE Regulation No. 16 or other equivalent standards).
    • ISOFIX anchorages systems (approved to UN/ECE Regulation No. 16 or other equivalent standards).
    • Top Tether.

Usage Features:

  • Universal and Semi-Universal Category: The child restraint is classified as "Universal" for general use with 3-point safety belts and "Semi-universal" for use with 3-point safety belts and ISOFIX attachments.
  • ISOFIX Child Restraint System: Approved for vehicles fitted with ISOFIX anchorages systems. The ISOFIX size class for this device is D for Group 0+ (0-13kg) and Group I (9-18kg).
  • Installation Location: Suitable for seatbelt models equipped with a three-point retractor that complies with ECE R16. Not suitable for models only equipped with 2-point seat belts. For semi-universal use, ISOFIX installation is required.
  • Harness Buckle: A 5-point harness system with a buckle that makes a "CLICK" noise when engaged. Shoulder straps should be adjusted to remove slack and lie flat. The harness buckle is opened by pressing a red button.
  • Headrest and Shoulder Belt Adjustment: The headrest height and shoulder belt height can be adjusted simultaneously by pulling the headrest adjustment handle upward. To lower, press the headrest down while pulling the handle upward. The headrest should be adjusted so that the shoulder straps are at the same level as the child's shoulders, with the lower edge of the headrest as close as possible to the child's shoulder, maintaining a finger's distance.
  • Safety Belt Lengthening/Tightening:
    • Tighten: Pull up the shoulder belt and lap belt, then pull the crotch belt to tighten the safety belt. The lap belt should be worn low down, engaging the pelvis.
    • Loosen: Press the limited slide button and grasp the shoulder belt (not the shoulder pad belt) to loosen the safety belt.
  • Seat Rotation: Press the rotate button to rotate the seat 360 degrees. For rearward-facing installation, the seat must be rotated to a 90-degree position, the recline handle pulled, and the angle adjusted to the most inclined position before turning to the rearward-facing position. The car cannot be driven with the seat in the 90-degree rotation position.
  • Angle Adjustment: Pull the recline handle (located at the bottom of the body shell) and the body shell simultaneously to adjust the seat angle. There are 5 recline positions.
  • Removing 5-Point Harness: For Group II III (15-36kg), the 5-point harness should be removed. This involves detaching shoulder belts from the metal link, removing them from the harness connector, storing the metal link behind the backrest, pulling the shoulder belt and harness from the seat hole, and removing the shoulder belt from the buckle. Redundant belt should be put into the cloth cover.
  • Removing Triangle Pad and Sleeping Pad: The triangle pad should be removed when the child's weight exceeds 8kg. The sleeping pad should be removed when the child's weight exceeds 12kg.
  • Removing Fabric Cover: To remove the fabric cover, first remove the 5-point harness, then take off the cover from the backrest and base. Move the headrest to the highest position, then remove the cover from the headrest base, followed by the headrest cover. Re-fitting follows the reverse steps.
  • Installation in Car (Rearward Facing - Belt Group 0+ (0-13kg)): Rotate the seat to 90 degrees, adjust to maximum recline. The diagonal seat belt section bypasses from the back of the seat, through between the headrest and backrest. The lap belt section goes through the belt guidance and under the sleeping cushion. Buckle tongues must be properly locked into the vehicle buckle with an audible CLICK. Adjust diagonal and lap belts, ensuring the diagonal belt section passes between the headrest and backrest, and the lap belt is fastened tight and not twisted.
  • Installation in Car (Rearward Facing - ISOFIX and Top Tether Group 0+I (0-18kg)): Insert ISOFIX guides (if applicable). Pull out locking arms from the base bottom by pressing the ISOFIX button. Pull arms to and fro until an audible CLICK is heard and buttons turn green. Pull out the top tether, press the release button, and hang the latch on the fixed point at the back of the car seat, ensuring it is tightened.
  • Installation in Car (Forward Facing - Belt or Belt and ISOFIX connector Group I (9-18kg)): Insert ISOFIX guides (if applicable). Pull out locking arms from the base bottom by pressing the ISOFIX button. Pull arms to and fro until an audible CLICK is heard and buttons turn green. Push the seat as far back as possible. Pull out the belt from belt ALR slowly. Shoulder belts pass through the gap between the headrest and seat back. One side of the diagonal belt passes through the backrest and Belt Guidance 3. The other side passes along the upper inside. The lap belt passes through Belt Guidance 3 on both sides. Use a knee to press down on the child seat, then tighten the vehicle seat belt by pulling the lower part of the diagonal seat belt section near the buckle. The path should be between the headrest, sleeping pad, and back of the seat, and between the sleeping pad and the cover of the seat.
  • Installation in Car (Forward Facing - ISOFIX connector and Belt or only Belt Group II III (15-36kg)): Remove the 5-point harness. Place the child seat forward facing. Insert ISOFIX guides (if applicable). Pull out locking arms from the base bottom by pressing the ISOFIX button. Pull arms to and fro until an audible CLICK is heard and buttons turn green. Pull out the belt from the belt ALR. Diagonal belt passes through the same side of belt guidance 1, lap belt through the same side of belt guidance 2. Then pull the diagonal belt and lap belt together through another side of belt guidance 3. Keep the diagonal belt at shoulder height (middle of point A and B). Lock the buckle tip into the vehicle seat buckle with a CLICK noise. Tighten the belt and put redundant belt into cloth cover. Shake the seat to ensure it is securely attached. The diagonal seat belt section must run diagonally backward; its course can be adjusted with the vehicle's adjustable belt deflector. Ensure the lap belt is as close as possible to the lower pelvis, not the abdomen.
  • Installation in Car (Forward Facing - ISOFIX connector, Belt and Top Tether Group II III (15-36kg)): Same ISOFIX and belt installation as above. Pull out the top tether, press the release button, and hang the latch on the fixed point at the back of the car seat, ensuring it is tightened.

Maintenance Features:

  • Inspection: Periodically inspect the child seat for worn or damaged parts. Replace the child seat if damaged.
  • Cleaning:
    • General: Keep the child seat clean. Do not lubricate any parts.
    • Fabric Covers and Trims: Removable fabric covers and trims can be cleaned using warm water with household soap or a mild detergent. Allow to dry fully, preferably away from direct sunlight.
    • Harness Buckle: Wash in warm water until clean. Ensure an audible click is heard to confirm proper functioning.
    • Harness and Shell: Sponge clean using warm water and mild soap. Do not use any other cleaning agents.
  • Storage: Store in a safe, dry place, away from heat and direct sunlight. Avoid placing heavy objects on top of the seat.
  • Washing Instructions (Symbols):
    • Maximum wash temperature 30°C.
    • Do not bleach.
    • Do not dry clean.
    • Do not iron.
    • Do not dry (machine).
    • Dry flat in shade place.

Warnings and Important Notes:

  • Read and understand all instructions in the manual and vehicle owner's manual. Failure to do so can result in serious injury or death.
  • Keep instructions with the child restraint for future reference.
  • Consult a professional doctor or hospital staff member for suitability for low birth weight and premature infants.
  • Do not use with damaged or missing parts, or damaged/frayed harness straps/vehicle belt.
  • Never use with any other base than permitted by the manufacturer.
  • Do not use a child safety seat that has been in a crash.
  • Do not use a second-hand child seat or one with unknown history.
  • Do not leave the child unattended in the restraint for an extended period.
  • Do not use on vehicle seats that face the sides or rear of the vehicle; only use on forward-facing vehicle seats.
  • Ensure rigid items and plastic parts are located and installed so they are not trapped by a movable seat or door.
  • Do not use forward-facing before the child's weight exceeds 9kg.
  • Ensure all straps holding the restraint to the vehicle are tight and not twisted. Straps restraining the child should be adjusted to the child's body.
  • Ensure the lap strap is worn low down to engage the pelvis.
  • Do not make alterations or additions without Type Approval Authority approval.
  • Keep the child seat away from sunlight if not provided with a textile cover, as it can become too hot.
  • Secure any luggage or objects that could cause injuries in a collision.
  • Do not use the child restraint system without the cover.
  • Replace seat cover only with one recommended by the manufacturer.
  • Contact the manufacturer if the adult safety-belt buckle position is unsatisfactory.
  • Do not use load-bearing contact points other than those described and marked in the instructions.
  • Read the car manufacturer's handbook before installing the ISOFIX child safety seat.
  • If the vehicle seat has an opened airbag in front, the child seat cannot be installed there.
  • Only with 3-point seat belt and ISOFIX attachments can install in this place.
  • If the safety belt is pulled out a certain length and needs to be increased, it must be fully rolled up and pulled out again.
  • Shake the safety seat before use to ensure it is firmly fixed. Retighten if shaking or loosening is found.

Xomax S64 Specifications

General IconGeneral
BrandXomax
ModelS64
CategoryCar Seat
LanguageEnglish