EasyManua.ls Logo

Yakima FullSwing 4 User Manual

Yakima FullSwing 4
15 pages
To Next Page IconTo Next Page
Page #1 background imageLoading...
Page #1 background image
1033275E-1/15
FullSwing 4
IMPORTANT WARNING
IT IS CRITICAL THAT ALL YAKIMA RACKS AND ACCESSORIES BE PROPERLY AND SECURELY ATTACHED TO YOUR VEHICLE. IMPROPER
ATTACHMENT
COULD RESULT IN AN AUTOMOBILE ACCIDENT, AND COULD CAUSE SERIOUS BODILY INJURY OR DEATH TO YOU OR TO
OTHERS
. YOU ARE RESPONSIBLE FOR SECURING THE RACKS AND ACCESSORIES TO YOUR CAR, CHECKING THE ATTACHMENTS PRIOR
TO
USE, AND PERIODICALLY INSPECTING THE PRODUCTS FOR ADJUSTMENT, WEAR, AND DAMAGE. THEREFORE, YOU MUST READ AND
UNDERSTAND
ALL OF THE INSTRUCTIONS AND CAUTIONS SUPPLIED WITH YOUR YAKIMA PRODUCT PRIOR TO INSTALLATION OR USE.
I
F YOU DO NOT UNDERSTAND ALL OF THE INSTRUCTIONS AND CAUTIONS, OR IF YOU HAVE NO MECHANICAL EXPERIENCE AND ARE
NOT
THOROUGHLY FAMILIAR WITH THE INSTALLATION PROCEDURES, YOU SHOULD HAVE THE PRODUCT INSTALLED BY A
PROFESSIONAL
INSTALLER SUCH AS A QUALIFIED GARAGE OR AUTO BODY SHOP.
Part #1033275 RevE
TOOLS:
3/4" wrenches (2)
PURCHASE
SEPARATELY:
PowderHorn
Carries up to 6 pr. skis or 4
snow boards.
Part #8002588
HITCH
WRENCH
INSTALL THIS PRODUCT ON 2"
HITCH RECEIVERS ONLY.
Do not use with a hitch extender.
Do not use with 1 1/4" hitch adapters.
Question and Answer IconNeed help?

Do you have a question about the Yakima FullSwing 4 and is the answer not in the manual?

Yakima FullSwing 4 Specifications

General IconGeneral
BrandYakima
ModelFullSwing 4
CategoryAutomobile Accessories
LanguageEnglish

Summary

Product Overview and Safety Guidelines

Important Safety Warning

Details critical safety information regarding proper attachment, potential hazards, and user responsibility.

Hitch Receiver Compatibility

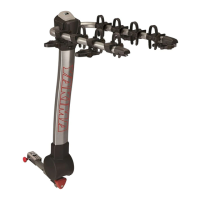
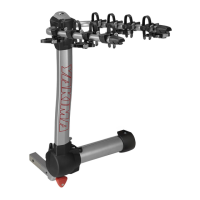
Specifies that the product must only be installed on 2" hitch receivers, not with extenders or 1-1/4" adapters.

Installation Procedure

Insert and Lock Hitch Tongue

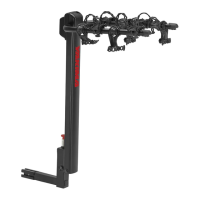
Guides on inserting the hitch tongue into the vehicle receiver and securely locking it in place with hardware.

Attach and Secure Mast Assembly

Instructions for positioning the mast and securing it to the tongue assembly using provided hardware and bolts.

Loading and Securing Bikes

Extend and Position Arms

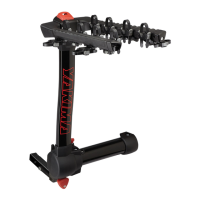
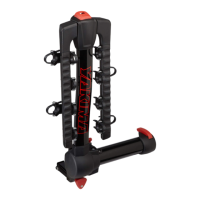
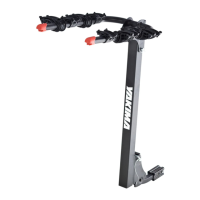
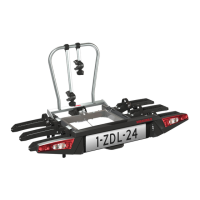
Details on extending the carrier arms, raising them, and positioning the cradles and stabilizers for bikes.

Load and Stabilize Bikes

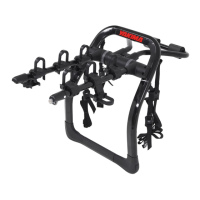
Provides guidance on loading bikes, starting with the heaviest, and securing them with straps for stability.

Lock Bikes to Carrier

Explains how to use the integrated lock system to secure individual bikes to the carrier for transport.

Operation and Final Checks

Accessing Vehicle Rear

Steps to swing away the loaded carrier to access the vehicle's rear without unloading the bikes.

Pre-Drive Safety Inspections

Mandatory checks before driving, including bolt tightness, strap security, and hardware condition.

Lowering Carrier Arms

Instructions on how to safely unload all bikes and lower the carrier arms to a stored position.

Load Limits and Usage Notes

Specifies maximum load capacity and restrictions on usage, such as off-road driving or specific bike types.

Maintenance and Support Information

Details on product maintenance, cleaning, and how to contact for technical assistance or replacement parts.

Related product manuals