EasyManua.ls Logo

Yakima Universal MightyMount User Manual

Yakima Universal MightyMount
18 pages
To Next Page IconTo Next Page
Page #1 background imageLoading...
Page #1 background image
— UNIVERSAL —
MightyMount
1033297A - 1/18
Part #1033297 Rev.A
IMPORTANT WARNING!
IT IS CRITICAL THAT ALL YAKIMA RACKS AND ACCESSORIES BE PROPERLY AND SECURELY ATTACHED TO YOUR VEHICLE.
IMPROPER ATTACHMENT COULD RESULT IN AN AUTOMOBILE ACCIDENT, AND COULD CAUSE SERIOUS BODILY INJURY
OR DEATH TO YOU OR TO OTHERS. YOU ARE RESPONSIBLE FOR SECURING THE RACKS AND ACCESSORIES TO YOUR
CAR, CHECKING THE ATTACHMENTS PRIOR TO USE, AND PERIODICALLY INSPECTING THE PRODUCTS FOR ADJUSTMENT,
WEAR, AND DAMAGE. THEREFORE, YOU MUST READ AND UNDERSTAND ALL OF THE INSTRUCTIONS AND CAUTIONS
SUPPLIED WITH YOUR YAKIMA PRODUCT PRIOR TO INSTALLATION OR USE. IF YOU DO NOT UNDERSTAND ALL OF THE
INSTRUCTIONS AND CAUTIONS, OR IF YOU HAVE NO MECHANICAL EXPERIENCE AND ARE NOT THOROUGHLY FAMILIAR
WITH THE INSTALLATION PROCEDURES, YOU SHOULD HAVE THE PRODUCT INSTALLED BY A PROFESSIONAL INSTALLER
SUCH AS A QUALIFIED GARAGE OR AUTO BODY SHOP.
• Follow the Fitting Process
on the next page to match
the size of your factory or
square bars.
• Do not install
KayakStackers (single-post
style), or AnkleBiters. They
will not work with this
product.
Install Universal
MightyMounts opening to
the front of the vehicle.
YAKIMA
WRENCH
(shown for accessory, Cobra bike carrier)
4 EACH:
Kit contains 4 of each piece of hardware
(excluding the wrench).
SET OF PADS
SMALL BAIL
(marked “A”)
LARGE BAIL
(marked “B”)
THUMB-WHEEL
LONG HEX BOLT
(for large bail)
SHORT HEX BOLT
(for small bail)
BARREL
SLEEVE
SHORT
CARRIAGE BOLT
LONG
CARRIAGE BOLT
SPACER
ADAPTER
BACKBONE
WASHER
NUT
Question and Answer IconNeed help?

Do you have a question about the Yakima Universal MightyMount and is the answer not in the manual?

Yakima Universal MightyMount Specifications

General IconGeneral
Mounting StyleClamp-On
MaterialSteel
IncludesMounting hardware
FinishBlack
Security FeatureLockable
TypeRoof Rack Mounting System
CompatibilityUniversal fit for most vehicles with factory or aftermarket crossbars

Summary

Critical Safety Warning

Fitting Process

Install Pads to One Set of Mounts

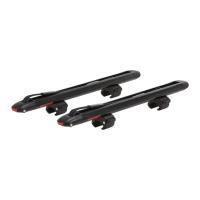
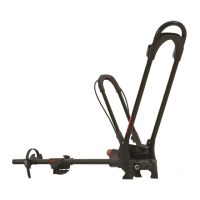
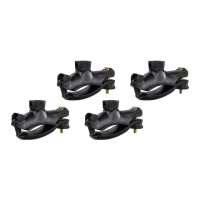
Press a pad into the smaller bail (marked "A") and the backbone.

Attach Small Bail to Backbone

Use the upper hinge slot on the backbone to attach the small bail.

Place Mount onto Bar

Mount the assembly onto the vehicle's crossbar, opening towards the front.

Bolt Selection for Mounts

Use short bolt with small bail and long bolt with large bail for secure attachment.

Attach Thumb-Wheel

Secure the mount by attaching the thumb-wheel, ensuring no looseness.

Remove Fitted Mount

Carefully remove the fitted mount from the crossbar and set aside.

Consult Accessory Chart

Refer to the accessory chart for specific hardware and adapter needs.

Accessory Chart

Snow Accessory Installation

Instructions for installing snow accessories using short carriage bolt and adapter.

Snow Accessory with Binding Clearance

Steps for snow accessories with added binding clearance, using short carriage bolt and adapter.

Water and Upright Bikes Accessories

Water/Upright Bike Accessory Installation

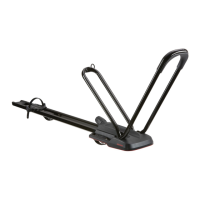
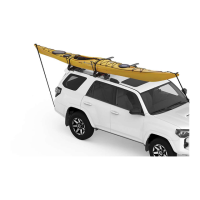
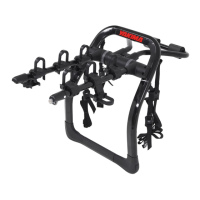
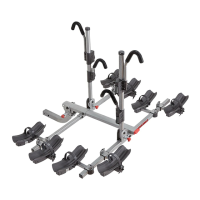
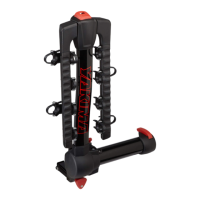
Install water and upright bike accessories using long carriage bolt and spacer.

Cobra and KingCobra Accessory Installation

Install Cobra and KingCobra accessories using adapter and carriage bolt.

Basket Case Cargo Installation

Basket Case Cargo Mounting

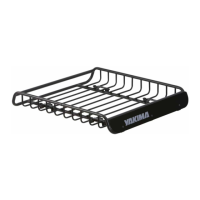
Mount basket cases using long carriage bolt, spacer, and washer/nut.

Weight Limits and General Precautions

Weight Limits

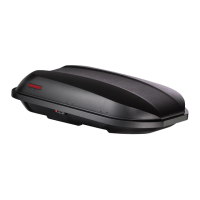
Adhere to vehicle and rack weight limits; maximum is 165 lbs.

Accessory Removal and Reinstallation

Unscrew wheels for removal; tighten thumb-wheels and check security on reinstallation.

Accessory Locks

Ensure adequate clearance for accessory locks to avoid contact with the vehicle.

Load Securing and Vehicle Interaction

Tie down long loads, be cautious of rear hatch clearance, and antenna interference.

Maintenance and Technical Support

Use specific lubricants, clean with mild detergent, and contact support for assistance.

Related product manuals