13
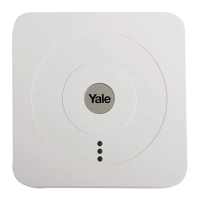
About your Alarm System (Default Settings)
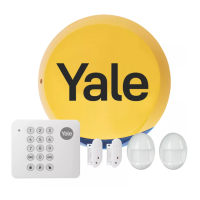
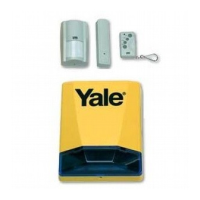
Using Accessories
7
To provide additional exibility and protection you can add extra Key Fobs, Key Pads,
Panic Buttons and Smoke Detectors. These are available separately from this kit.
Adding Accessories to your System
(See page 7)
Using your Key Fob
• The Key Fob can be used to Away Arm, Home Arm, and
Disarm the system using the buttons as shown.
• An emergency alarm can be activated by pressing the
emergency button for 3 seconds until LED stops ashing.
• An emergency alarm can only be stopped by using
the Key Pad.
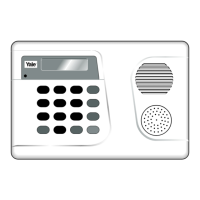
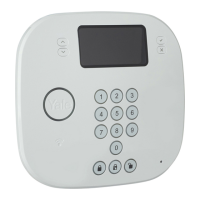
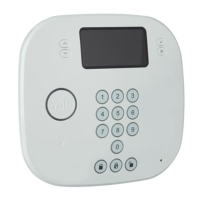
Key Pad
Key Pad Initialisation
If you purchase a Key Pad as an extra Key Pad, you will
need to initialise it prior to use with the Hub.
1 Press ‘Panic button A’ followed by factory default Key
Pad code ‘0000’.
2 The LED will now ash slowly indicating it is in test
(programming) mode.
3 Press ‘Panic button A’ followed by the ‘7’ key to set the
Key Pad into Hub system mode (also known as slave
mode).
4 Quit test mode by pressing the disarm key twice. The
Key Pad code and Mode setting has been completed.
/
Away
5
Door/window contacts
1 Pull out the battery saver tab to activate the battery.
Cover screw
Learn/Test
Button
Status
LED
Battery
saver tab
Gap no more
than 8mm
Magnet
Sensor
Learn/Test
button
LED
Keyfob remote control accessory
1 Open the battery compartment using a coin by
turning cover in the direction of the big arrow so
the cover small arrow is next to round dot.
2 Insert battery and replace cover.
Smoke detector accessory
1 Remove the cover and insert the four AAA
batteries as shown
2 The Smoke detector will now enter into self-
calibration mode for 10 minutes. It will resume
normal operation after this period.
Help button accessory
Remove the cover by loosening the fixing screw
and insert the 12V battery (supplied) as shown.
Please ensure you observe battery polarity.
Door/window contacts
1 Remove the cover of each door/window contact
by loosening the fixing screw.
2 Insert two AAA batteries into each detector as
shown. The indicator LED will flash briefly.
7
Keypad remote control
Remove the cover and insert the 3 AAA alkaline
batteries as shown. The ‘Tx’ LED will flash briefly
while components initialise.
Please note, the Home button on the operating
panel and the jumper switch inside (do not move)
have no function on this model.
Smoke detector accessory
Remove the cover and insert the four AAA
batteries as shown.
Keyfob remote control accessory
Slide off the battery cover, insert the
23A/MN21 battery as shown, and replace
battery cover. Switch to ‘on’.
Help button accessory
Remove the cover by loosening the fixing
screw and insert the 12V battery (supplied) as
shown. Please ensure you observe battery
polarity.
Tamper
switch
Jumper
switch
Tamper
switch
Jumper
switch
Magnet
Extension terminals
Learn/Test button
Learn/Test
button
On/Off switch
Keypad remote control
1 Pull out the plastic battery saver tab at the back of
the remote keypad. This will activate the batteries.
ale
Y
R
1
2
3
6
5
4
7
8
9
0
B
Disarm
Home
Arm
Arm
LED
Learn/Test
Button
 Loading...