SECTION VI -APPENDIX
«
i
46
WHERE'S THE SOUND
A Brief
Troubleshooting Guide
Many times
the
unit will
be
connected
and basically
adjusted properly, yet there nnay
not be
sound. The
difficulty can
be
caused
by a playing technique
that
is
inappropriate
for
a
given
patch;
it can
sometimes
be
cured
by a
change
in playing
style or
by
minor
adjust-
ment
of one or two
control
settings.
1.
Be
sure all
equipment is plugged in and the
POWER
is
ON,
and all
controls are
set
a
nominal, as
shown
by
the
inside cover illustration.
2. Play
one
or more notes, and continue
to
play
notes, holding the
key(s) down for
a
few seconds
rather
than playing staccato.
3. Check
the
sound
system
to
verify
it is properly
connected, turned
on,
and working. If
the rear-panel
HIGH/LOW
switch is
at LOW,
try
the
HIGH
position
(if that doesn't help, switch HIGH/LOW
back
to
LOW).
It
may be necessary
to
check the
sound system
with
a
sound
source other
than
the
CS-80, or use headphones
to
check the
CS-80.
4. Check
the EXPression
pedal and
VOLUME
control
settings.
5. Use a
preset patch
rather
than
a
memory or
panel-programmed
patch,
and play in
the middle
of
the
keyboard.
6.
If
you hear
nothing, check
the setting
of the
BRILLIANCE
control
[7]
. If sound dies
only
at
the
upper and/or lower
extremes
of
the keyboard, center
the
KEYBOARD
CONTROL levers.
7. Check
to
be sure the
FEET
selector sliders
[5]
are set at a
detented
position and not in
between
settings.
8.
If the sound goes away only with
a
panel
or
memory programmed
patch, check the following:
a.
A
basic waveform or noise
level
must
be
turned ON in the VCO
section
[23,
24,
25]
and
VCF
level in the VCA
section
[35]
must
be
up
or
sine wave
[36]
in
the
VCA
section
must
be up.
b.
If
the
LPF
slider
[28]
is set at
the same
height
or below the
HPF
[26]
slider,
it
may
be
necessary
to
raise
LPF
or
lower HPF
[26]
.
c.
VCA LEVEL
[41]
must
be
up.
d.
Some envelope must
be up (Sustain
[39]
and/
or
Decay
[38]
).
If
a long Attack Time is used
[37]
,
then you may have
to
hold
a key
for
a
second or more before
you
begin to hear the
sound.
TIPS ON
RECORDING
In
any
recording
situation,
the levels
are
extremely
important.
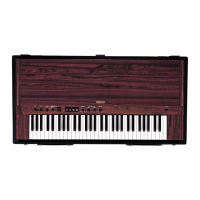
The
CS-80
has very low
inherent noise,
high
output
capability,
and
hence
a
large
usable dynamic
range.
If
you
use
a
lot
of
expression
and
touch
sensitivity to
create very
wide playing dynamics,
the
recording engineer will be
forced
to
use compression
and/or
limiting
to
avoid severe
distortion
on the
tape
and, ultimately, on
the
record.
If
you want
to
have the
recorded sound
be
very similar
to
what
you
play In
the studio, then
you
can hold back your
playing
dynamics
so
that less
compression
and
limiting
are
needed. You
might
also
reduce the
amount of
Initial
Level or After
Level touch sensitivity in your
programmed patches.
The synthesizer output
is
capable of
driving low
impedance studio
console
or
tape
machine inputs, but
it
is unbalanced.
Where long cable runs are
required,
it
may
be a good
idea
to
use
a
balancing transformer
or
direct box
at
the
synthesizer
output,
since this will
help
to
reduce
susceptibility
to
hum, noise and radio
frequency interference. The
LOW/HIGH switch should
be set at
HIGH
and the VOLUME control
at
1 2 o'clock
or
higher, whenever possible,
so
that
signal levels
between
the synthesizer
and recording
equipment
are
as
high
as
possible.
In
most
cases,
the
level can
then
be
turned down
(attenuated)
at
the
console Input.
As you
know,
with overdubbing the
first track
recorded
is
the one against which
the rest of
the music
is
played.
Therefore,
make It
clean
and
rhythmically
precise.
For
large
multi-track machines,
you
might
use
a
click
track (metronome), or
a
rhythm line
with
a
pair
of
bass and piano tracks. On
the other
hand, with
4-track
machines,
it
is
usually
better to start
with
a
rhythm
sound
that
Is as close to
the midrange
as
possible. This avoids excess high frequency loss
or
low
frequency irregularities
that
might occur
after
multiple
"sound-on-sound"
transfers.
(Head
bumps,
a very common tape machine characteristic,
produce
Irregular
low
frequency
response that would be
emphasized
more by a bass track
than
by
a
mid-
range track.)
The
following suggestions
apply
to
all
orchestration,
whether
you
are
playing
with
a large band, over-
dubbing one
synthesizer
on
multiple
tracks
of a tape
machine,
or not using
any synthesizer
at
all. There
Is
sometimes
a
trade
off
between clarity
of
voices
and
richness
of
sound, often
because
too
much music
Is
being
played
In
one frequency
band.
To
avoid com-
petition
between voices,
try
to
make
a sound full and
complete as possible,
but
keep
it
within
a
given
frequency
range.
The
secret
to a
richer
sounding
orchestration Is
to use
a variety
of
waveforms,
counter
lines, envelopes
and
sub oscillator
frequencies
for
the
different
voices;
try
not to
layer
many voices
that are
nearly identical.
This
principle
of
distinct voices
and
frequency bands is useful, but it
does
not mean
that
frequencies
should never
be
duplicated by two
or more
voices;
it
is
only
a
guide line.
If two
sounds are played
in the same register,
a
slight detuning of
one sound can
make the mix more
dense.
TIPS
ON
LIVE
PERFORMANCE
When rehearsing,
try to
set
up a
logical
progression
of
patches—logical in that a
given patch
is
changed
slightly
to
achieve
the
next sound.
You
never need
to
start
"from scratch" because you
can start
with
a
pre-
set
patch and adjust the
sub oscillator,
touch
sensitivity, ring modulator, etc. to
modify that
sound. In a live
performance, you
can then
quickly
get
another sound
by
selecting
a
different preset,
or
by readjusting
one or more of
the modifying
circuits.
Two different
approaches
can be
taken
with regard
to use of
programmed patches.
In
one
instance, you
may
wish
to
program a unique and
different sound on
each panel and
memory.
These
would essentially add
to the
variety
of
existing preset patches.
However, you
may instead
wish
to
pre-program
two or
more very
similar patches,
patches that
differ
only slightly,
but
in
areas
where control settings
are
critical. Then, the
different sounds can be pushbutton selected
without
concern
about
instantly
getting
sliders and
levers
"just
right."
The
preset
patches
make
It easy to
get
different
sounds quickly
and with excellent
repeatability.
How-
ever,
a
very
wide range of
variation can be
achieved
within
any
given preset by merely changing
the
Brightness lever
[7]
. Use
of the
keyboard control
section,
the
sustain
foot
switch,
the Feet selectors, and
various sub
oscillator functions
will add even
more
possibilities
to
each preset. Therefore,
instead of
switching from preset
to
preset, it Is
often
more
interesting and
exciting
to explore
the
full
scope
available within
a
single
preset
patch.
Yamaha polyphonic
synthesizers
enable you to get
a very wide range of keyboard
dynamics,
plus
further
dynamic control
via
the
expression
pedal.
Thus
the
playing level can
change
quite dramatically depending
on what
voices
you have programmed
and how
you
play.
Therefore, be sure
to
check
levels
for a specific
patch ahead
of
time
so
that
when
you come on
stage
to
play the
first
notes, they
are
at
the
right volume
level.
If
one of your
programmed
patches doesn't work
 Loading...