EasyManua.ls Logo

Yamaha DPX-1 - User Manual

Yamaha DPX-1
42 pages
Print Icon
To Next Page IconTo Next Page
Loading...
DPX1
Digital Cinema Projector
Projecteur Cinema Numerique
UCA
OWNERS MANUAL
MODE DEMPLOI

Questions and Answers

  • E
    Elizabeth HallAug 12, 2025
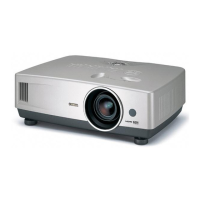
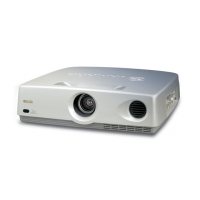
    How to fix a Yamaha DPX-1 Projector that does not turn on?
    • D
      Daniel HollandAug 12, 2025
      If your Yamaha Projector is not turning on, make sure the power switch is turned on. If you've recently turned it off, wait a couple of minutes before trying again, as the unit has a built-in delay to protect the lamp. Also, check that both the filter cover and the lamp cover are correctly attached.
  • A
    Amber CunninghamAug 16, 2025
    What to do if my Yamaha DPX-1 Projector has no picture?
    • J
      Jessica BaxterAug 16, 2025
      If your Yamaha Projector isn't displaying a picture, first ensure the lens cap is removed. Then, check that the unit is correctly connected to all other components. Verify that you've selected the correct input signal using the INPUT button, and also within the “INPUT A SIGNAL” and “INPUT B SIGNAL” settings in the menu. Finally, make sure the HIDE function isn't active by pressing the HIDE button again. If you are using a computer, ensure it is set to display on the external monitor.
  • C
    Charles MorrowAug 19, 2025
    Why is my Yamaha Projector remote control not working correctly?
    • O
      Olivia LopezAug 19, 2025
      If the remote control for your Yamaha Projector isn't working right, begin by replacing both batteries with new ones. If that doesn't solve it, check the “R/C SENSOR” setting in the menu to ensure the correct remote control sensor is selected. If you're using the projector near a fluorescent lamp, try selecting the other sensor in the “R/C SENSOR” menu, as fluorescent lamps can sometimes interfere with the signal.
  • C
    carol52Aug 25, 2025
    What to do if LAMP/COVER indicator lights up on Yamaha DPX-1 Projector?
    • A
      Alyssa RossAug 25, 2025
      If the LAMP/COVER indicator light is on, ensure that both the filter cover and the lamp cover are tightly attached to your Yamaha Projector.
  • A
    Amy BennettAug 27, 2025
    How to fix a blurred picture on a Yamaha DPX-1 Projector?
    • M
      Molly WhiteAug 27, 2025
      If the picture from your Yamaha Projector is blurred, try adjusting the focus of the lens using the focus ring. Also, make sure that the projector and the screen are placed squarely (90 degrees) to each other. Adjusting the projection angle, direction, and height of the unit may also help.
  • J
    jpaulAug 30, 2025
    What does it mean when LAMP/COVER indicator flashes on Yamaha Projector?
    • S
      Spencer MedinaAug 30, 2025
      If the LAMP/COVER indicator is flashing on your Yamaha Projector, it means that the lamp has either exceeded its specified usage hours or has burned out. In either case, you will need to replace the lamp with a new one.
  • S
    sarawhiteSep 3, 2025
    Why is the image unstable on my Yamaha Projector?
    • M
      Megan PenaSep 3, 2025
      If the image from your Yamaha Projector is unstable, it's likely due to connection issues. Ensure that all connection cables are correctly connected to the appropriate terminals on the unit.
  • C
    Carrie RogersSep 7, 2025
    What does it mean when the TEMP/FAN indicator lights up on Yamaha Projector?
    • K
      Kyle RamirezSep 8, 2025
      If the TEMP/FAN indicator light is on for your Yamaha Projector, it indicates that the temperature inside the unit is extremely high. Check the ventilation slots to ensure they are not covered, as this can cause overheating.

Summary

Important Safety Instructions

Explanation of Graphical Symbols

Explains the meaning of warning symbols used in the manual for user safety.

Electrical Safety Precautions

Details essential warnings for preventing electric shock and fire hazards.

Serial Number and Manual Retention

Instructions for recording the model's serial number and keeping the manual.

FCC Information

Notice: Do Not Modify Unit

A critical warning against modifying the product to comply with FCC regulations.

General Operating Precautions

Installation and Operation Precautions

General advice on proper installation and operation to ensure performance and safety.

Wiring and Safety Information

Details on wire color coding and specific plug requirements for different regions.

Inappropriate Places for Installation

Environmental and Stability Risks

Identifies unsuitable locations to prevent damage from temperature, humidity, dust, impact, or instability.

Controls and Functions

Front Panel and Terminal Panel Layout

Diagram and description of the projector's front panel and various input/output terminals.

Control Panel Overview

Details the buttons and indicators located on the projector's rear control panel.

Remote Control Functions

Explains the operation of buttons on the remote control for projector functions.

Loading Remote Batteries

Instructions on how to insert batteries into the remote control.

How to Install

Screen and Projection Distance

Guidance on determining the optimal distance between the projector and screen for various sizes.

Screen Setting and Aspect Ratio

Adjusting screen height and aspect ratio for correct image projection.

Digital Lens Shift Adjustment

How to vertically adjust the projected image digitally for precise positioning.

Installation Methods Overview

Describes different installation options: tabletop, ceiling mount, and rear projection.

How to Connect

Connecting Video Components

Details on connecting various video sources like composite, S-Video, and component signals.

Connecting a Computer

Instructions for connecting computers via analog RGB (BNC, D-Sub) and digital DVI.

Using This Unit

Turning the Unit On

Step-by-step guide on powering on the projector and confirming readiness.

Focusing the Image

Instructions on using the focus ring and zoom ring for sharp image projection.

Selecting Input Source

How to choose the active input signal from the available connection terminals.

Image Freezing and Hiding

Using the STILL and HIDE functions to temporarily pause or turn off the projected image.

Selecting Aspect Ratio Modes

Explains how to adjust the image aspect ratio for different types of input signals.

Aspect Modes for 16:9 Screen

Details specific aspect ratio modes available when the screen aspect is set to 16:9.

Turning the Unit Off

Procedure for safely shutting down the projector, including cooling the lamp.

Indicator Lights Explanation

Description of the status indicators on the projector and their meanings.

Menu Structure

Menu Groups Overview

Introduction to the menu hierarchy: groups, items, and submenus.

Image, Signal, and Initial Settings

Details on adjusting image quality, signal input, and initial setup parameters.

Setup Settings (SETUP)

Configuration options related to installation, screen, and keystone correction.

Signal Input Options

Specific menu items for configuring signal input, including aspect ratio and noise reduction.

Initial Configuration Options

Settings for color system, language, power saving, and lamp time reset.

Setup and Installation Options

Detailed setup options for installation, screen aspect, keystone, and remote sensor.

Menu Operation

Menu Screen and Buttons

Explains how to navigate the menu system using buttons on the remote and control panel.

Basic Menu Navigation

Step-by-step guide on accessing and adjusting menu items and parameters.

Submenu Operations

Describes how to operate submenus, including different operation groups.

Submenu Operation Groups A and B

Detailed steps for performing menu operations within specific submenu groups.

White Balance and Lamp Time Submenus

Examples of operating submenus for adjusting white balance and lamp running time.

Reset Submenu Example

Illustrates the process of resetting parameters to factory settings via the submenu.

One-Touch Image Menu

How to access and use the quick image adjustment menu.

Changing Menu Location

Instructions on how to reposition the menu display on the screen.

Memory Function

Selecting Memory Settings

How to select and store up to six different projector setting configurations.

Resetting to Factory Settings

Procedures for resetting individual parameters or all memory settings to default values.

Additional Information

Glossary of Terms

Definitions of technical terms and technologies used in the manual, like DLP and Progressive scan.

Projectable Signal Formats

Lists the supported video and PC signal types and formats for projection.

Menu Item Signal Compatibility

Table showing which menu items are adjustable based on the type of input signal.

Message Display Guide

Explanation of various messages that may appear on the screen during operation.

Maintenance

Regular Care and Filter Cleaning

Instructions for cleaning the projector housing and the air filter for optimal performance.

Replacing the Lamp Cartridge

Step-by-step guide for safely replacing the projector lamp when it reaches end-of-life.

Troubleshooting

Common Problems and Solutions

A guide to diagnosing and resolving common issues encountered with the projector.

Specifications

Optical, Electrical, and Input Specifications

Detailed technical specifications including optical performance, power, and input formats.

Accessories List

Lists the items included with the projector, such as power cord, remote, and adapters.

Dimensional Drawings

Provides detailed physical dimensions and mounting hole information for the projector.

Yamaha DPX-1 Specifications

General IconGeneral
Brightness1100 ANSI lumens
Resolution1280x720
Contrast Ratio1300:1
Lamp Life2000 hours
Weight5.5 kg
Display TechnologyDLP
Native Resolution1280x720
Aspect Ratio16:9
Projection Size300 inch
Input PortsComponent, S-Video, Composite

Related product manuals