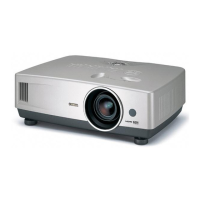
EasyManua.ls Logo

Yamaha LPX-510 User Manual

Yamaha LPX-510
83 pages
To Next Page IconTo Next Page
Page #1 background imageLoading...
Page #1 background image
LPX-510
Home Cinema Projector
OWNER'S MANUAL
U R T G
ENGLISH

Table of Contents

Questions and Answers:

Yamaha LPX-510 Specifications

General IconGeneral
BrandYamaha
ModelLPX-510
CategoryProjector
LanguageEnglish

Summary

IMPORTANT SAFETY INSTRUCTIONS

Explanation of Graphical Symbols

Explains the meaning of symbols like lightning flash and exclamation mark used in the manual.

WARNING

Alerts users to reduce the risk of fire or electric shock by not exposing the unit to rain or moisture.

COMPLIANCE INFORMATION STATEMENT

FCC INFORMATION (for US customers)

Details compliance with FCC rules and potential interference issues for US users.

Caution: Read this before operating this unit.

Installation

Provides guidelines for properly installing the projector in a suitable environment for optimal performance and safety.

Operation

Covers essential steps for operating the projector, including power on/off and basic adjustments.

Others

Includes miscellaneous points like cleaning the lens and lamp replacement advice.

For U.K. customers

Specific guidance for users in the UK regarding plug fitting and wiring.

For Canadian Customers

Specific guidance for users in Canada regarding plug fitting and compliance.

Notations used in this Owner's Manual

Notes on Handling and Storage

Lamp Operating Errors

Describes common issues related to the projector's lamp, such as failure to turn on or flickering.

Notes on Carrying the Projector

Provides essential precautions to take when moving or transporting the projector.

Accessories

Features of the Projector

Turning On the Projector

Connecting the Power Cord

Step-by-step instructions on how to safely connect the projector to a power source.

Turning On the Power and Projecting Images

Details the procedure for powering on the projector and displaying images.

Turning Off the Projector

Adjusting the Screen Image

Adjusting the Image Size (Zoom adjustment)

Explains how to change the size of the projected image using the zoom function.

Projection image position adjustment (Lens shift)

Describes how to adjust the projected image's position horizontally and vertically without distortion.

Correcting Keystone Distortion (Keystone)

Explains how to correct trapezoidal image distortion caused by angling the projector.

Displaying a Test Pattern

Guides users on projecting test patterns for calibration and adjustment purposes.

Adjusting the Image Quality

Focus adjustment

Instructions on how to adjust the projector's focus for a sharp and clear image.

Brightness adjustment (Iris adjustment)

Explains how to adjust the image brightness using the iris control for different lighting conditions.

Selecting the picture mode

Details how to choose from preset picture modes to optimize image appearance for various content.

Selecting the Image Aspect Ratio

Guides users on setting the correct aspect ratio for projected images to match the source content.

Advanced Operations

Functions for Enhancing Projection

Introduces advanced features for improving image quality and projection experience.

Saving and Retrieving Image Quality Settings (Memory Save)

Explains how to store and recall custom image settings for quick access.

Using the Menu Functions

Provides an overview of how to navigate and utilize the projector's comprehensive menu system.

Functions for Enhancing Projection

Description of Functions

Provides detailed explanations of various image enhancement functions available in the projector.

White Level Adjustment

Adjusts the brightness of bright shades while maintaining the black level.

Black Level Adjustment

Adjusts the brightness of dark shades while maintaining the white level.

Input Level Adjustment

Adjusts the overall brightness of the image for better overall visibility.

Contrast Adjustment

Modifies the difference between bright and dark areas for sharper images.

Absolute Color Temperature and Flesh Tone Adjustment

Allows adjustment of overall image tint and specific flesh tones for desired color reproduction.

RGB adjustment

Enables fine-tuning of individual red, green, and blue color components for detailed image control.

Storing image quality settings

Details the procedure for saving current image adjustments to memory for later use.

Retrieving Saved Image Quality Settings

Explains how to load previously saved image quality settings.

Using the Menu Functions

List of Menus

Provides an overview of all available menus and their corresponding sections in the manual.

Signal

Adjusts settings related to incoming signal types and formats for optimal display.

Screen

Covers adjustments for image position, keystone correction, and projection method.

Operation

Allows configuration of power-saving, lamp power, standby mode, and lock settings.

User's Logo

Enables personalization by recording a custom image as a startup or hide screen logo.

On-Screen Display

Configures the appearance and behavior of menus and messages shown on the screen.

Input Signal

Manually selects or automatically detects the video signal format for connected sources.

Reset

Returns specific menu settings to their default factory values.

"Info" menu

Displays detailed status information about the projector's current operation.

"Reset" menu

Provides options to reset various projector settings to default values.

Picture Quality

Contains settings for adjusting image sharpness, tracking, sync, and color intensity.

Color Adjustment

Allows adjustment of absolute color temperature and flesh tones for accurate color representation.

Picture Mode

Selects from predefined modes (Dynamic, Bright, Cinema, PC) to optimize image settings for different content.

Memory Save

Stores current "Image" and "Setup" menu settings for quick recall.

Auto Setup

Automatically adjusts image settings for optimal display when the input signal changes.

Reset

Resets all "Image" menu adjustments to their default values, except for saved memory.

Input Signal

Manages video signal format selection for different ports and sets the display language for menus and messages.

Screen

Covers adjustments for image position, zoom caption display, keystone correction, and projection orientation.

Operation

Configures sleep mode, lamp power levels, standby mode conditions, trigger output, lock settings, and LCD panel adjustments.

User's Logo

Explains how to record and use a custom image as a startup screen or hide screen logo.

On-Screen Display

Controls the visibility and appearance of menu elements like position, navigation bar, message display, and startup screen.

Input Signal

Manages video signal format selection for different ports and sets the display language for menus and messages.

Language

Sets the display language for messages and menus.

Reset

Returns all "Setup" menu adjustments to default values, excluding specific settings.

Displaying and Operating Full Menus

Guides users on accessing and navigating the complete menu structure of the projector.

Displaying and Operating Line Menus

Explains how to use simplified line menus for quick adjustments to picture quality settings.

Troubleshooting

When Having Some Trouble

Introduces the troubleshooting section, categorizing common issues for easier diagnosis.

When the Indicators Provide No Help

Offers solutions for problems not covered by the projector's status indicators.

Problems relating to images

Addresses issues such as no image display, incorrect colors, or fuzzy images.

Problems when projection starts

Covers difficulties encountered during the projector's startup sequence.

Problems with the remote control

Provides solutions for situations where the remote control is unresponsive.

No images appear

Offers troubleshooting steps for scenarios where the projector fails to display any image.

The message "Not Supported." is displayed

Helps resolve issues when the projector indicates an unsupported signal format.

The message "No Signal." is displayed

Guides users on troubleshooting when the projector detects no input signal.

Images are fuzzy or out of focus

Provides steps to fix blurry or out-of-focus projected images.

Interference or distortion appear in images

Offers solutions for image quality problems like lines, noise, or distortion.

Image is truncated (large) or small

Addresses issues where the projected image is improperly sized or cut off.

Image colors are not right

Provides solutions for incorrect color reproduction or monochrome display.

Images appear dark

Offers steps to resolve issues with projected images being too dim.

Projection stops automatically

Explains how to fix the projector shutting down unexpectedly.

Vertical interference appears in the projected images

Guides users on resolving vertical line issues in the projected image.

Power does not turn on

Provides troubleshooting steps for when the projector fails to power on.

Appendices

Maintenance

Provides information on keeping the projector in good working condition for longevity.

Optional Accessories

Lists additional items available for purchase to enhance projector functionality.

List of Supported Signal Resolutions

Details the various video resolutions and formats the projector can accept.

Specifications

Presents technical details and performance characteristics of the projector.

Part Names and Functions

Identifies the different parts of the projector and explains their purpose.

Glossary

Defines terms used in the manual that may be unfamiliar to the user.

Maintenance

Cleaning

General guidance on cleaning the projector to maintain its performance and appearance.

Cleaning the Projector Case

Instructions on how to clean the exterior of the projector safely.

Cleaning the Lens

Provides methods for cleaning the projector lens without causing damage.

Cleaning the Air Filter

Explains how to clean the air filter to prevent overheating and ensure proper operation.

Removing the Air Filter

Step-by-step instructions for detaching the air filter for cleaning or replacement.

Replacing Consumables

Explains procedures for replacing parts that wear out over time, such as the lamp.

Lamp Replacement Period

Indicates when the projector's lamp is nearing the end of its lifespan.

Replacing the Lamp

Provides a detailed, step-by-step guide for safely replacing the projector lamp.

Resetting the Lamp Operating Time

Explains how to reset the lamp usage counter after replacing the lamp.

If vertical stripe interference appears in the projected images

Offers specific adjustments to correct vertical stripe issues in the projected image.

Optional Accessories

List of Supported Signal Resolutions

Specifications

Part Names and Functions

Rear

Details the connection ports and features on the rear panel of the projector.

Base

Identifies components and features located on the bottom of the projector.

Front/Top

Identifies parts and controls located on the front and top surfaces of the projector.

Control Panel

Describes the buttons and indicators on the projector's main control panel.

Remote Control

Explains the layout and functions of each button on the projector's remote control.

Glossary

Setup Guide

Before Using the Remote Control

Instructions on preparing the remote control, including battery insertion.

Setup

Covers initial setup steps, including screen size and projector placement.

Connecting to a home theater system

Guides on connecting the projector to audio-visual equipment.

Connecting to a Computer

Provides instructions for connecting the projector to a computer for display.

Inserting the batteries and replacement period

Details how to insert batteries into the remote control and when to replace them.

Using the remote control and remote operating range

Explains how to operate the remote control effectively within its specified range.

Screen Size and Setting-up Distance

Provides tables showing optimal projection distances for various screen sizes.

Setting-up Methods

Describes the four supported projection methods for displaying images.

Connecting to a home theater system

Guides on connecting the projector to audio-visual equipment.

Connecting to a Computer

Provides instructions for connecting the projector to a computer for display.

Related product manuals