

V
valeriethomasAug 16, 2025
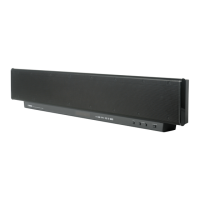
What to do if my Yamaha Speaker System fails to turn on?
- MMegan MezaAug 16, 2025
If your Yamaha Speaker System doesn't turn on when you press the STANDBY/ON button, or it enters standby mode shortly after being turned on, check the following: * Ensure the power supply cable is securely connected to the AC wall outlet. * If the unit was exposed to a strong electric shock (like lightning), set it to standby mode, disconnect the power cable, wait 30 seconds, reconnect it, and then use it normally.