RX-V1600/DSP-AX1600
18
RX-V1600/
DSP-AX1600
5. Connect the power cable of main unit to the AC outlet.
While pressing the “PRESET/TUNING
” key and “A/
B/C/D/E” key of the main unit, press the “MASTER ON/
OFF” key to activate the DIAG function.
a.
Using the “PROGRAM” knob of the main unit, select
the DIAG menu in the figure below.
5. 本機の電源コードをACコンセントに接続し、本機の
PRESET/TUNING
キーとA/B/C/D/Eキーを押し
ながら、MASTERON/OFFキーを押し、ダイアグを
起動します。
a.
本機の
PROGRAM
ノブを回し
、下図のダイアグメ
ニューを選択します。
b. 本機のPRESET/TUNING
キーを使い、下図の
ダイアグメニューを選択します。
b.
Using the “PRESET/TUNING
” key of the main
unit, select the DIAG sub-menu in the figure below.
• Writing of MAIN / MAINの書き込み
• Writing of VIDEO / VIDEOの書き込み
4.
レシーバのモデル名、
マイコン、ポート、ファイル名を
選択します。
・Model
V1600を選択します。
・Micom
MAINの書き込み時 :Mainを選択します。
VIDEOの書き込み時:Videoを選択します。
・ComPort
接続しているRS-232Cポートを選択し[connect]ボタ
ンを押します。
(ComPortStatusがconnectedに変わります)
・Filename
MAINの書き込み時 :V16Mxxxx.motを選択します。
VIDEOの書き込み時:V16Vxxxx.motを選択します。
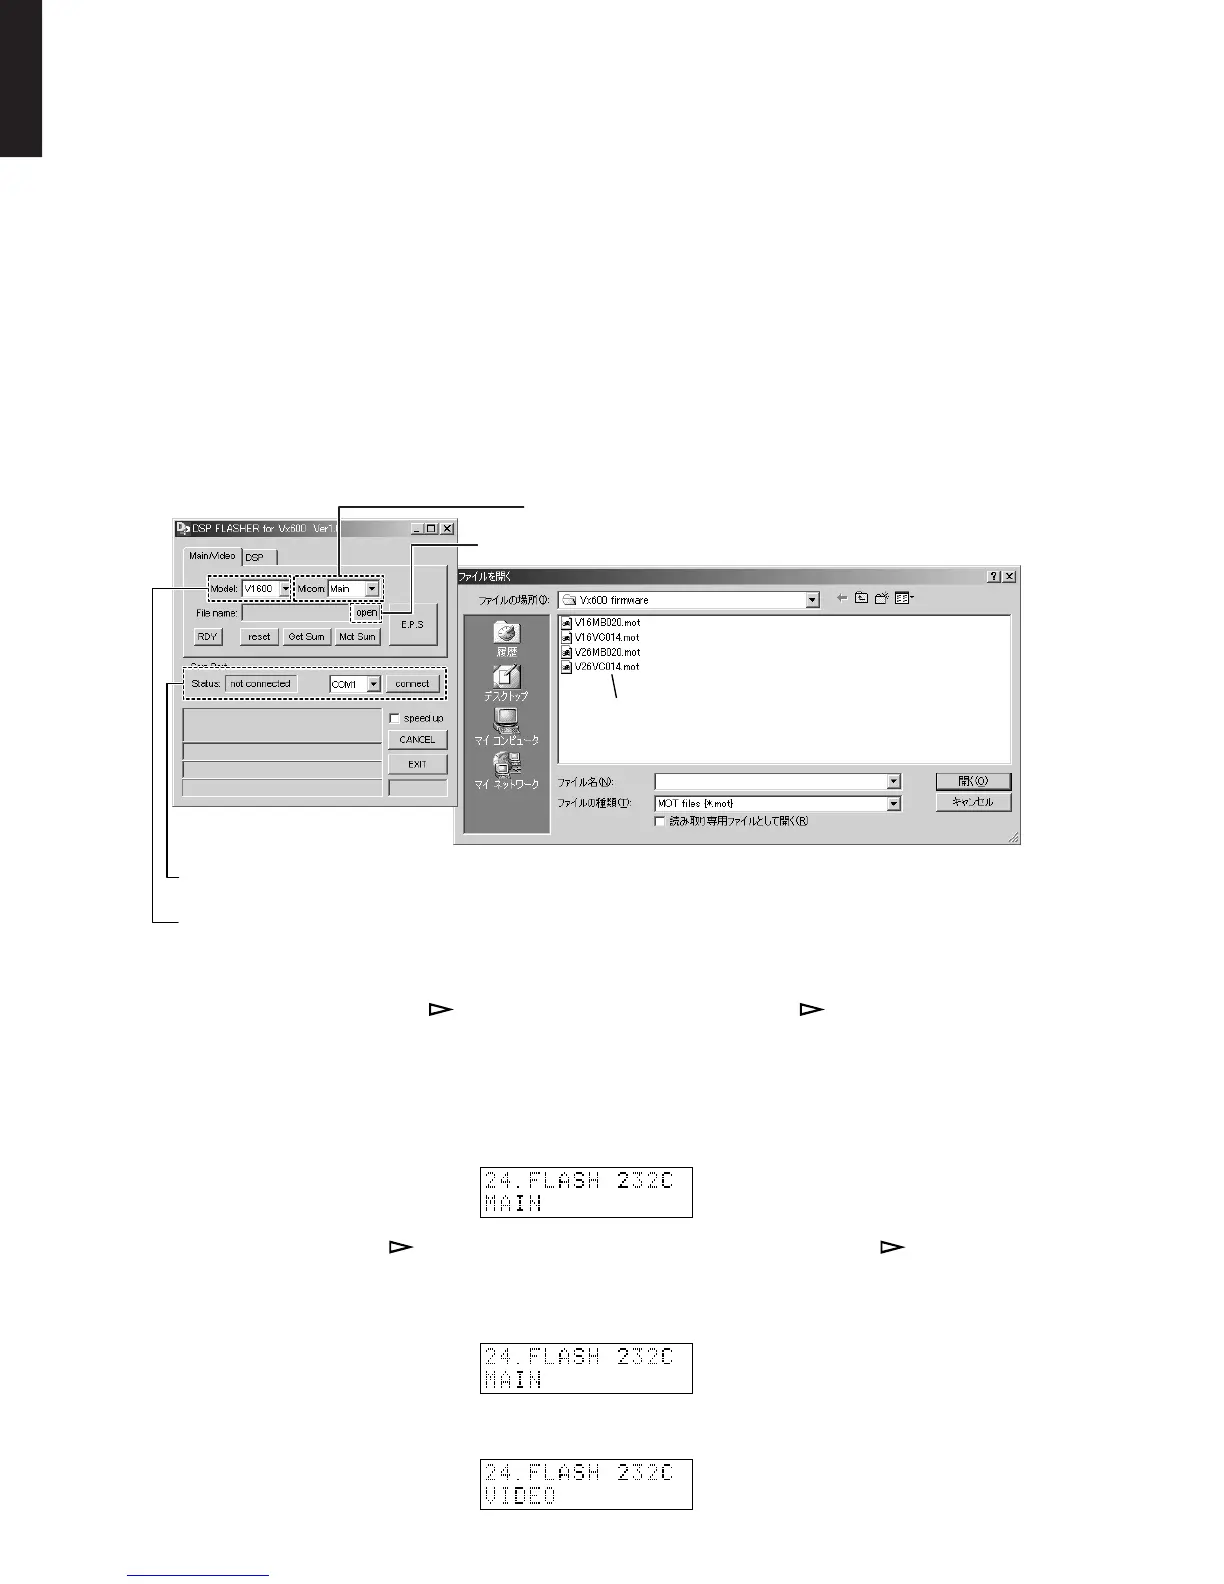
4. Select the model name of the receiver, the Micom, Com
Port and file name.
· Model
Select “V1600”.
· Micom
Writing of MAIN : Select “Main”.
Writing of VIDEO : Select “Video”
· Com Port
Select the port of RS-232C to use and press the
[connect] button.
(Com Port Status changes to “connected”)
· File name
Writing of MAIN : Select “V16Mxxxx.mot”.
Writing of VIDEO : Select “V16Vxxxx.mot”
Press this button to open the window
このボタンを押すとウィンドウが開きます
Select the firmware
ファームウェアを選択します
Select the model name of the receiver
レシーバーのモデル名を選択します
Select the port of RS-232C to use and press the [connect] button
接続しているRS-232Cポートを選択し[connect]ボタンを押します
Select the Micom
マイコンを選択します

 Loading...