Maintenance
87
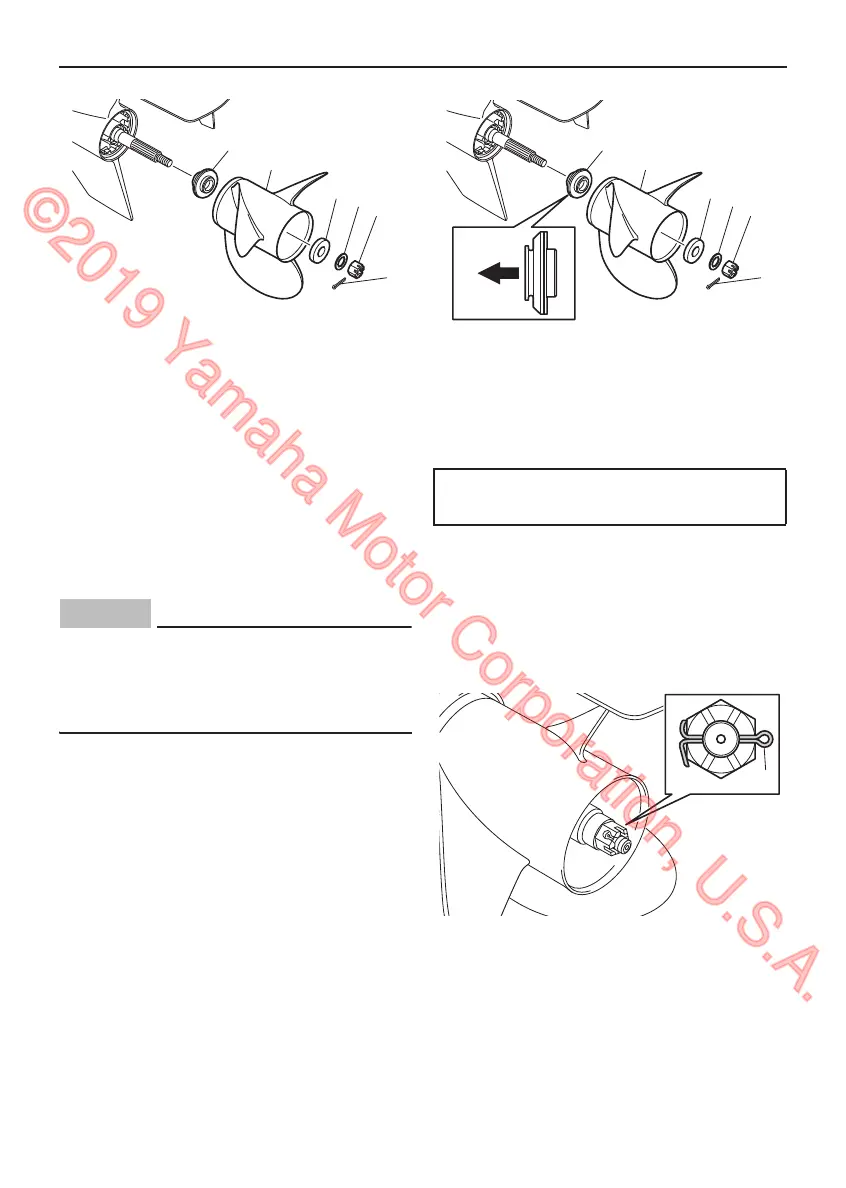
3. Remove the propeller, washer (if
equipped), and thrust washer.
EMU30673
Installing propeller
EMU29236
Spline models
ECM00502
Make sure to use a new cotter pin and
bend the ends over securely. Otherwise,
the propeller could come off during oper-
ation and be lost.
1. Apply Yamaha marine grease or a corro-
sion resistant grease to the propeller
shaft.
2. Install the spacer (if equipped), thrust
washer, washer (if equipped), and pro-
peller on the propeller shaft. NOTICE:
Make sure to install the thrust washer
before installing the propeller. Other-
wise, the lower case and propeller
boss could be damaged.
[ECM01882]
3. Install the spacer (if equipped) and the
washer. Tighten the propeller nut to the
specified torque.
4. Align the propeller nut with the propeller
shaft hole. Insert a new cotter pin in the
hole and bend the cotter pin ends.
NOTICE: Do not reuse the cotter pin.
Otherwise, the propeller can come off
during operation.
[ECM01892]
If the propeller nut does not align with the
propeller shaft hole after tightening to the
specified torque, tighten the nut further to
align it with the hole.
1. Cotter pin
2. Propeller nut
3. Washer
4. Spacer
5. Propeller
6. Thrust washer
1. Cotter pin
2. Propeller nut
3. Washer
4. Spacer
5. Propeller
6. Thrust washer
Propeller nut tightening torque:
54 N·m (5.51 kgf·m, 39.8 lb·ft)
1. Cotter pin
©2019 Yamaha Motor Corporation, U.S.A.