INSTRUMENT AND CONTROL FUNCTIONS
4-9
4
5. Push the “RESET” button to set
the minutes.
6. Push the “SELECT” button and
then release it to start the clock.
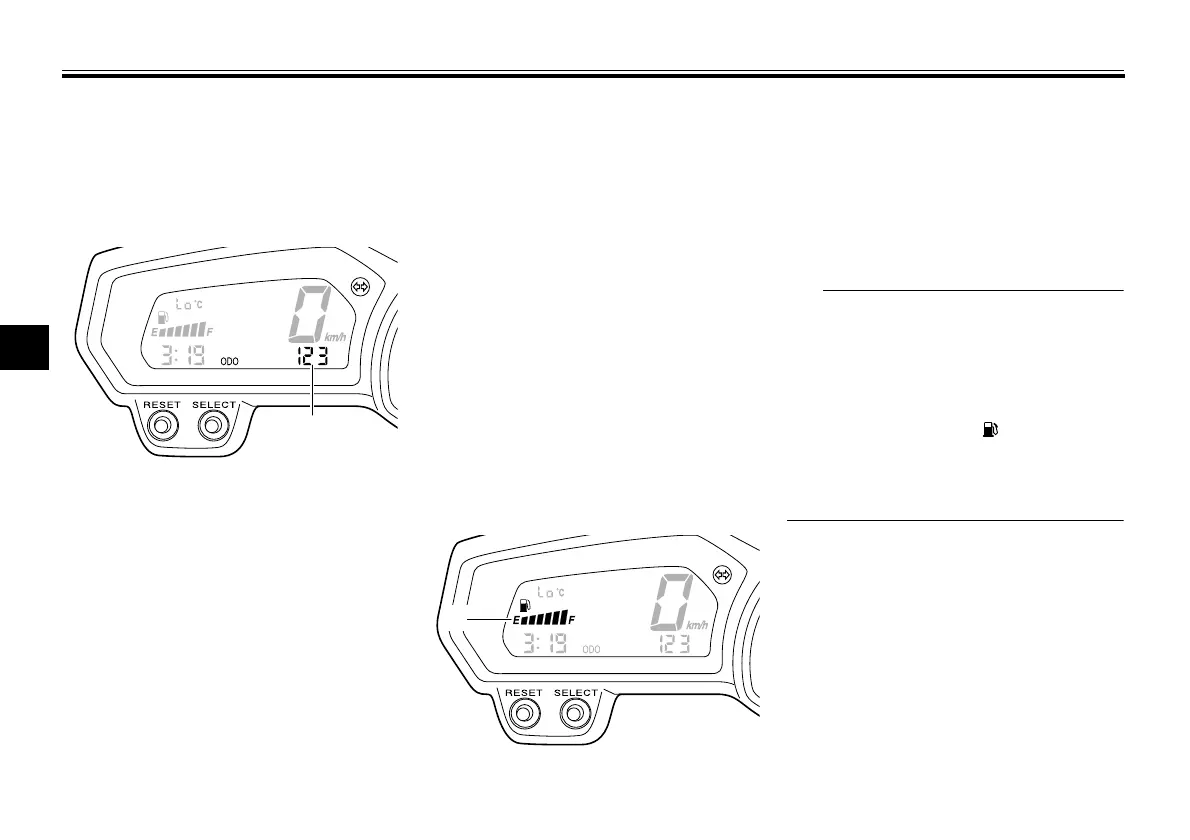
Odometer and tripmeter modes
Push the “SELECT” button to switch
the display between the odometer
mode “ODO” and the tripmeter modes
“TRIP A” and “TRIP B” in the following
order:
TRIP A → TRIP B → ODO → TRIP A
When the fuel amount in the fuel tank
decreases to 3.4 L (0.90 US gal,
0.75 Imp.gal), the left segment of the
fuel meter will start flashing, and the
odometer display will automatically
change to the fuel reserve tripmeter
mode “F-TRIP” and start counting the
distance traveled from that point. In that
case, push the “SELECT” button to
switch the display between the various
tripmeter and odometer modes in the
following order:
F-TRIP → TRIP A → TRIP B → ODO
→ F-TRIP
To reset a tripmeter, select it by push-
ing the “SELECT” button, and then
push the “RESET” button for at least
one second. If you do not reset the fuel
reserve tripmeter manually, it will reset
itself automatically and the display will
return to the prior mode after refueling
and traveling 5 km (3 mi).
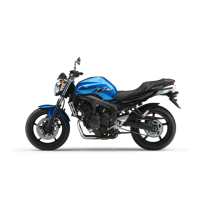
Fuel meter
The fuel meter indicates the amount of
fuel in the fuel tank. The display seg-
ments of the fuel meter disappear to-
wards “E” (Empty) as the fuel level
decreases. When the last segment on
the left starts flashing, refuel as soon as
possible.
This fuel meter is equipped with a self-
diagnosis system. If a problem is de-
tected in the electrical circuit, the follow-
ing cycle is repeated until the
malfunction is corrected: fuel level seg-
ments and symbol “ ” flash eight
times, then go off for approximately 3
seconds. If this occurs, have a Yamaha
dealer check the electrical circuit.
1. Odometer/tripmeter/fuel reserve tripmeter
1. Fuel meter
U39P22E0.book Page 9 Friday, November 16, 2012 5:47 PM


 To Next Page