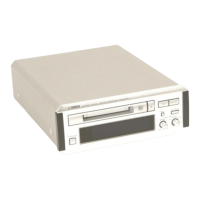
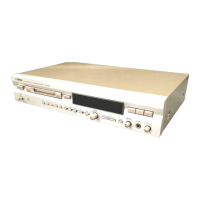
MDX-596
MDX-596
11
3. AUTO adjustment mode Disc in use: TDYS1 (SONY) [for reproduction] or commercially available
mini disc for recording
Step Setting method Remark Display
1
2
3
4
5
6
Set the TEST mode.
Load a disc.
Press the SET/ENTER button once.
Adjusted values are output.
Adjustment is completed.
When adjustment is OK, press the
SET/ENTER button.
Press the INPUT button.
Press the DELETE/CANCEL button.
When adjustment is NG, press the
DELETE/CANCEL button.
No disc is loaded.
AUTO adjustment menu
Automatic adjustment is started after sliding to the innermost
track.
“ *** ” changes in the following order when a high reflecting disc
(disc for reproduction) is used.
PEG -> HAG
“ *** ” changes in the following order when a low reflecting disc
(disc for recording) is used.
PEG -> LAg -> GCG -> GEG -> LAG
Proceed to Step 4 when adjustment is OK.
Proceed to Step 6 when adjustment is NG.
Continuous reproduction (bit section) (Address + C1 error display)
Continuous reproduction (group section) (Address + C1 error display)
Continuous reproduction (group section) (Address + ADIP error display)
Display returns to the AUTO adjustment menu display.
There is an abnormality at the adjusted point such as PEG.
Refer to “Troubleshooting”. (page 20)
[ EJECT ]
[ LOADING ]
[ AUTO _ AJST _ ]
[ *** : _ _ _ _ _ _ ]
[ _ COMPLETE _ ]
[ Can't _ ADJ. ]
[ s XXXX c YYYY ]
[ a XXXX c YYYY ]
[ a XXXX a YYYY ]
[ AUTO _ AJST _ ]
[ Can't _ ADJ. ]
Note) *** : Adjustment name, XXXX: Address, YYYY: Measured value
2. AUTO preliminary adjustment mode Disc in use: MMD-318 [for pre-adjustment]
Step Setting method Remark Display
1
2
3
4
5
6
Set the Test mode.
Load a disc.
Press the EDIT button once.
Press the SET/ENTER button once.
Adjusted values are output.
Adjustment is completed.
When adjustment is OK, press the
DELETE/CANCEL button.
When adjustment is NG, press the
DELETE/CANCEL button.
No disc is loaded.
Auto adjustment menu
Auto preliminary adjustment menu
Auto preliminary adjustment is started after sliding to the
innermost track.
“ *** ” changes in the following order during automatic
adjustment.
HAo -> ................. -> TCO
Proceed to Step 5 when adjustment is OK.
Proceed to Step 6 when adjustment is NG.
The display returns to the AUTO preliminary adjustment menu.
There is an abnormality at the adjusted point such as HAo.
Refer to “Troubleshooting”. (page 20)
[ EJECT ]
[ LOADING ]
[ AUTO _ AJST _ ]
[ _ AUT _ YOBI _ ]
[ *** : _ _ _ _ _ _ ]
[ _ COMPLETE _ ]
[ Can't _ ADJ. ]
[ _ AUT _ YOBI _ ]
[ Can't _ ADJ. ]
4. AUTO AFB adjustment mode Disc in use: Commercially available mini disc for recording
Step Setting method Remark Display
1
2
3
4
5
Set the Test mode.
Load a disc.
Press the DISPLAY button once.
Press the SET/ENTER button once.
Press the DELETE/CANCEL button.
No disc is loaded.
Auto adjustment menu
Auto AFB adjustment menu
Auto AFB adjustment is started.
Adjusted values are output.
The display returns to the AUTO AFB adjustment menu.
[ EJECT ]
[ LOADING ]
[ AUTO _ AJST _ ]
[ _ AUT _ AFB _ _ ]
[ FAB YY _ ZZZZ ]
[ YY _ ZZZZ _ _ _ ]
[ _ AUT _ AFB _ _ ]
Note) YY, ZZZZ: Measured value
 Loading...