Creating a Voice by using the Sampling function
96
Owner’s Manual
Quick Guide — Advanced Course
Immediately after sampling, the sample is assigned only to
one key — the one set in step #4 as “KeyBank.” This display
lets you expand the key range within which the sample is
sounded. Here, set the key range to C2 - B3.
For example, in step #4 set Keybank to “G4,” sing into the
microphone as described in step #7 (matching the pitch G4, if
necessary), and set the Key Range to C4 - E5 in step #10. As a
result, the sample is assigned to the keys as illustrated below.
When you play the sample from the keyboard, the more
distant the played samples are from the original key, the less
natural the samples sound. For this reason, you should try to
make multiple samples and multiple key ranges, so that each
key range is shorter and the samples sound more natural.
Refer to “Saving a Sample” on page 97.
The recorded (edited) sample data resides temporarily in DIMM (page 187).
Because data contained in DIMM is lost when the power is turned off, you
should always save any data residing in DIMM to a SmartMedia /USB
storage device before turning off the power.
About Samples, Key Banks, Waveforms, and Voices
Understanding the Sampling-related terms below will
help you better understand the Sampling function itself
and how to use it. Keep in mind the hierarchy here as it
relates to sampling — the audio source (e.g., your voice)
starts as a Sample, becomes part of a Key Bank, which
makes up a Waveform, which is used to create a Voice.
● Sample
The sound obtained via the Sampling function is
referred to as “Sample.”
● Key Bank
In order to play the sample from the keyboard, the
sample must be assigned to notes on the keyboard.
First, assign the sample to a specified key when
sampling (step #4 on page 94), then expand the key
range within which the sample is sounded (step #10 on
page 96). The Key Range and the Velocity Range within
which the sample is sounded is referred to as a “Key
Bank.” In step #10 above, you saw how to set the Key
Range. From the same display, you can also set a
Velocity Range. Using these two parameters, you can
create a Key Bank.
● Waveform
The group of Key Banks to which sample data is
assigned is referred to as a “Waveform.” The Waveform
is assigned to each Element of a Normal Voice. In step
#11 above, you saw how to add Key Banks one by one
to create a Waveform.
● Voice
After completing a Waveform, you can create an
Element by applying various sound-making parameters
such as Pitch, Filter, Amplitude and other parameters
such as Effect and EQ to it. Finally, combine four
Elements (each containing its own Waveform) to create
a Normal Voice.
n You can select and hear the Waveforms created via the
Sampling function as well as all the preset Waveforms in the
WAVE display ([VOICE] → [EDIT] → Element selection →
[F1] OSC → [SF1] WAVE).
9
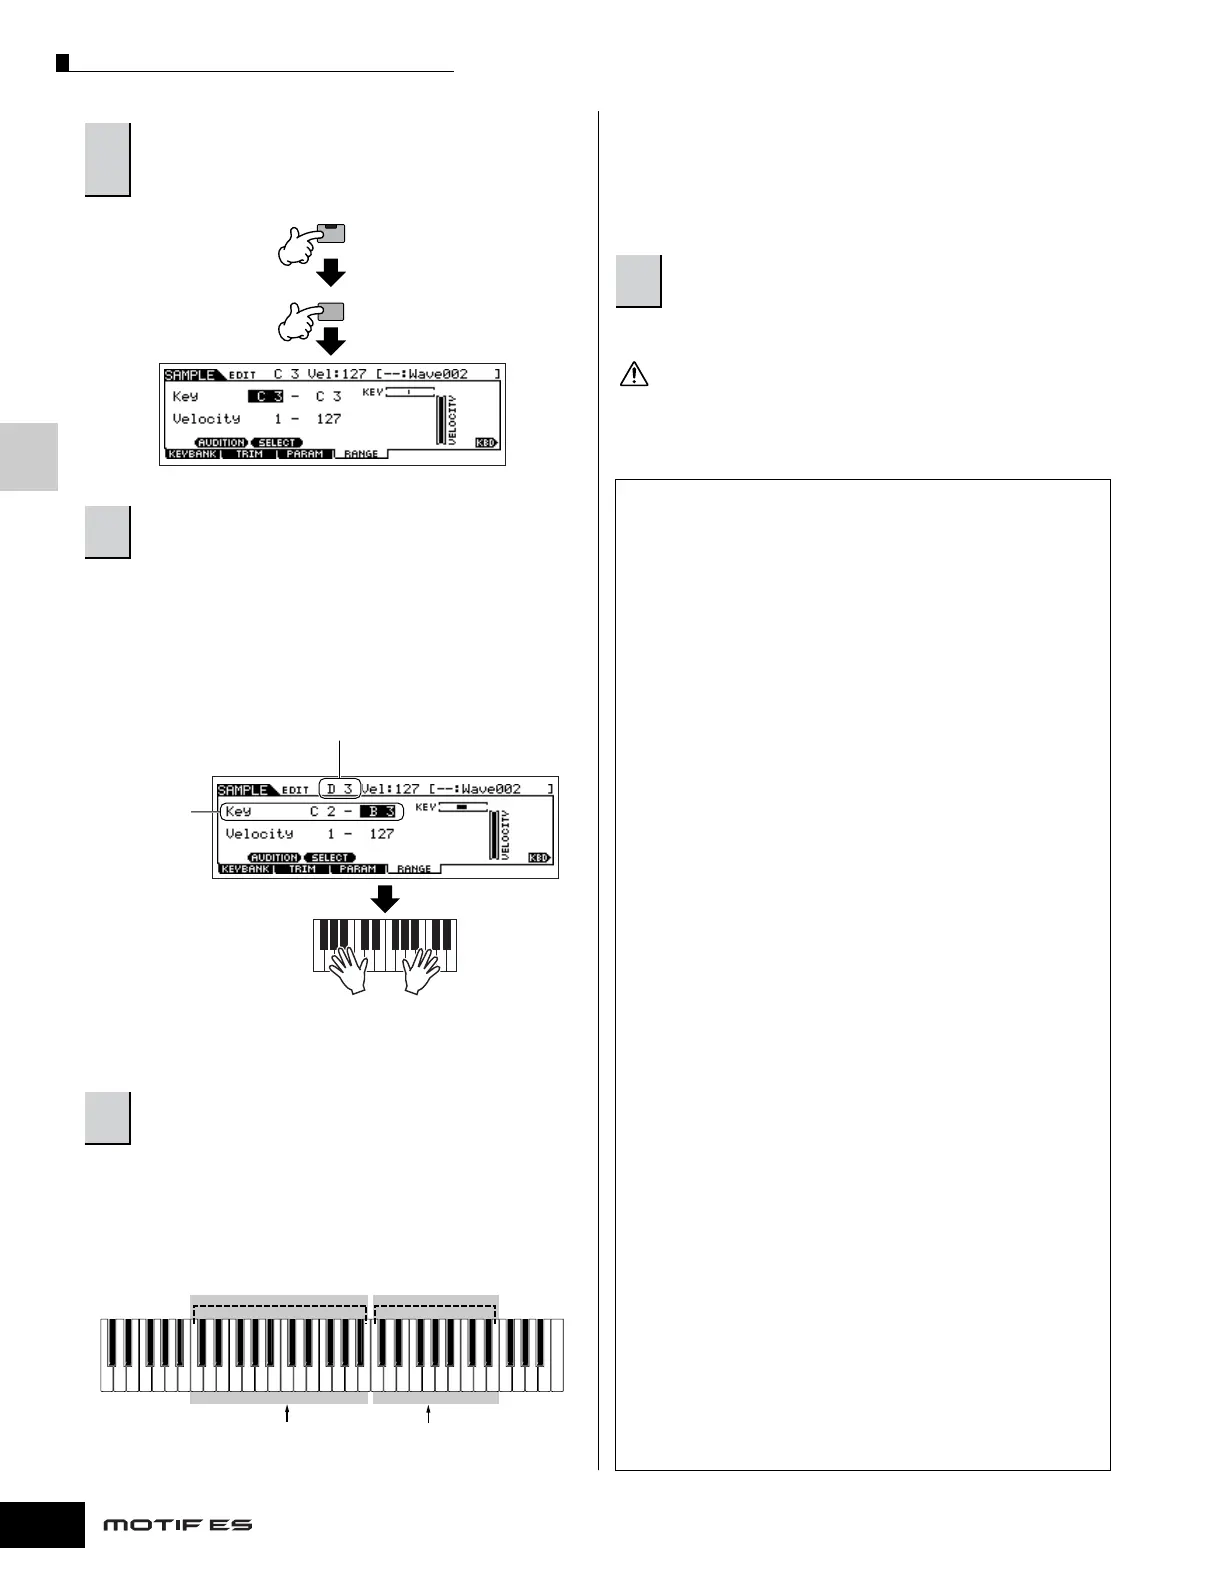
Press the [EDIT] button to enter the Sampling
Edit mode, then press the [F4] RANGE button to
call up the Range setting display.
10
Set the key range within which the sample is
sounded.
11
Repeat step #4 - 10 to add another sample to the
same Voice (Waveform).
F4
EDIT
COMPARE
Set the key
range.
Use the data
dial, [INC/YES]
and [DEC/NO]
button, or press
the key while
holding the
[INFORMATION]
button.
Play the keyboard within the key range set above.
Your sampled voice is sounded, following the pitches of the
notes you play.
Indicates the original key of the currently selected sample.
If you wish to select a different sample, call up the [F1]
KEYBANK display, then press a different key while holding
the [INFORMATION] button.
C3 G4
The sample is sounded
within this key range.
The sample is sounded
within this key range.
The original sample is
assigned to this key.
The original sample is
assigned to this key.
12
Save your newly created User Voice to a
SmartMedia/USB storage device.
CAUTION

 Loading...