MSP5 STUDIO
10
8. Heat Sink (Time required: about 6 minute)
8-1 Remove the rear panel assembly. (See procedure 2)
8-2 Remove the power transformer and the bracket trans.
(See procedure 5-2, 5-3)
8-3 Remove the AMP circuit board. (See procedure 5-4)
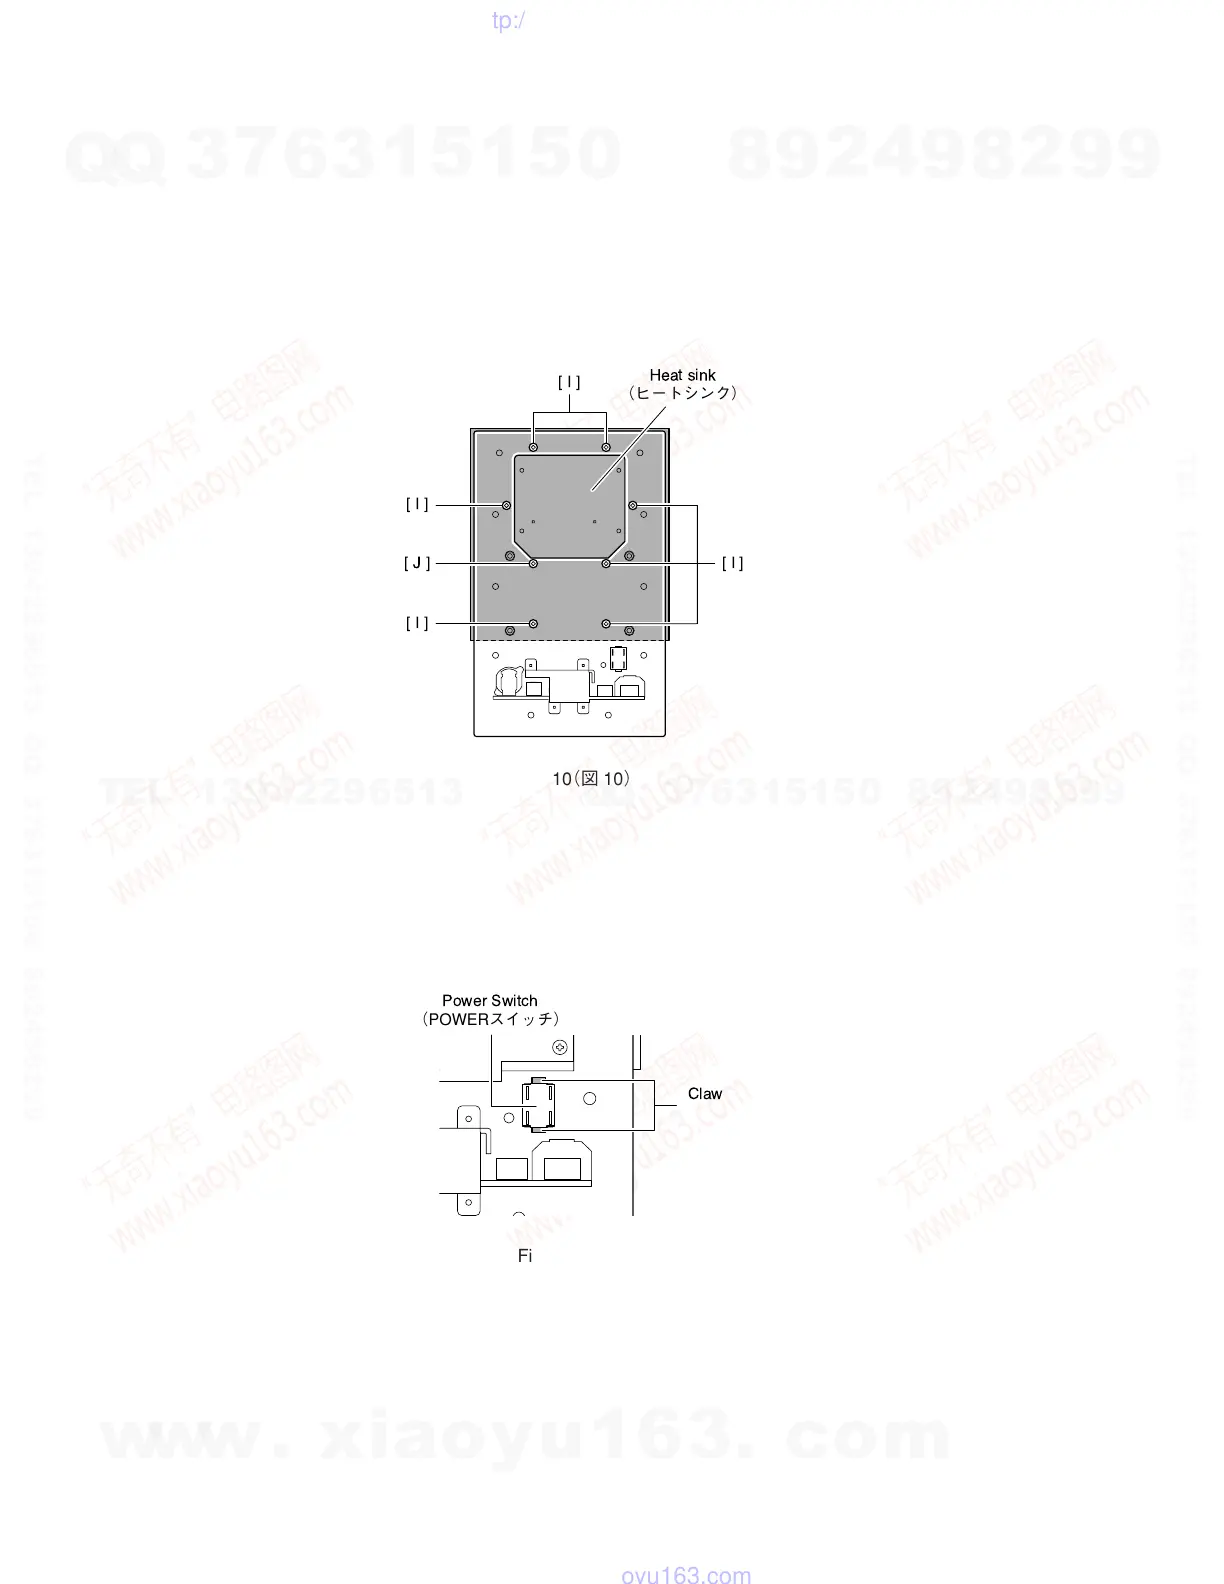
8-4 Remove the seven (7) screws marked [I] and screw
marked [J]. The heat sink can then be removed.
(Fig. 10)
* Pull the heat sink lightly away from the rear panel to
remove it.
9. Power Switch
(Time required: About 2 minutes)
9-1 Remove the rear panel assembly. (See procedure 2)
9-2 Press the claw to remove the power switch. (Fig. 11)
8. ヒートシンク(所要時間:約6分)
8-1 リアパネルAssyを外します。(2項参照)
8-2 電源トランスとトランス金具を外します。
(5-2、5-3項参照)
8-3 AMPシートを外します。(5-4項参照)
8-4 [I]のネジ7本と[J]のネジを外し、ヒートシンクを外し
ます。(図10)
※ 軽く力を加えれば、容易にヒートシンクを外すこと
ができます。
9. POWERスイッチ(所要時間:約2分)
9-1 リアパネルAssyを外します。(2項参照)
9-2 ツメを押さえながらPOWERスイッチを外します。
(図11)
[J]
[I]
[I]
[I]
[I]
Heat sink
(ヒートシンク)
Power Switch
(POWERスイッチ)
Claw
(ツメ)
Fig. 10(図10)
Fig. 11(図11)
w
w
w
.
x
i
a
o
y
u
1
6
3
.
c
o
m
Q
Q
3
7
6
3
1
5
1
5
0
9
9
2
8
9
4
2
9
8
T
E
L
1
3
9
4
2
2
9
6
5
1
3
9
9
2
8
9
4
2
9
8
0
5
1
5
1
3
6
7
3
Q
Q
TEL 13942296513 QQ 376315150 892498299
TEL 13942296513 QQ 376315150 892498299
http://www.xiaoyu163.com
http://www.xiaoyu163.com