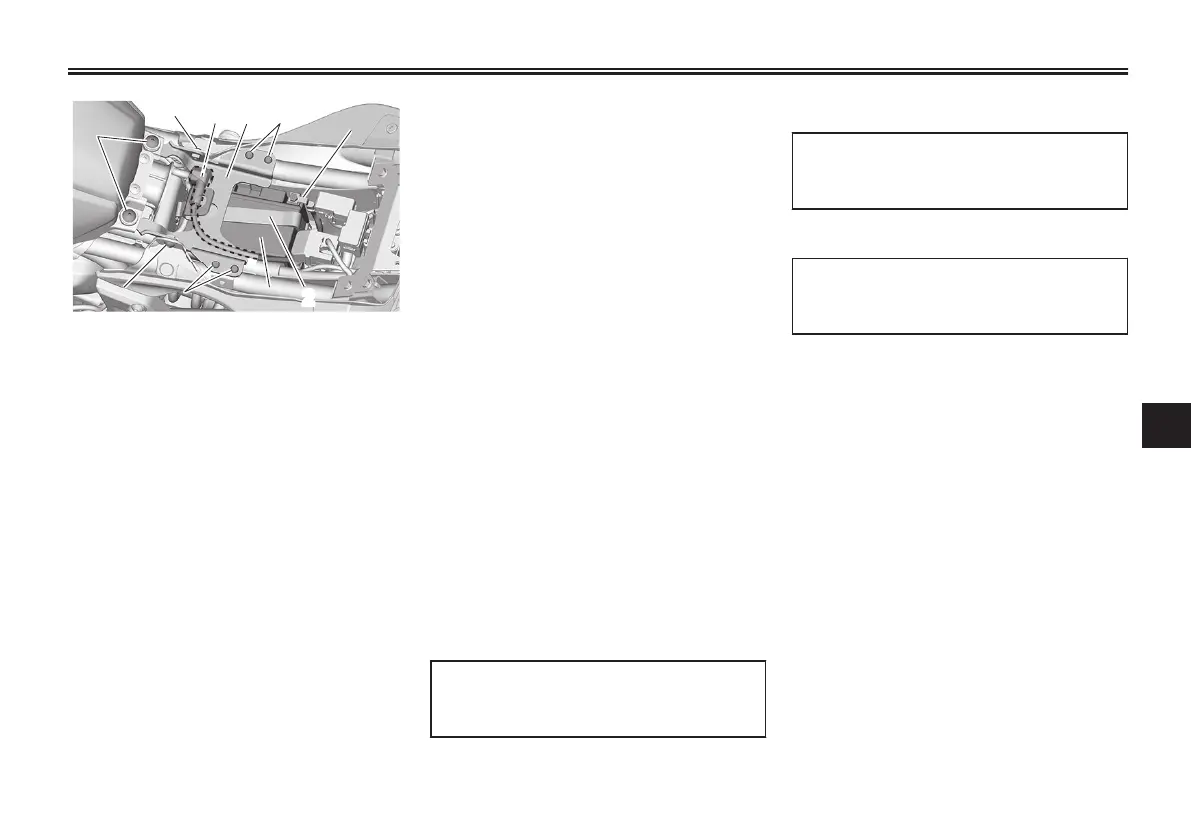
1. Battery
2. Band
3. Positive battery lead (red)
4. Negative battery lead (black)
5. Seat bracket
6. Bolt A
7. Bolt B
8. Bolt C
1. Turn the main switch off.
2
.
Remove the bolts A.
3. Remove the bolts B.
4. Remove the bolts C, and then re-
move the seat bracket.
5. Disconnect the negative battery
lead (black). NOTICE: When re-
moving the battery, be sure to
turn the main switch off, then
disconnect the negative lead
before disconnecting t
he posi-
tive lead.[ECA16304]
6. Disconnect the positive battery
lead (red).
7. Remove the battery band.
8. Remove the battery.
To install the battery
1. Make sure the main switch is off.
2. Install the battery in its original po-
sition.
3. Install the battery band.
4. Connect the positive battery lead
(red). NOTICE: When installing
the battery, be sure to turn the
main switch off, then connect
the positive lead before con-
necting the negative lead.[ECA16842]
5. Connect the negative battery lead
(black).
6. Install the seat bracket in its origi-
nal position.
7. Install the bolts C.
Tightening torque:
Seat bracket bolt C:
7 N·m (0.7 kgf·m, 5.2 lb·ft)
8. Install the bolts B.
Ti
ghtening torque:
Seat bracket bolt B:
7 N·m (0.7 kgf·m, 5.2 lb·ft)
9. Install the bolts A.
Ti
ghtening torque:
Seat bracket bolt A:
7 N·m (0.7 kgf·m, 5.2 lb·ft)
Periodic maintenance and adjustment
7-28
7



 To Next Page