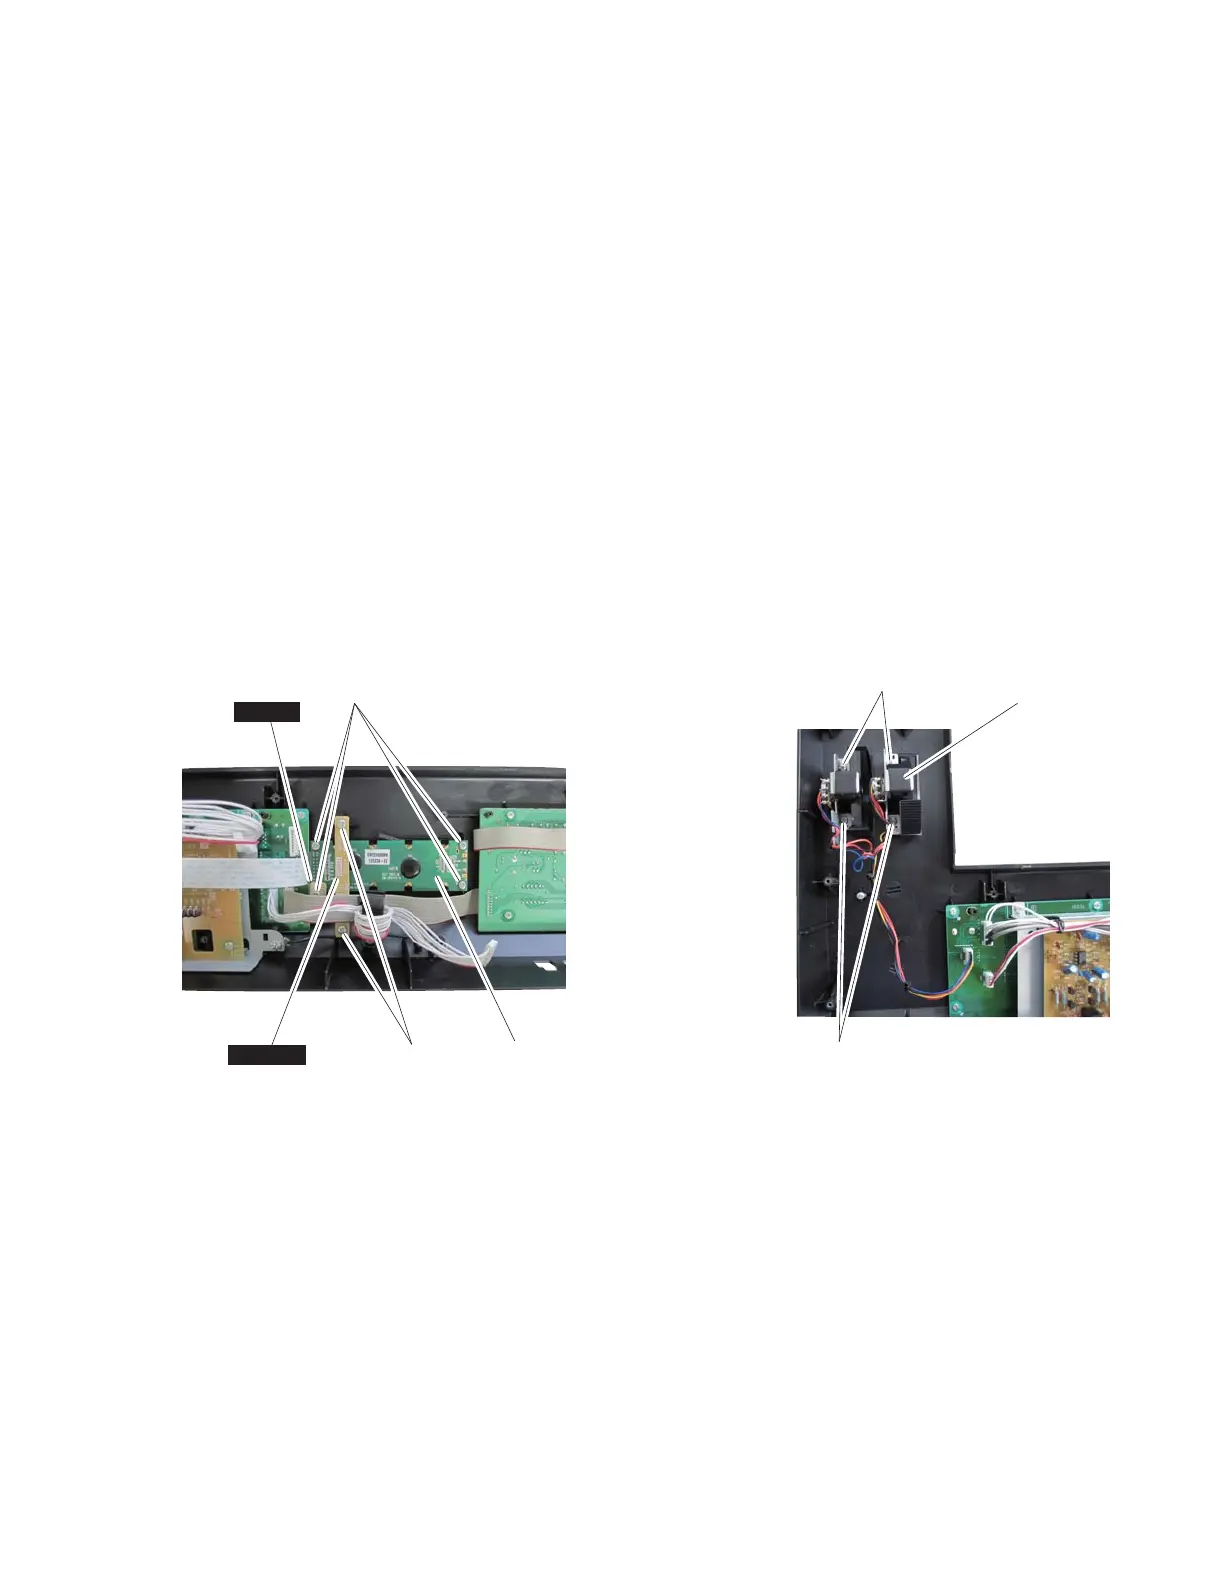
8. LCD Assembly
(Time required: About 4 minutes)
8-1 Remove the upper case assembly. (See procedure 1.)
8-2 Remove the DM circuit board assembly and DC-IN
circuit board. (See procedure 7-2.)
8-3 Remove the two (2) screws marked [U220I]. Then
remove the TOME2 circuit board. (Photo 1)
8-4 Remove the four (4) screws marked [U220J]. The LCD
assembly and the TOME circuit board can then be
removed. (Photo. 1)
* The LCD assembly consists of the LCD display
and the CN circuit board.
9. Wheel Assembly
(Time required: About 4 minutes)
9-1 Remove the upper case assembly. (See procedure 1.)
9-2 Remove the four (4) screws marked [U220K]. The
wheel assembly can then be removed. (Photo. 2)
8. LCDAss'y
(所要時間:約 4 分)
8-1 上ケース Ass'y を外します。(1 項参照)
8-2 DM シート Ass'y と DC-IN シートを外します。
(7-2 項参照)
8-3 [U220I]のネジ 2 本を外し、TOME2 シートを外し
ます。(写真 1)
8-4 [U220J]のネジ 4 本を外し、LCDAss'y と TOME シー
トを外します。(写真 1)
※ LCDAss'y は、液晶ディスプレイと CN シートで
構成されています。
9. ホイール Ass'y
(所要時間:約 4 分)
9-1 上ケース Ass'y を外します。(1 項参照)
9-2 [U220K]のネジ 4 本を外して、ホイール Ass'y を外
します。(写真 2)
Photo. 1
(写真 1)
Photo. 2
(写真 2)
TOME2
TOME
LCD assembly
(LCDAss'y)
[U220J]
[U220I]
Wheel assembly
(ホイール Ass'y)
[U220K]
[U220K]
11
MX61/MX49