DVD-E600MK2
8
DVD-E600MK2
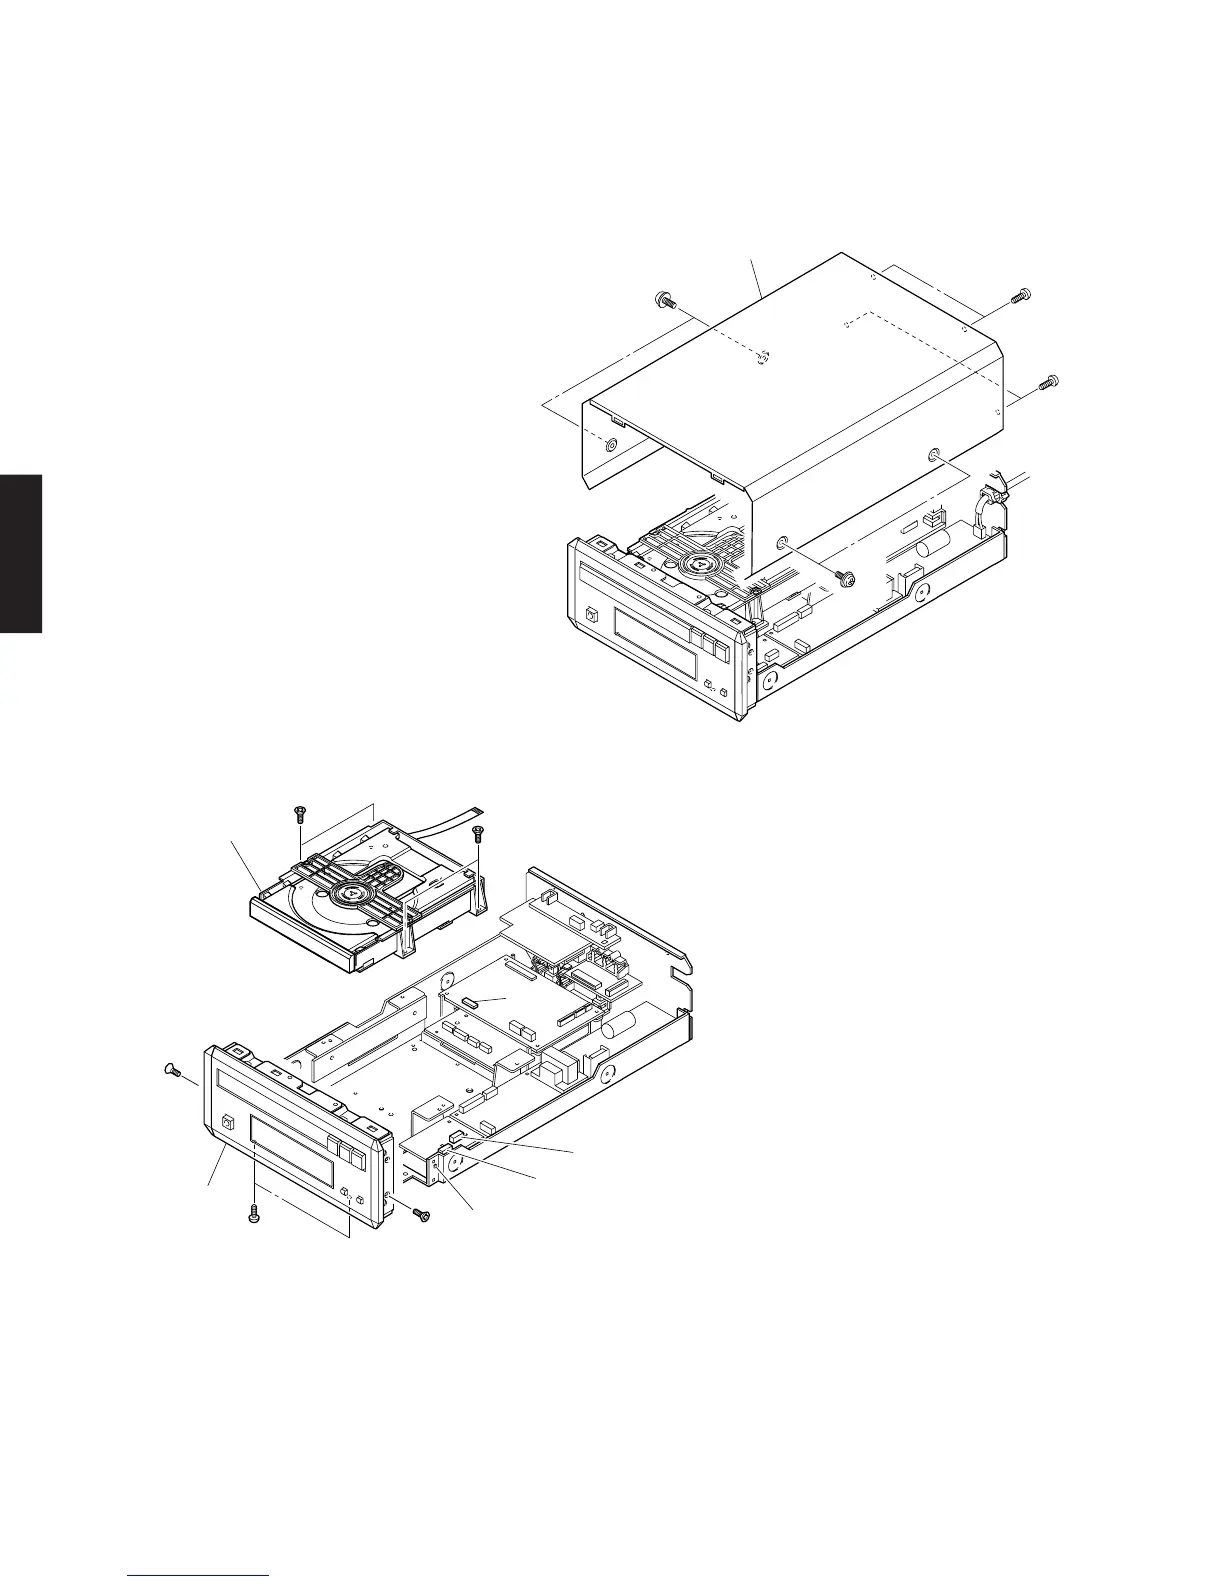
■ DISASSEMBLY PROCEDURES
(Remove parts in the order as numbered.)
Disconnect the power cable from the AC outlet.
1. Removal of Top Cover
a. Remove 4 screws (1), 4 screws (2). (Fig. 1)
b. Slide the Top Cover rearward to remove it.
Fig. 2
Fig. 1
1
1
2
2
Top Cover
3
5
4
4
3
D
V
D
M
e
c
h
a
n
is
m
U
n
it
H
o
o
k
C
B
3
0
2
1
1
0
1
C
B
3
0
5
F
ro
n
t P
a
n
e
l U
n
it
3. Removal of Front Panel Unit
a. Remove 2 screws (4), 2 screws (5). (Fig. 2)
b. Remove a connectors (CB16, CB17). (Fig. 3)
c. Release 2 hooks and remove the Front Panel Unit by
pulling it forward. (Fig. 2)
2. Removal of DVD Mechanism Unit
a. Remove 4 screws (3). (Fig. 2)
b. Remove a connectors (1101, CB302, CB305). (Fig. 2)
c. Remove the DVD Mechanism Unit backward.